Using moulding remover D, detach the 16 clips and remove the tail gate protector.
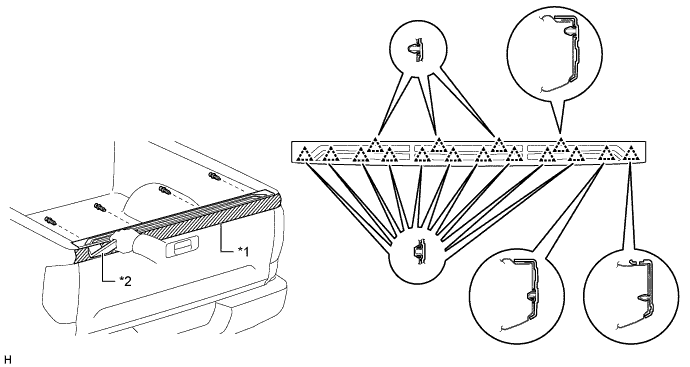
| *1 | Protective Tape | *2 | Moulding Remover D |
TAIL GATE > REMOVAL |
| 1. REMOVE TAIL GATE PROTECTOR |
Put protective tape around the tail gate protector.
Remove the 4 clips.
Using moulding remover D, detach the 16 clips and remove the tail gate protector.
| *1 | Protective Tape | *2 | Moulding Remover D |
| 2. REMOVE TAIL GATE SERVICE HOLE COVER |
Using a T30 "TORX" socket, remove the 8 screws and service hole cover.
| 3. REMOVE TAIL GATE LOCK ASSEMBLY LH |
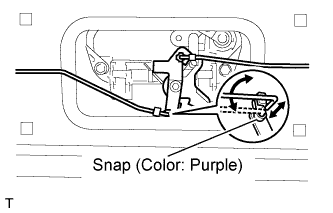 |
Remove the tail gate lock links from the tail gate lock and tail gate handle assembly.
Using a T40 "TORX" socket, remove the 2 screws and tail gate lock.
| 4. REMOVE TAIL GATE LOCK ASSEMBLY RH |
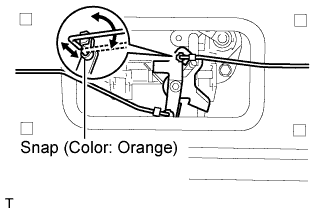 |
Remove the tail gate lock links from the tail gate lock and tail gate handle assembly.
Using a T40 "TORX" socket, remove the 2 screws and tail gate lock.
| 5. REMOVE TAIL GATE LOCK CONTROL LINK LH |
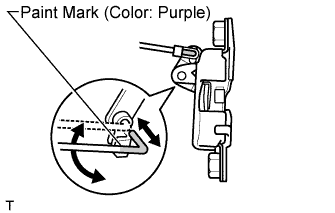 |
Remove the control rod.
| 6. REMOVE TAIL GATE LOCK CONTROL LINK RH |
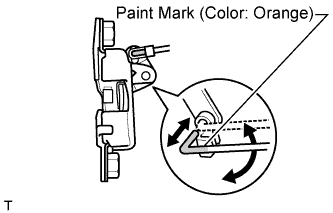 |
Remove the control rod.
| 7. REMOVE TELEVISION CAMERA ASSEMBLY (w/ Rear View Monitor System) |
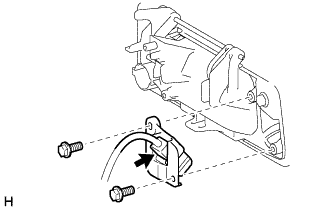 |
Disconnect the television camera connector.
Remove the 2 bolts and television camera assembly.
| 8. REMOVE TAIL GATE HANDLE |
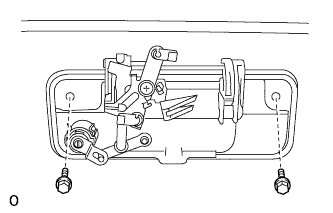 |
Remove the 2 bolts and tail gate handle.
| 9. REMOVE TAIL GATE LOCK KEY CYLINDER |
Pull off the snap ring and remove the tail gate lock key cylinder.
| 10. REMOVE TAIL GATE LOCK STRIKER |
Using a T40 "TORX" socket, remove the 4 screws and 2 tail gate lock strikers.
| 11. REMOVE REAR COMBINATION LIGHT ASSEMBLY LH |
Put protective tape around the rear combination light assembly LH.
Using a T30 "TORX" socket wrench, remove the 2 screws.
Detach the 2 clips.
Disconnect each connector and remove the rear combination light assembly LH.
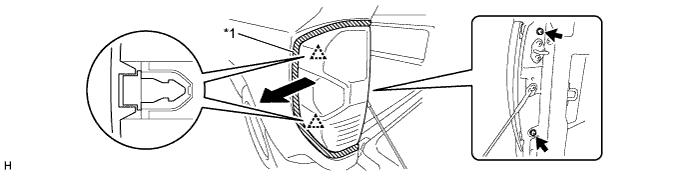
| *1 | Protective Tape | - | - |
| 12. REMOVE SIDE GATE SUPPORT SUB-ASSEMBLY LH |
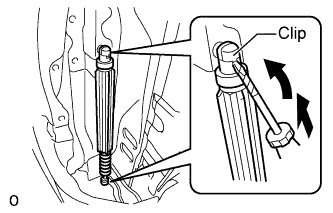 |
Using a screwdriver, remove the side gate support while releasing the 2 clips.
| 13. REMOVE TAIL GATE STAY ASSEMBLY |
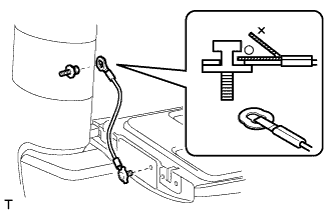 |
Remove the deck side shaft and tail gate stay from the body.
Remove the gate side shaft and tail gate stay.
| 14. REMOVE REAR BODY TAIL GATE ASSEMBLY |
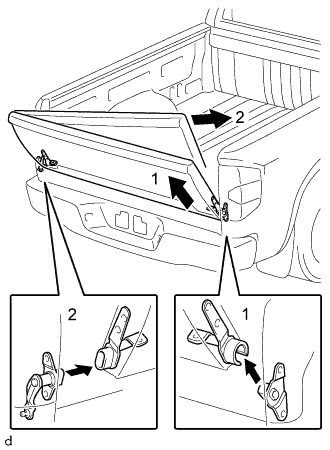 |
Pull up the tail gate in the direction of arrow 1 from the tail gate hinge assembly RH slot as shown in the illustration.
Move the tail gate rearwards and then pull in the direction of arrow 2 as shown in the illustration to remove the tail gate.
| 15. REMOVE TAIL GATE HINGE ASSEMBLY LH |
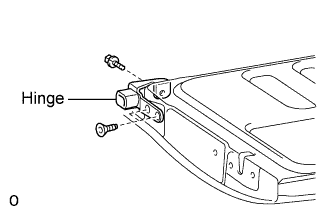 |
Remove the bolt.
Using a T40 "TORX" socket, remove the 2 screws and tail gate hinge from the tail gate.
| 16. REMOVE TAIL GATE HINGE ASSEMBLY RH |
Remove the bolt.
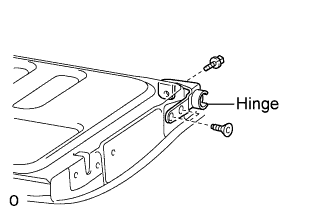 |
Using a T40 "TORX" socket, remove the 2 screws and tail gate hinge from the tail gate.
| 17. REMOVE TAIL GATE MALE HINGE SUB-ASSEMBLY LH |
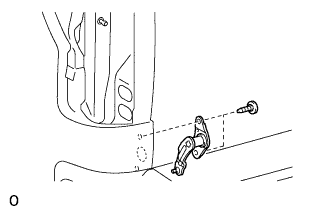 |
Using a T40 "TORX" socket, remove the 2 screws and tail gate male hinge from the tail gate.
| 18. REMOVE TAIL GATE MALE HINGE SUB-ASSEMBLY RH |
Using a T40 "TORX" socket, remove the 2 screws and tail gate male hinge from the tail gate.