 |
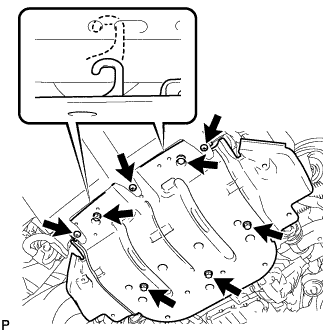
Remove the 3 screws and 5 bolts.
WATER PUMP > REMOVAL |
| 1. REMOVE NO. 1 ENGINE UNDER COVER |
|
Remove the 3 screws and 5 bolts.
Unhook the engine under cover from the vehicle body as shown in the illustration.
| 2. DRAIN ENGINE COOLANT |
Loosen the radiator drain cock plug.
Remove the radiator cap. Then drain the coolant from the radiator.
Loosen the 2 cylinder block drain cock plugs. Then drain the coolant from the engine.
Tighten the 2 cylinder block drain cock plugs.
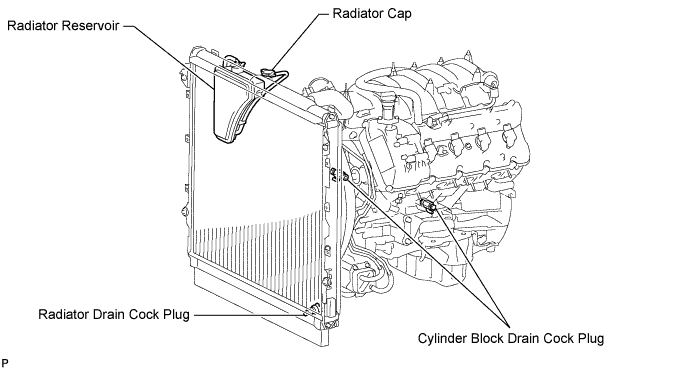
Tighten the radiator drain cock plug by hand.
| 3. REMOVE V-BANK COVER SUB-ASSEMBLY |
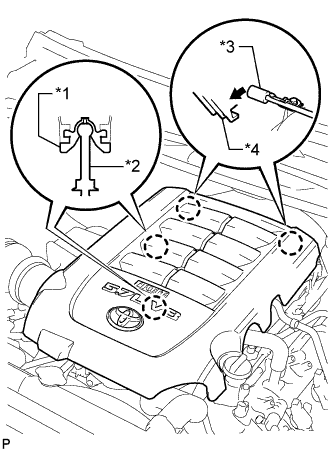 |
Raise the front of the V-bank cover sub-assembly to detach the 2 pins. Then remove the 2 V-bank cover hooks from the No. 1 V-bank cover bracket, and remove the V-bank cover sub-assembly.
| *1 | V-bank Cover Grommet |
| *2 | Pin |
| *3 | No. 1 V-bank Cover Bracket |
| *4 | V-bank Cover Hook |
| 4. REMOVE AIR CLEANER HOSE ASSEMBLY |
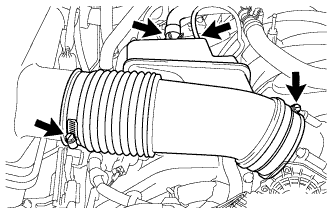 |
Disconnect the vacuum hose from the air cleaner hose assembly.
Slide the clamp and disconnect the ventilation hose from the air cleaner hose assembly.
Loosen the 2 hose clamps.
Remove the air cleaner hose assembly.
| 5. REMOVE AIR CLEANER ASSEMBLY |
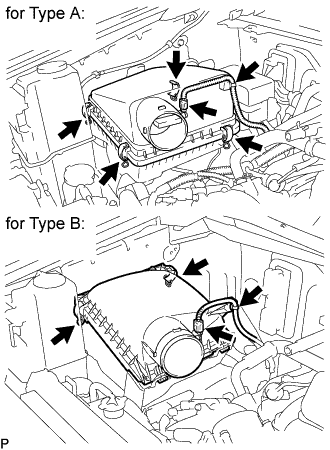 |
Remove the air cleaner cap.
Disconnect the MAF meter connector.
Using a clip remover, detach the wire harness clamp.
for Type A:
Unfasten the 4 hook clamps and then remove the air cleaner cap.
for Type B:
Unfasten the 2 hook clamps and then remove the air cleaner cap.
Remove the air cleaner element.
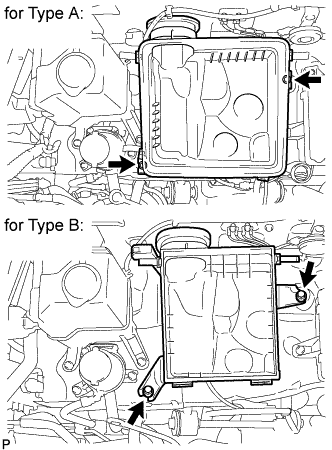 |
Remove the 2 bolts and air cleaner case.
| 6. DISCONNECT INLET RADIATOR HOSE |
| 7. DISCONNECT OUTLET RADIATOR HOSE |
| 8. REMOVE FAN SHROUD |
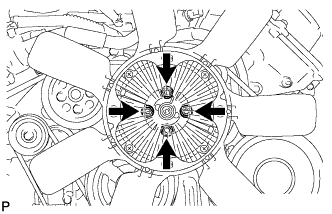 |
Loosen the 4 nuts holding the fan with fluid coupling.
Remove the fan and generator V-belt.
Disconnect the reservoir hose from the upper radiator tank.
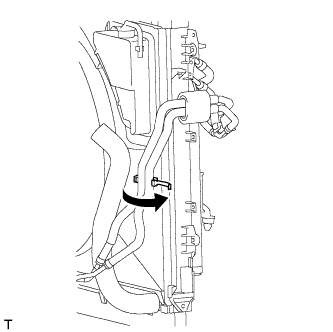 |
for Condenser with Integrated Oil Cooler:
Detach the claw and open the No. 1 flexible hose clamp.
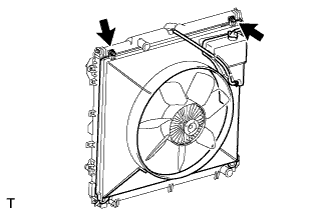 |
Remove the 2 bolts holding the fan shroud.
Remove the 4 nuts of the fan with fluid coupling, and then remove the fan shroud together with the fan with fluid coupling.
Remove the fan pulley from the fan bracket.
| 9. REMOVE NO. 1 WATER BY-PASS HOSE |
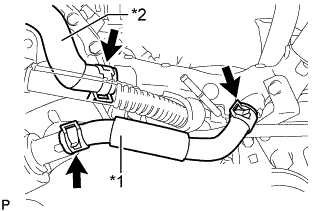 |
Slide the 2 clamps and remove the No. 1 water by-pass hose from the front water by-pass joint and water inlet housing.
| *1 | No. 1 Water By-pass Hose |
| *2 | No. 2 Water By-pass Hose |
| 10. DISCONNECT WATER BY-PASS PIPE (w/ Oil Cooler) |
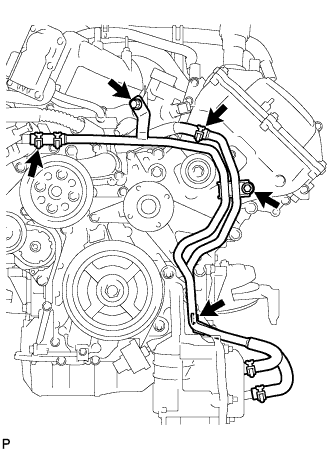 |
Disconnect the No. 6 water by-pass hose.
Remove the 3 bolts.
Disconnect the water by-pass pipe with water hose.
| 11. REMOVE WATER INLET HOUSING |
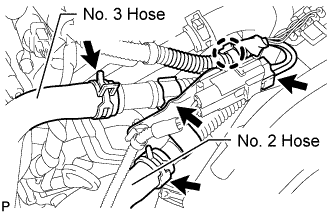 |
Disconnect the No. 2 and No. 3 air hoses.
Disconnect the air pump connector.
Disconnect the air pump connector clamp's holder.
Using a clip remover, detach the wire harness clamp.
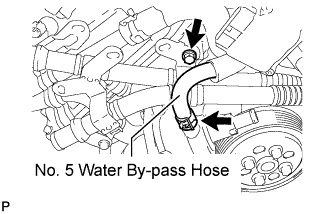 |
Disconnect the No. 5 water by-pass hose.
Remove the air tube bracket bolt.
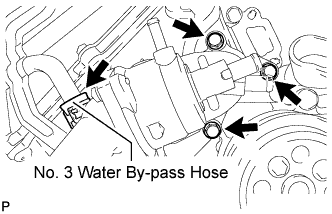 |
Remove the 3 bolts, water inlet housing and No. 3 water by-pass hose.
Remove the gasket from the water pump.
| 12. REMOVE WATER PUMP PULLEY |
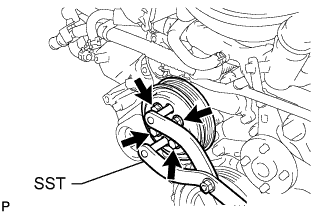 |
Using SST, hold the water pump pulley.
Remove the 4 bolts and water pump pulley.
| 13. REMOVE WATER PUMP ASSEMBLY |
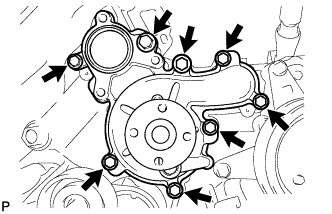 |
Remove the 8 bolts, water pump and gasket.