COMBINATION METER > REMOVAL |
| 1. PRECAUTION |
| 2. DISABLE AUTOAWAY/RETURN FUNCTION (for Power Tilt and Power Telescopic Steering Column) |
Disable the Autoaway/Return function by changing the customize parameter (Click here).
Turn the ignition switch to ON. Operate the tilt and telescopic switch to fully extend and lower the steering column.
Turn the ignition switch off.
| 3. DISCONNECT CABLE FROM NEGATIVE BATTERY TERMINAL |
Disconnect the cable from the negative (-) battery terminal.
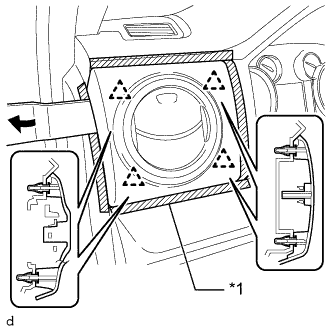
| 4. REMOVE NO. 1 INSTRUMENT PANEL REGISTER SUB-ASSEMBLY |
|
Apply protective tape as shown in the illustration.
| *1 | Protective Tape |
Using a moulding remover B, detach the 4 clips and remove the No. 1 instrument panel register sub-assembly.
| 5. REMOVE INSTRUMENT SIDE PANEL LH |
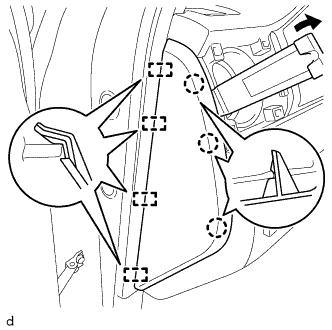 |
Using a moulding remover B, detach the 3 claws, 4 guides and remove the instrument side panel LH.
| 6. REMOVE LOWER CENTER INSTRUMENT COVER (for Column Shift Type) |
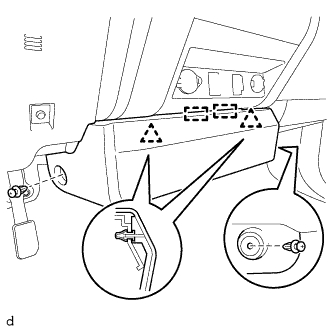 |
Remove the 2 clips.
Detach the 2 clips, 2 guides and remove the lower center instrument cover.
| 7. REMOVE FRONT DOOR SCUFF PLATE LH |
for Double Cab:
for CrewMax:
for Regular Cab:
| 8. REMOVE COWL SIDE TRIM BOARD LH |
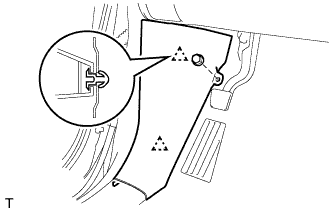 |
Remove the nut.
Detach the 2 clips and remove the cowl side trim board LH.
| 9. REMOVE LOWER INSTRUMENT PANEL FINISH PANEL SUB-ASSEMBLY LH |
Operate the tilt lever to fully extend and raise the steering column.
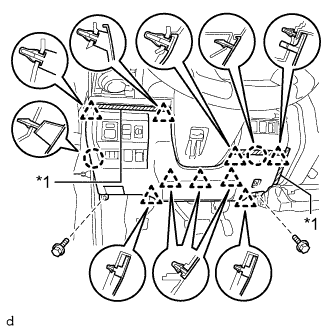 |
Apply protective tape as shown in the illustration.
| *1 | Protective Tape |
Remove the 2 bolts <A>.
Detach the 9 clips, 2 claws and remove the lower instrument panel finish panel sub-assembly LH.
Disconnect each connector.
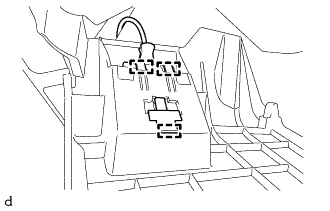 |
Detach the 3 hooks and disconnect the hood lock control lever from the lower instrument panel finish panel sub-assembly LH.
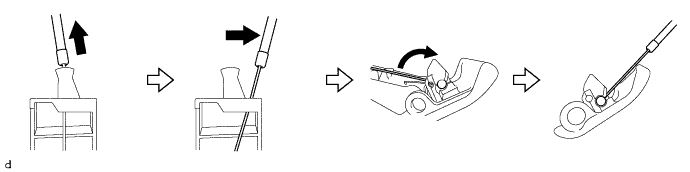
Pull and slide the hood lock control cable, rotate the hood lock control cable, and then disconnect the hood lock control cable from the hood lock control lever.
| 10. REMOVE NO. 1 INSTRUMENT CLUSTER FINISH PANEL GARNISH |
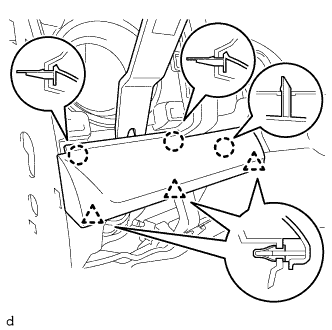 |
Using a moulding remover B, detach the 3 claws, 3 clips and remove the No. 1 instrument cluster finish panel garnish.
| 11. REMOVE LOWER STEERING COLUMN COVER (for Column Shift Type) |
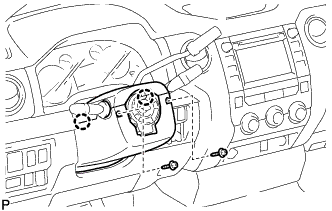 |
Remove the 2 screws.
Detach the 2 claws to remove the lower steering column cover.
| 12. REMOVE UPPER STEERING COLUMN COVER (for Column Shift Type) |
Detach the 4 clips.
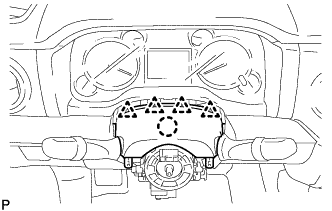 |
Detach the claw to remove the upper steering column cover.
| 13. REMOVE NO. 2 SWITCH HOLE BASE |
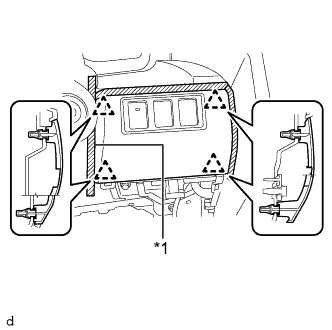 |
Apply protective tape as shown in the illustration.
| *1 | Protective Tape |
Detach the 4 clips and remove the No. 2 switch hole base.
Disconnect each connector.
| 14. REMOVE INSTRUMENT CLUSTER FINISH PANEL ORNAMENT |
for Column Shift Type:
for Floor Shift Type:
| 15. REMOVE INSTRUMENT CLUSTER FINISH PANEL ASSEMBLY |
for Column Shift Type:
for Floor Shift Type:
| 16. REMOVE COMBINATION METER ASSEMBLY |
for Floor Shift Type:
Apply protective tape as shown in the illustration.
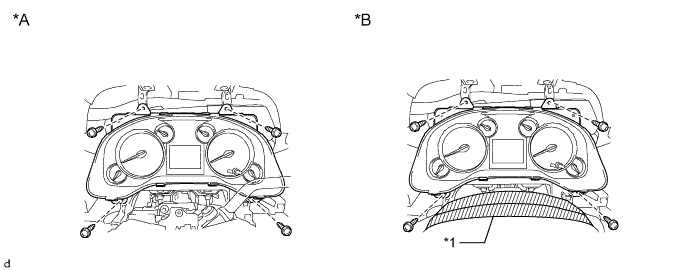
| *A | for Column Shift Type | *B | for Floor Shift Type |
| *1 | Protective Tape | - | - |
Remove the 4 screws.
Move the combination meter assembly as shown in the illustration and disconnect the connector and detach the wire harness clamp.
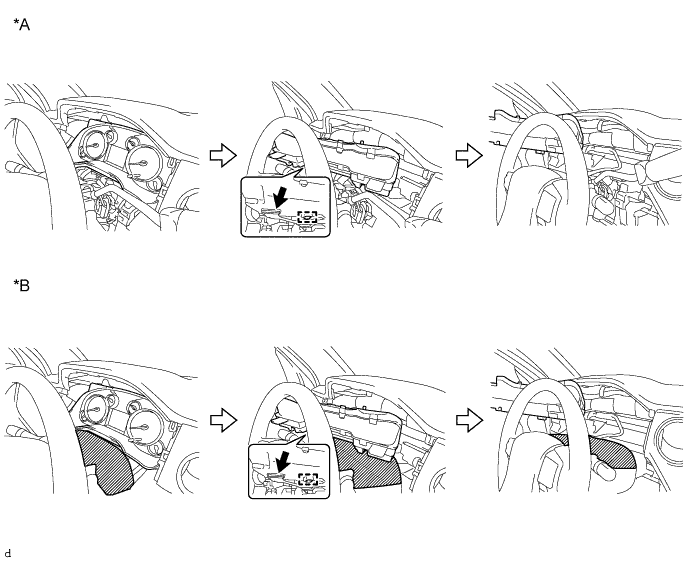
| *A | for Column Shift Type | *B | for Floor Shift Type |
Pass the combination meter assembly between the steering wheel assembly and instrument panel.