 |
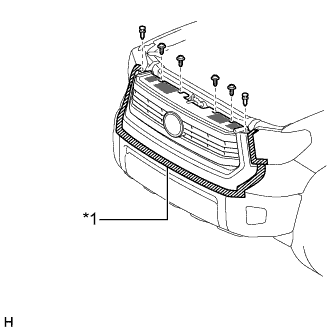
Put protective tape around the radiator grille sub-assembly.
| *1 | Protective Tape |
HEADLIGHT ASSEMBLY > REMOVAL |
| 1. REMOVE RADIATOR GRILLE SUB-ASSEMBLY |
|
Put protective tape around the radiator grille sub-assembly.
| *1 | Protective Tape |
Remove the 4 screws and 2 clips.
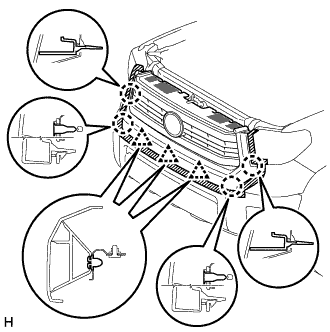 |
Detach the 4 claws and 3 clips and remove the radiator grille sub-assembly.
| 2. REMOVE FRONT END PANEL LH |
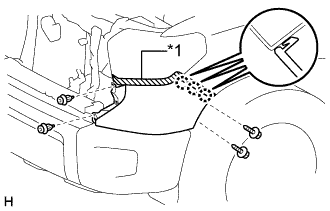 |
Put protective tape around the front end panel LH.
| *1 | Protective Tape |
Remove the 2 screws and 2 clips.
Detach the 3 claws and remove the front end panel LH.
| 3. REMOVE HEADLIGHT ASSEMBLY LH |
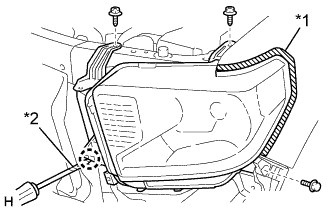 |
Put protective tape around the headlight assembly LH.
| *1 | Protective Tape |
Remove the 2 screws and bolt.
Using a screwdriver, detach the claw.
| *2 | Tape |
Disconnect each connector, detach the clamp and remove the headlight assembly LH.