HAZARD WARNING SWITCH > INSTALLATION |
| 1. INSTALL AIR CONDITIONING CONTROL ASSEMBLY (HAZARD WARNING SWITCH) |
|
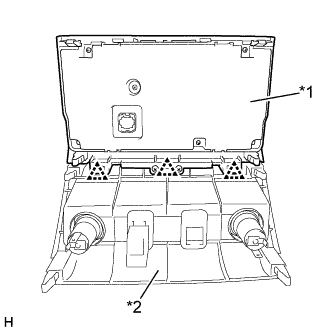
Attach the 3 clips to connect the air conditioning control assembly (hazard warning switch) and center lower instrument panel finish panel.
| *1 | Air Conditioning Control Assembly (Hazard Warning Switch) |
| *2 | Center Lower Instrument Panel Finish Panel |
Put protective tape around the air conditioning control assembly (hazard warning switch).
Connect each connector.
Attach the 8 clips, 2 claws and guide to install the air conditioning control assembly (hazard warning switch) with the center lower instrument panel finish panel.
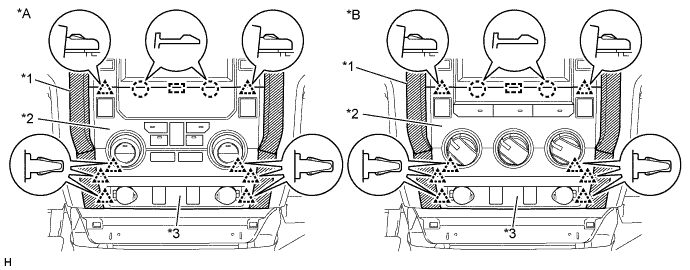
| *A | for Automatic Air Conditioning System | *B | for Manual Air Conditioning System |
| *1 | Protective Tape | *2 | Air Conditioning Control Assembly (Hazard Warning Switch) |
| *3 | Center Lower Instrument Panel Finish Panel | - | - |
| 2. INSTALL CENTER LOWER INSTRUMENT COVER (for Column Shift Type) |
Attach the 2 guides and 2 clips to install the lower center instrument cover.
Install the 2 clips.
| 3. INSTALL FRONT CONSOLE BOX (for Floor Shift Type) |
Install the front console box with the 5 screws <E>.
Install the 2 clips and attach the connector.
| 4. INSTALL REAR CONSOLE BOX ASSEMBLY (for Floor Shift Type) |
Install the rear console box assembly with the 2 screws <E> and 4 bolts <B>.
Connect the 2 connectors.
| 5. INSTALL CONSOLE BOX CARPET (for Floor Shift Type) |
Install the console box carpet.
| 6. INSTALL REAR CONSOLE END PANEL SUB-ASSEMBLY (for Floor Shift Type) |
w/ Power Outlet Socket:
Attach the 2 wire harness clamps and connect the connector.
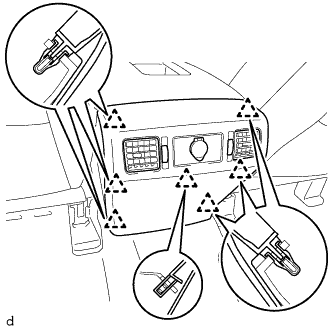 |
Attach the 7 clips to install the rear console end panel sub-assembly.
| 7. INSTALL UPPER CONSOLE PANEL SUB-ASSEMBLY (for Floor Shift Type) |
Attach the 12 clips to install the upper console panel sub-assembly.
| 8. INSTALL UPPER REAR CONSOLE PANEL SUB-ASSEMBLY (for Floor Shift Type) |
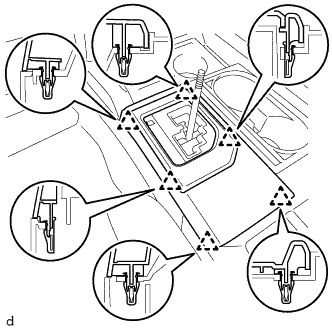 |
Attach the 6 clips to install the upper rear console panel sub-assembly.
| 9. INSTALL SHIFT LEVER KNOB SUB-ASSEMBLY (for Floor Shift Type) |
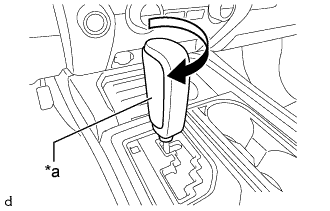 |
Twist the shift lever knob sub-assembly in the direction indicated by the arrow to install it.
| *a | Leather Portion |