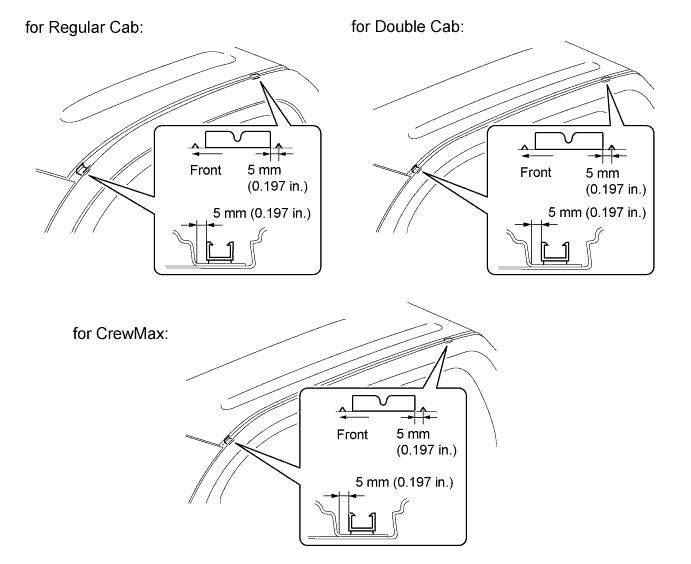
Install the clips in the positions shown in the illustration.
- HINT:
- Press the clips firmly to install them.
ROOF DRIP SIDE FINISH MOULDING > INSTALLATION |
| Item | Temperature |
| Vehicle Body | 40 to 60°C (104 to 140°F) |
| Moulding | 20 to 30°C (68 to 86°F) |
| Clip | 20 to 30°C (68 to 86°F) |
| 1. INSTALL ROOF DRIP SIDE FINISH MOULDING CLIP |
Using a heat light, heat the clip installation areas on the vehicle body.
Remove the double-sided tape from the vehicle body.
Wipe off any tape adhesive residue with cleaner.
Using a heat light, heat the clips.
Remove the peeling paper from the face of the clips.
Install the clips in the positions shown in the illustration.
| 2. INSTALL ROOF DRIP SIDE FINISH MOULDING LH |
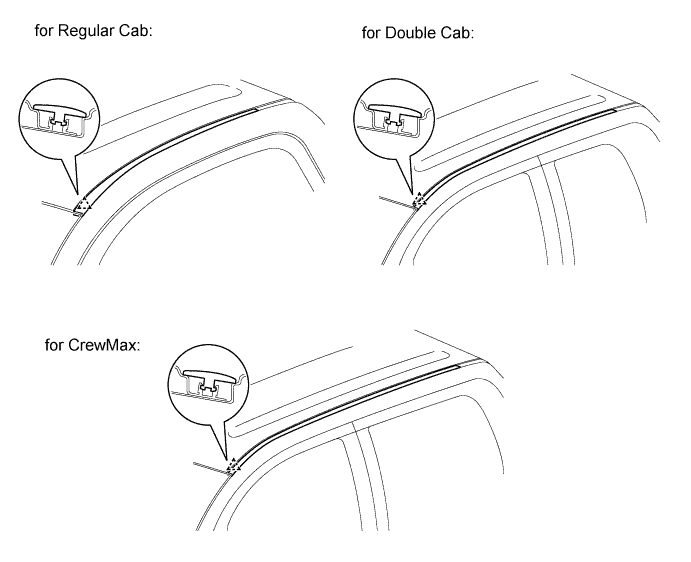
Attach the clip to install the moulding.
| 3. INSTALL REAR ROOF DRIP SIDE FINISH MOULDING LH |
Clean the vehicle body surface.
Using a heat light, heat the vehicle body surface.
Remove the double-sided tape from the vehicle body.
Wipe off any tape adhesive residue with cleaner.
If reusing the moulding:
Clean the moulding.
Using a heat light, heat the moulding.
Remove the double-sided tape from the moulding.
Wipe off any tape adhesive residue with cleaner.
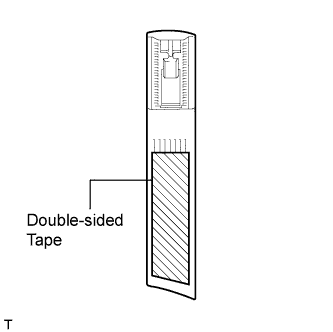 |
Apply new double-sided tape to the moulding, as shown in the illustration.
Install the moulding.
Using a heat light, heat the vehicle body and moulding.
Remove the peeling paper from the face of the moulding.
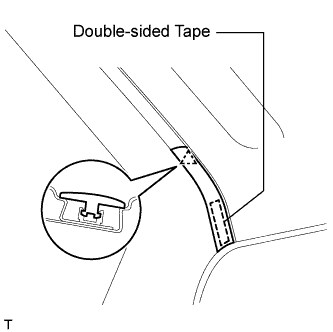 |
Attach the clip to install the moulding.