FRONT SEAT ASSEMBLY (for Center Seat) > REASSEMBLY |
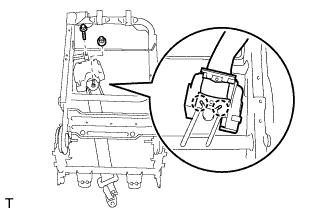
| 1. INSTALL CENTER FRONT SEAT BELT ASSEMBLY |
|
Attach the 2 claws to install the center front seat belt assembly.
Install the bolt and nut.
| 2. INSTALL CENTER SEAT RECLINING ADJUSTER INSIDE COVER RH |
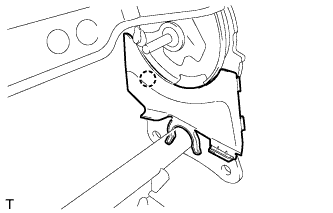 |
Attach the claw to install the center seat reclining adjuster inside cover RH.
| 3. INSTALL CENTER SEAT RECLINING ADJUSTER INSIDE COVER LH |
Attach the claw to install the center seat reclining adjuster inside cover LH.
| 4. INSTALL CENTER SEATBACK PAD |
Install the center seatback pad.
| 5. INSTALL CENTER FRONT SEATBACK COVER |
Install the center front seatback cover.
| 6. INSTALL FRONT SEAT HEADREST SUPPORT |
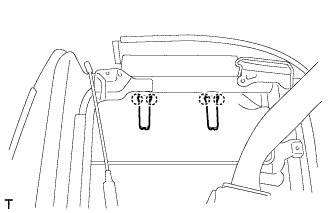 |
Attach the 4 claws to install the 2 front seat headrest supports.
| 7. INSTALL FRONT SEATBACK BOARD SUB-ASSEMBLY |
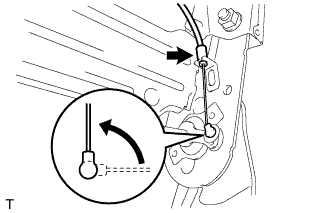 |
RH Side:
Connect the cable to the center seatback frame inner side.
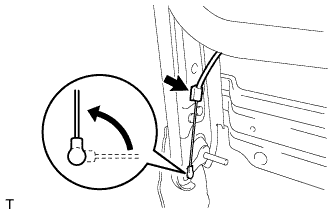 |
LH Side:
Connect the cable to the center seatback frame inner side.
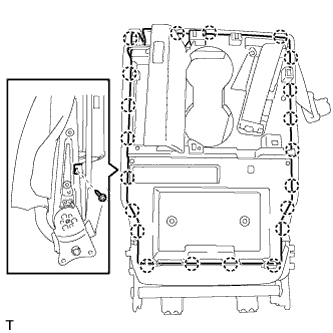 |
Attach the 21 claws to install the front seatback board sub-assembly.
Install the screw.
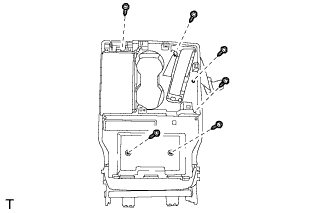 |
Install the 6 screws.
| 8. INSTALL SEAT FASTENER COVER |
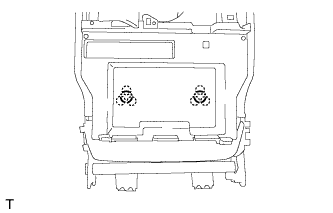 |
Attach the 6 claws to install the 2 seat fastener covers.
| 9. INSTALL CENTER FRONT SEAT ARMREST COVER |
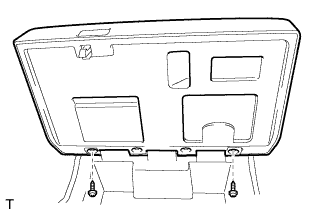 |
Install the center front seat armrest cover with the 2 screws.
| 10. INSTALL FRONT SEAT TRAY |
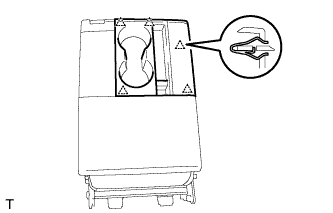 |
Attach the 5 clips to install the front seat tray.
| 11. INSTALL RECLINING REMOTE CONTROL BEZEL |
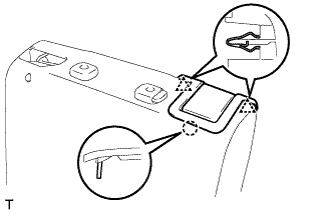 |
Attach the 2 clips and claw to install the reclining control bezel.
| 12. INSTALL LOWER FRONT SEAT SHOULDER BELT COVER |
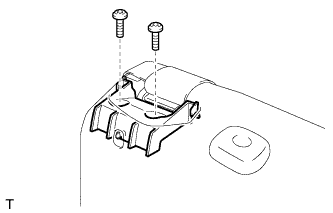 |
Using a T30 "TORX" socket wrench, install the lower front seat shoulder belt cover with the 2 bolts.
| 13. INSTALL UPPER REAR SEATBACK LOCK BEZEL |
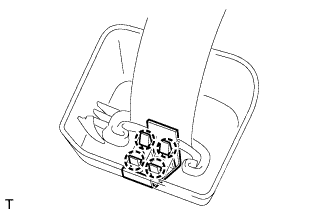 |
Connect the center front seat belt assembly to the front seat shoulder belt cover.
Attach the 4 claws to install the upper rear seatback lock bezel.
| 14. INSTALL FRONT SEAT SHOULDER BELT COVER |
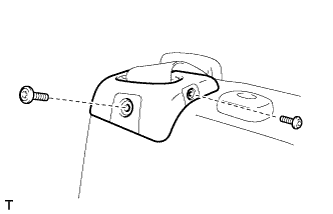 |
Using a T10 "TORX" socket wrench, install the front seat shoulder belt cover with the 2 screws.
| 15. INSTALL FRONT SEAT HEADREST ASSEMBLY |
Install the front seat headrest assembly.
| 16. INSTALL CONSOLE BOX WIRE |
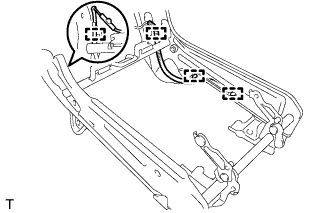 |
Attach the 4 clamps to install the console box wire.
| 17. INSTALL CENTER POWER OUTLET SOCKET COVER |
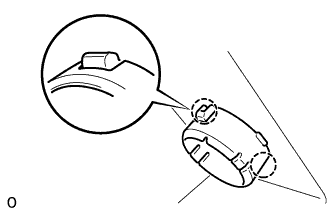 |
Attach the 2 claws to install the power outlet socket cover.
| 18. INSTALL POWER OUTLET SOCKET ASSEMBLY |
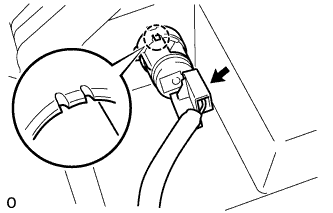 |
Attach the claw to install the power outlet socket assembly.
Connect the power outlet socket connector.
| 19. INSTALL FRONT SEAT UNDER TRAY |
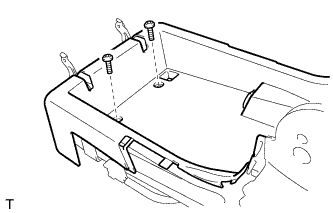 |
Using a T30 "TORX" socket wrench, install the front seat under tray with the 2 bolts.
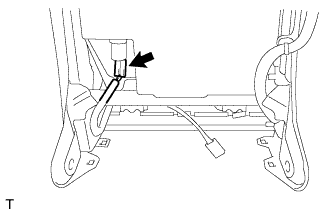 |
Connect the connector of the power outlet socket assembly.
| 20. INSTALL FOLD SEAT STOPPER CUSHION |
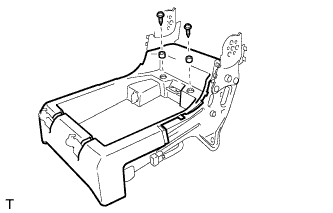 |
Using a T20 "TORX" socket wrench, install the 2 fold stopper cushions with the 2 screws.
| 21. INSTALL CENTER SEATBACK ASSEMBLY |
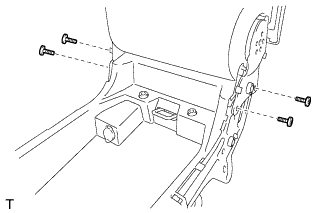 |
Install the center seatback assembly.
RH Side:
Using a T55 "TORX" socket wrench, install the 2 bolts.
LH Side:
Using a T40 "TORX" socket wrench, install the 2 bolts.
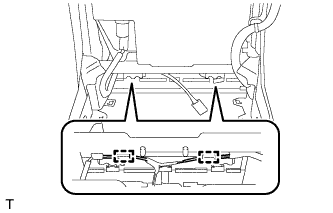 |
Install the 2 wire harness clamps to the center seatback frame.
| 22. CONNECT CENTER FRONT SEAT BELT ASSEMBLY RH |
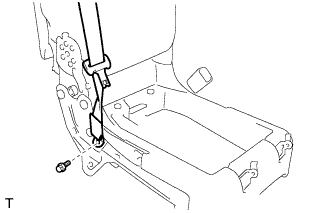 |
Connect the center front seat belt assembly RH with the bolt.
| 23. INSTALL CENTER FRONT SEAT INNER BELT ASSEMBLY |
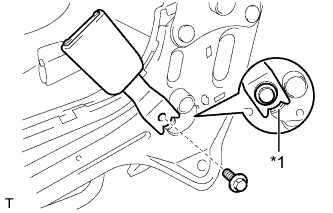 |
Install the center front seat inner belt assembly with the bolt.
| *1 | Protruding Part |
| 24. INSTALL CENTER FRONT SEAT CUSHION PAD |
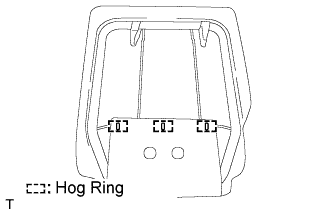 |
Using hog ring pliers, install the seat cushion pad to the seat cushion frame with new hog rings.
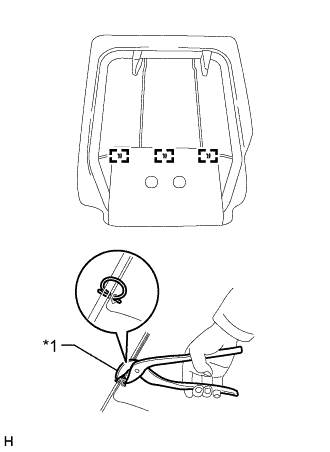 |
Using hog ring pliers, install the center front seat cushion pad to the center seat cushion frame with 3 new hog rings as shown in the illustration.
| *1 | Hog Ring Pliers |
| 25. INSTALL REAR SEAT LOCK LATCH |
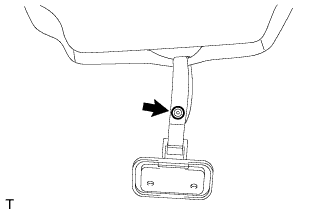 |
Install the rear seat lock latch and fasten the button.
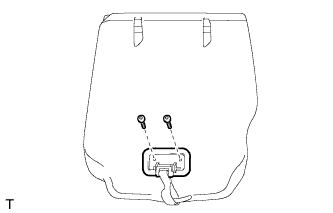 |
Using a T30 "TORX" socket wrench, install the 2 bolts.
| 26. INSTALL CENTER FRONT SEAT CUSHION ASSEMBLY |
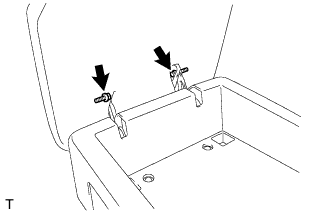 |
Install the center front seat cushion assembly with the 2 bolts.
| 27. INSTALL CENTER FRONT SEAT CUSHION COVER |
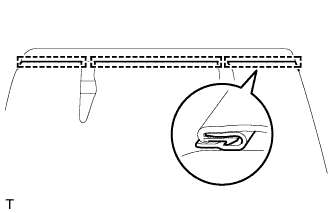 |
Install the center front seat cushion cover, and then attach the 3 hooks.
| 28. INSTALL CENTER SEAT CUSHION SHIELD RH |
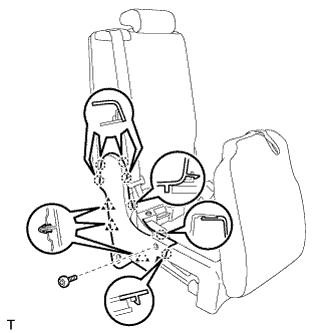 |
Attach the 7 claws and 3 clips to install the center seat cushion shield RH.
Using a T30 "TORX" socket wrench, install the bolt.
| 29. INSTALL CENTER SEAT CUSHION SHIELD LH |
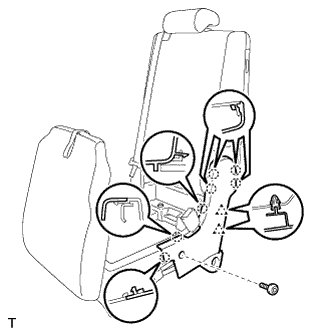 |
Attach the 7 claws and 2 clips to install the center seat cushion shield LH.
Using a T30 "TORX" socket wrench, install the bolt.
| 30. INSTALL REAR POWER OUTLET SOCKET COVER (for CrewMax) |
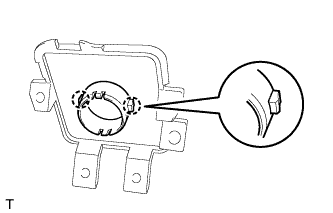 |
Attach the 2 claws to install the rear power outlet socket cover.
| 31. INSTALL REAR POWER OUTLET SOCKET (for CrewMax) |
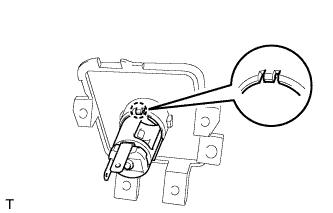 |
Attach the claw to install the rear power outlet socket.
| 32. INSTALL NO. 2 SEATBACK LOCK CONTROL BEZEL (for CrewMax) |
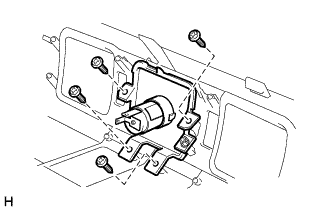 |
Install the No. 2 seatback lock control bezel with the 4 screws.
| 33. INSTALL NO. 1 CONSOLE BOX REGISTER ASSEMBLY (for CrewMax) |
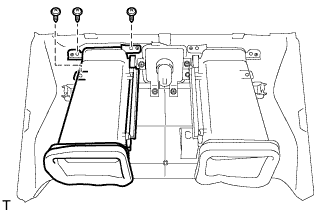 |
Install the No. 1 console box register assembly with the 3 screws.
| 34. INSTALL NO. 2 CONSOLE BOX REGISTER ASSEMBLY (for CrewMax) |
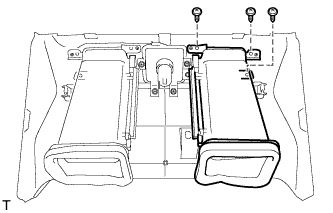 |
Install the No. 2 console box register assembly with the 3 screws.
| 35. INSTALL REAR POWER OUTLET SOCKET COVER (for Double Cab) |
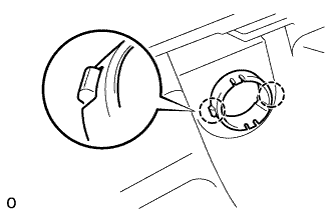 |
Attach the 2 claws to install the rear power outlet socket cover.
| 36. INSTALL REAR POWER OUTLET SOCKET ASSEMBLY (for Double Cab) |
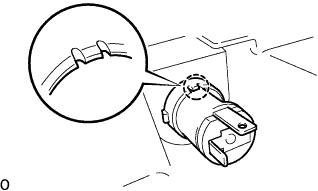 |
Attach the claw to install the rear power outlet socket assembly.
| 37. INSTALL CENTER SEATBACK PANEL |
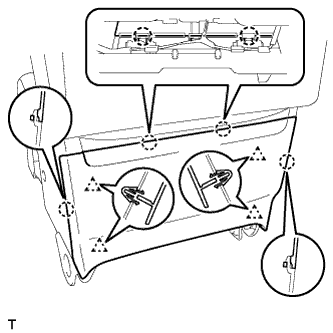 |
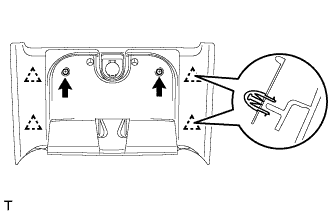
for Regular Cab:
Attach the 4 claws and 4 clips to install the center seatback panel.
 |
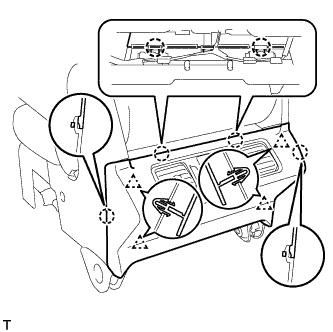
for Double Cab:
Connect the connector.
Attach the 4 clips to install the center seatback panel.
Install the 2 screws.
 |
for CrewMax:
Connect the connector.
Attach the 4 claws and 4 clips to install the center seatback panel.