 |
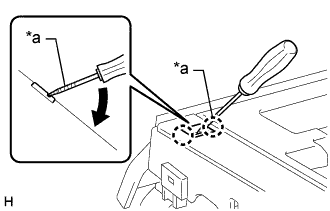
Using a screwdriver, detach the 2 claws and remove the shift lever cap from the upper position indicator housing.
| *a | Protective Tape |
- NOTICE:
- Be careful not to damage the shift lever cap.
- HINT:
- Tape the screwdriver tip before use.
SHIFT LEVER ASSEMBLY (for Floor Shift Type) > DISASSEMBLY |
| 1. REMOVE SHIFT LEVER CAP |
|
Using a screwdriver, detach the 2 claws and remove the shift lever cap from the upper position indicator housing.
| *a | Protective Tape |
| 2. REMOVE UPPER POSITION INDICATOR HOUSING |
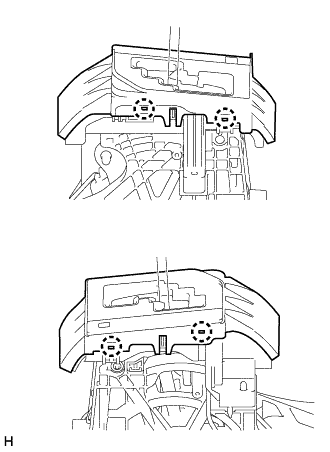 |
Detach the 4 claws and remove the upper position indicator housing from the shift lever assembly.
| 3. REMOVE POSITION INDICATOR SLIDE COVER |
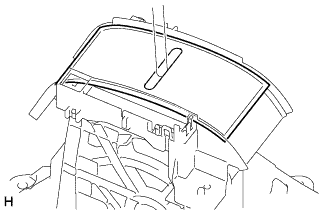 |
Remove the position indicator slide cover together with the No. 2 position indicator slide cover from the shift lever assembly.
| 4. REMOVE NO. 2 POSITION INDICATOR SLIDE COVER |
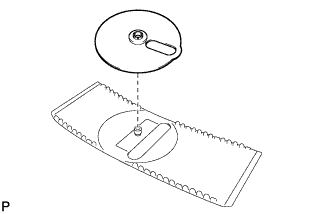 |
Remove the No. 2 position indicator slide cover from the position indicator slide cover.
| 5. DISCONNECT INDICATOR LIGHT WIRE SUB-ASSEMBLY |
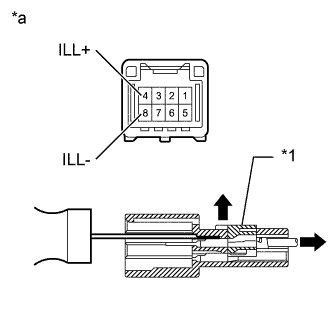 |
Using a thin-bladed screwdriver, release the connector housing retainer.
| *1 | Connector Housing Retainer |
| *a | Component without harness connected (Transmission Control Switch) |
Using a thin-bladed screwdriver, pull out the 4 (ILL+) and 8 (ILL-) terminals from the rear as shown in the illustration.
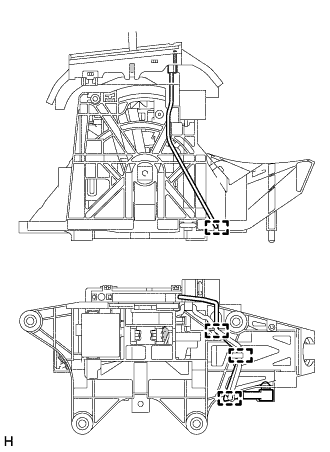 |
Detach the 4 guides from the shift lever assembly.
| 6. REMOVE LOWER POSITION INDICATOR HOUSING |
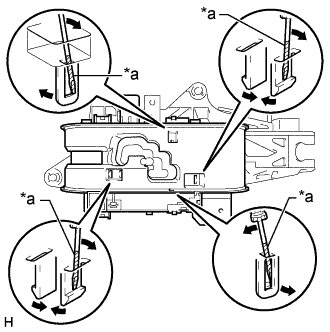 |
Using a small screwdriver, detach the 4 claws and remove the lower position indicator housing from the shift lever assembly.
| *a | Protective Tape |
| 7. REMOVE INDICATOR LIGHT WIRE SUB-ASSEMBLY |
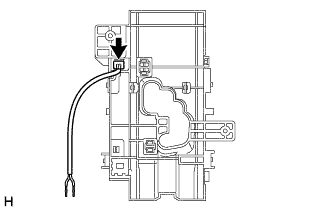 |
Disconnect the connector and remove the indicator light wire sub-assembly from the lower position indicator housing.
| 8. REMOVE POSITION INDICATOR LED |
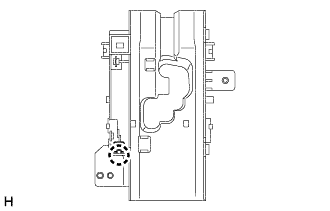 |
Detach the claw and remove the position indicator LED from the lower position indicator housing.
| 9. REMOVE SHIFT LOCK CONTROL ECU |
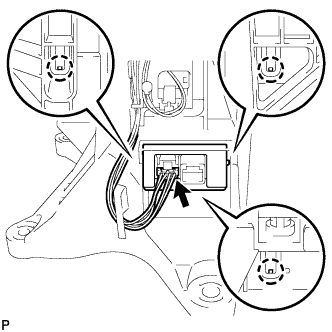 |
Disconnect the shift lock solenoid connector.
Detach the 3 claws and remove the shift lock control ECU from the shift lever assembly.