 |
Check that the ignition switch is OFF.
SIDE AIRBAG SENSOR (for CrewMax) > INSTALLATION |
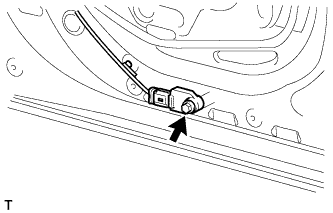
| 1. INSTALL FRONT SIDE AIRBAG SENSOR |
|
Check that the ignition switch is OFF.
Check that the cable is disconnected from the battery negative (-) terminal.
Install the door airbag sensor with the screw.
Check that there is no looseness in the installation parts of the door airbag sensor.
Connect the connector.
| 2. INSTALL FRONT DOOR TRIM BOARD SUB-ASSEMBLY LH (for Front Side) |
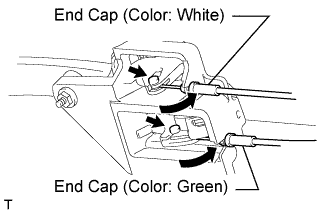 |
Connect the 2 cables to the inside handle.
Connect the connector.
Attach the inside handle's knob to the door trim board.
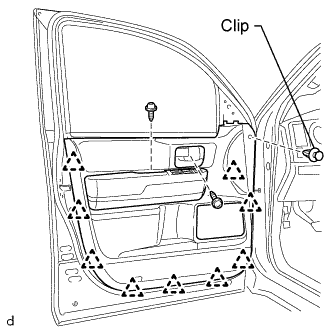 |
Attach the 9 clips to install the door trim board.
Install the inside handle and door trim board to the door trim panel with the screw.
Install the door trim board to the door panel with the screw.
Install the clip.
| 3. INSTALL FRONT LOWER DOOR FRAME BRACKET GARNISH LH (for Front Side) |
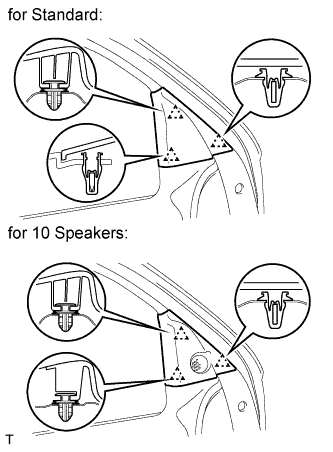 |
Attach the 3 clips to install the front door lower frame bracket garnish.
| 4. INSTALL FRONT UPPER ARMREST BASE PANEL LH (for Front Side) |
Connect the master switch connector.
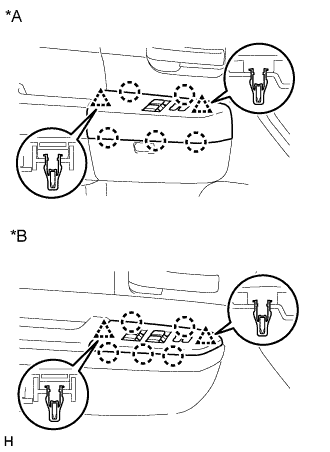 |
Attach the 2 clips and 5 claws to install the front upper armrest base panel LH.
| *A | for Regular Cab |
| *B | for Double Cab, for CrewMax |
| 5. INSTALL FRONT DOOR INSIDE HANDLE BEZEL PLUG LH (for Front Side) |
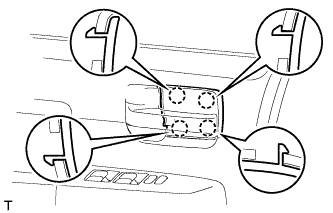 |
Attach the 4 claws to install the bezel plug.
| 6. INSTALL REAR SIDE AIRBAG SENSOR |
 |
Check that the ignition switch is OFF.
Check that the cable is disconnected from the battery negative (-) terminal.
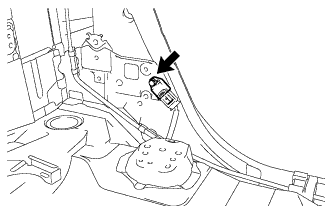
Install the side airbag sensor with the bolt.
Check that there is no looseness in the installation parts of the side airbag sensor.
Connect the connector.
| 7. INSTALL LOWER QUARTER TRIM PANEL ASSEMBLY LH (for Rear Side) |
Attach the 6 clips to install the lower quarter trim panel assembly LH.
Connect the rear seat outer belt assembly with the bolt.
Attach the 2 claws to install the cover.
| 8. INSTALL REAR DOOR OPENING TRIM WEATHERSTRIP LH (for Rear Side) |
| 9. INSTALL REAR DOOR SCUFF PLATE LH (for Rear Side) |
Attach the 6 claws and 2 clips to install the rear door scuff plate LH.
| 10. INSTALL REAR SEAT ASSEMBLY (for Rear Side) |
Install the rear seat assembly (Click here).
| 11. CONNECT CABLE TO NEGATIVE BATTERY TERMINAL |
| 12. CHECK SRS WARNING LIGHT |
Check the SRS warning light (Click here).