 |
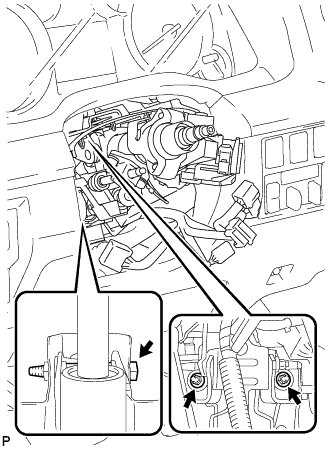
Install the steering column with the bolt and 2 nuts.
- Torque:
- 21 N*m{ 214 kgf*cm , 15 ft.*lbf }
STEERING COLUMN ASSEMBLY (for Power Tilt and Power Telescopic Steering Column) > INSTALLATION |
| 1. INSTALL STEERING COLUMN ASSEMBLY |
|
Install the steering column with the bolt and 2 nuts.
| 2. INSTALL NO. 2 STEERING INTERMEDIATE SHAFT SUB-ASSEMBLY |
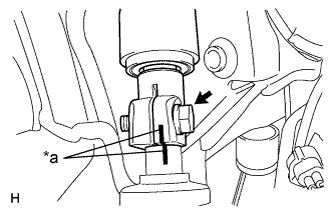 |
Align the matchmarks on the No. 2 steering intermediate shaft and power steering gear.
| *a | Matchmark |
Install the bolt.
| 3. INSTALL STEERING INTERMEDIATE SHAFT ASSEMBLY |
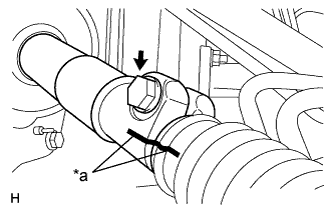 |
Align the matchmarks on the steering intermediate shaft and No. 2 steering intermediate shaft.
| *a | Matchmark |
Install the bolt.
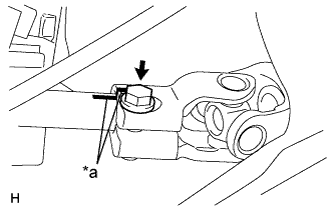 |
Align the matchmarks on the steering column and steering intermediate shaft.
| *a | Matchmark |
Install the bolt.
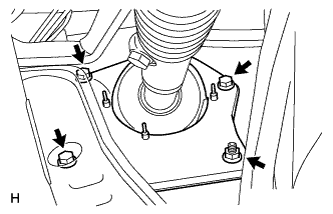 |
Install the 3 bolts and nut.
| 4. INSTALL NO. 1 AIR DUCT SUB-ASSEMBLY |
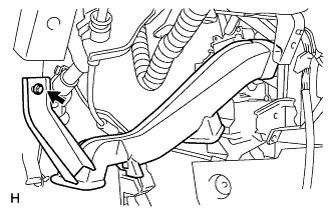 |
Install the air duct with the bolt.
| 5. INSTALL LOWER NO. 1 INSTRUMENT PANEL AIRBAG ASSEMBLY |
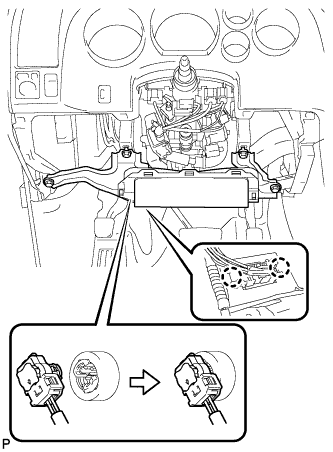 |
Connect the connector.
Attach the 2 claws to install the DLC3.
Install the 4 bolts to install the instrument panel airbag.
| 6. INSTALL LOWER INSTRUMENT PANEL FINISH PANEL SUB-ASSEMBLY LH |
Connect the hood lock control cable to the hood lock control lever, rotate the hood lock control cable, and then slide and push the hood lock control cable into place.
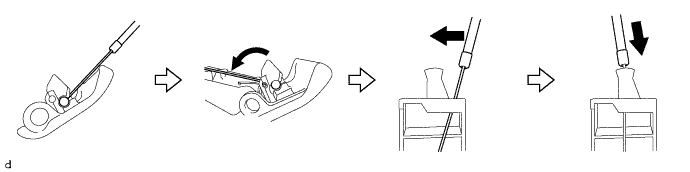
Attach the 3 hooks to connect the hood lock control lever to the lower instrument panel finish panel sub-assembly LH.
Connect each connector.
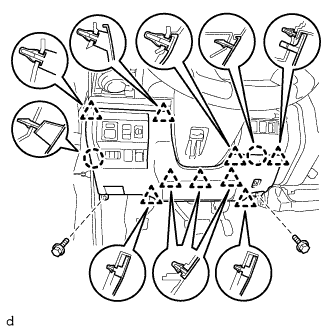 |
Attach the 9 clips and 2 claws to install the lower instrument panel finish panel sub-assembly LH.
Install the 2 bolts <A>.
| 7. INSTALL INSTRUMENT SIDE PANEL LH |
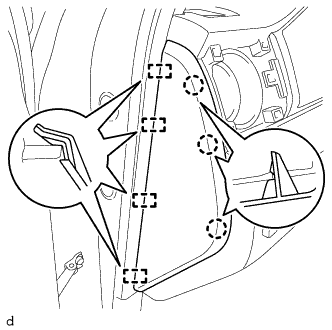 |
Attach the 4 guides and 3 claws to install the instrument side panel LH.
| 8. INSTALL COWL SIDE TRIM BOARD LH |
Attach the 2 clips to install the cowl side trim board LH.
Install the nut.
| 9. INSTALL FRONT DOOR SCUFF PLATE LH (for Regular Cab) |
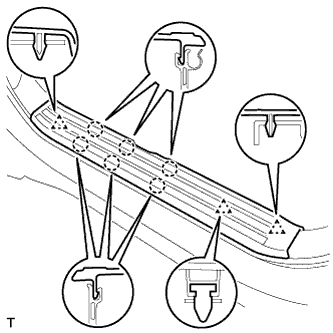 |
Detach the 6 claws and 3 clips, and remove the front door scuff plate LH.
| 10. INSTALL FRONT DOOR SCUFF PLATE LH (for Double Cab, CrewMax) |
Attach the 6 claws and 3 clips to install the front door scuff plate LH.
| 11. INSTALL COMBINATION SWITCH ASSEMBLY WITH SPIRAL CABLE SUB-ASSEMBLY |
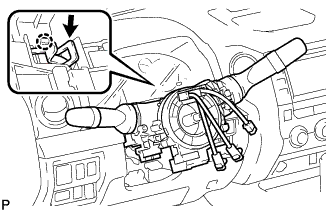 |
Install the combination switch assembly with spiral cable to the steering column assembly with the clamp.
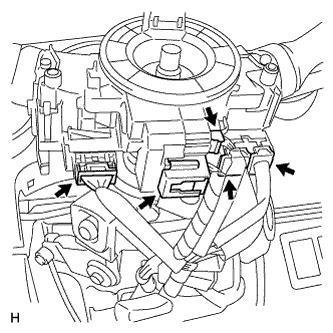 |
Connect the 5 connectors to the combination switch with spiral cable.
| 12. INSTALL UPPER STEERING COLUMN COVER |
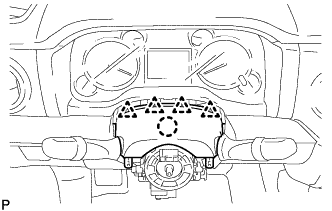 |
Attach the claw to install the upper steering column cover.
Attach the 4 clips.
| 13. INSTALL LOWER STEERING COLUMN COVER |
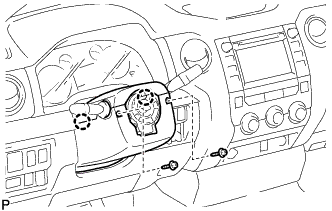 |
Attach the 2 claws to install the column cover.
Install the 2 screws.
| 14. INSTALL TILT AND TELESCOPIC MANUAL SWITCH |
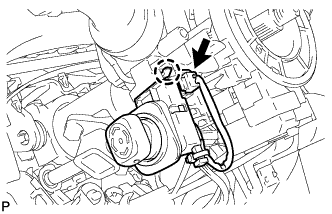 |
Attach the claw to install the tilt and telescopic switch.
Connect the connector.
| 15. ADJUST SPIRAL CABLE |
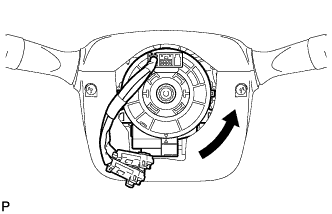 |
Check that the ignition switch is OFF.
Check that the battery negative (-) terminal is disconnected.
Rotate the spiral cable sub-assembly with steering sensor counterclockwise slowly by hand until it feels firm.
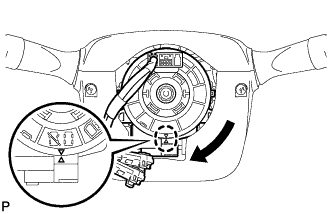 |
Rotate the spiral cable sub-assembly with steering sensor clockwise approximately 2.5 turns to align the marks.
| 16. INSTALL STEERING WHEEL ASSEMBLY |
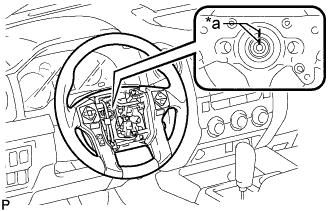 |
Align the matchmarks on the steering wheel and steering main shaft.
| *a | Matchmark |
Install the steering wheel set nut.
| 17. INSPECT STEERING WHEEL CENTER POINT |
| 18. ADJUST SPIRAL CABLE |
|
Check that the ignition switch is OFF.
Check that the battery negative (-) terminal is disconnected.
Rotate the spiral cable sub-assembly with steering sensor counterclockwise slowly by hand until it feels firm.
|
Rotate the spiral cable sub-assembly with steering sensor clockwise approximately 2.5 turns to align the marks.
| 19. INSTALL STEERING PAD |
Check that the ignition switch is off.
Check that the cable is disconnected from the negative (-) battery terminal.
Support the steering pad with one hand.
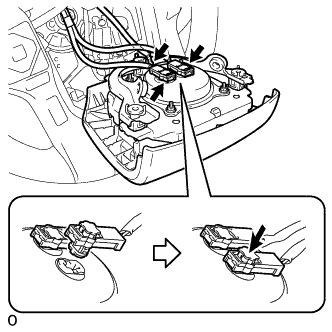 |
Connect the 2 airbag connectors to the steering pad.
Push in the 2 airbag connector locks to install the 2 airbag connectors.
Connect the horn connector to the steering pad.
Install the steering pad.
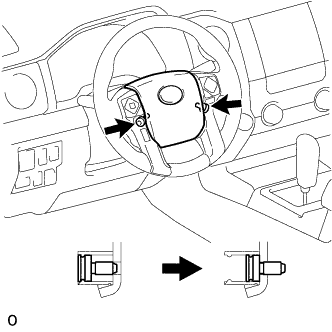 |
Using T30 "TORX" socked wrench, tighten the 2 screws.
| 20. INSTALL LOWER NO. 3 STEERING WHEEL COVER |
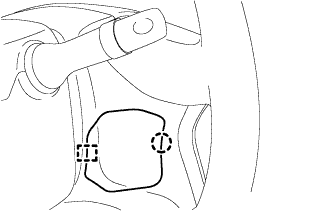 |
Attach the guide and claw to install the lower No. 3 steering wheel cover.
| 21. INSTALL LOWER NO. 2 STEERING WHEEL COVER |
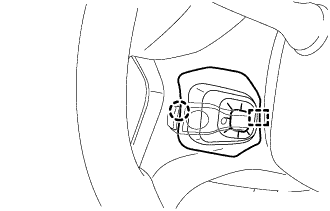 |
w/ Cruise Control:
Attach the guide and claw to install the lower No. 2 steering wheel cover.
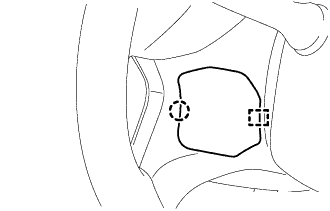 |
w/o Cruise Control:
Attach the guide and claw to install the lower No. 2 steering wheel cover.
| 22. CONNECT CABLE TO NEGATIVE BATTERY TERMINAL |
| 23. CHECK SRS WARNING LIGHT |