 |
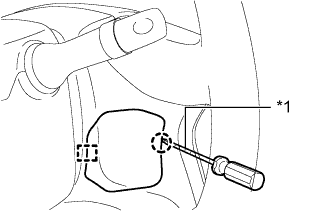
Using a screwdriver, detach the claw and guide and remove the lower No. 3 steering wheel cover.
| *1 | Protective Tape |
- HINT:
- Tape the screwdriver tip before use.
STEERING COLUMN ASSEMBLY (for Manual Tilt) > REMOVAL |
| 1. PRECAUTION |
| 2. PLACE FRONT WHEELS FACING STRAIGHT AHEAD |
| 3. DISCONNECT CABLE FROM NEGATIVE BATTERY TERMINAL |
| 4. REMOVE LOWER NO. 3 STEERING WHEEL COVER |
|
Using a screwdriver, detach the claw and guide and remove the lower No. 3 steering wheel cover.
| *1 | Protective Tape |
| 5. REMOVE LOWER NO. 2 STEERING WHEEL COVER |
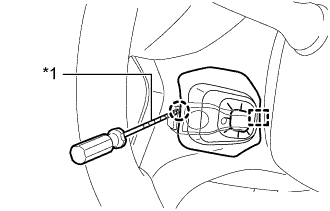 |
w/ Cruise Control:
| *1 | Protective Tape |
Using a screwdriver, detach the claw and guide and remove the lower No. 2 steering wheel cover.
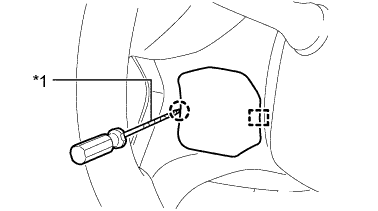 |
w/o Cruise Control:
| *1 | Protective Tape |
Using a screwdriver, detach the claw and guide and remove the lower No. 2 steering wheel cover.
| 6. REMOVE STEERING PAD |
Check that the ignition switch is off.
Check that the cable is disconnected from the negative (-) battery terminal.
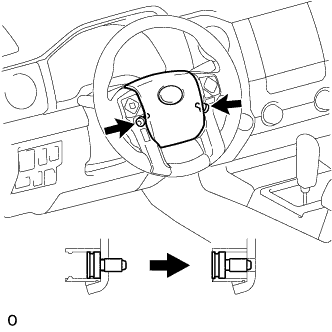 |
Using a T30 "TORX" socket wrench, loosen the 2 screws until the groove along the screw circumference catches on the screw case.
Pull the steering pad toward you.
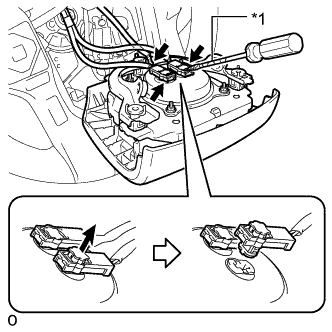 |
Disconnect the horn connector from the steering pad.
Using a screwdriver, release the 2 airbag connector locks.
| *1 | Protective Tape |
Disconnect the 2 airbag connectors and remove the steering pad as shown in the illustration.
| 7. REMOVE STEERING WHEEL ASSEMBLY |
Remove the steering wheel set nut.
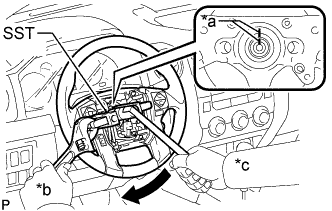 |
Put matchmarks on the steering wheel and main shaft.
| *a | Matchmark |
| *b | Hold |
| *c | Turn |
Using SST, remove the steering wheel.
| 8. REMOVE LOWER STEERING COLUMN COVER |
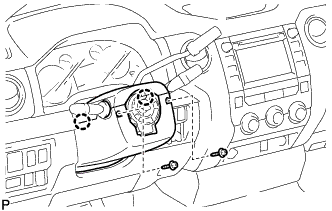 |
Remove the 2 screws.
Detach the 2 claws to remove the lower steering column cover.
| 9. REMOVE UPPER STEERING COLUMN COVER |
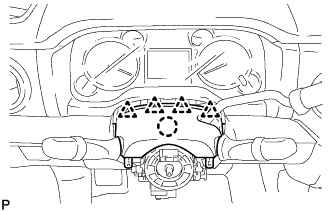 |
Detach the 4 clips.
Detach the claw to remove the upper steering column cover.
| 10. REMOVE TURN SIGNAL SWITCH ASSEMBLY WITH SPIRAL CABLE SUB-ASSEMBLY |
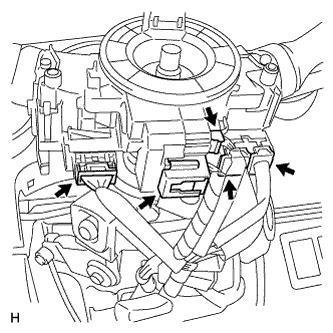 |
Disconnect the 5 connectors from the turn signal switch with spiral cable.
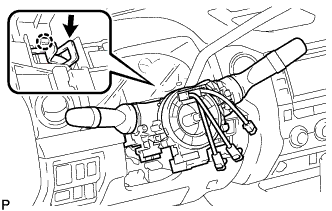 |
Using pliers, grip the claws of the clamp and remove the turn signal switch with spiral cable from the steering column.
| 11. DISCONNECT COLUMN SHIFT TRANSMISSION CONTROL CABLE ASSEMBLY |
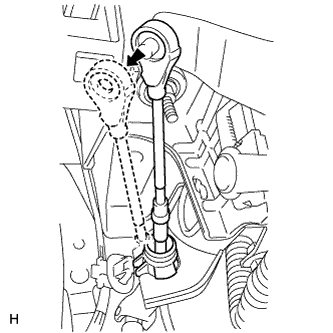 |
Move the shift lever to the N position.
Roll up the floor carpet front LH side.
Disconnect the column shift transmission control cable end from the column shift.
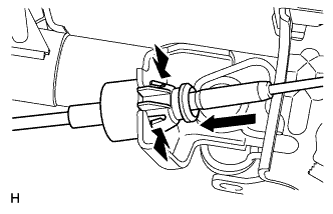 |
Press the outer cable socket's claws and disconnect the cable from the steering column shaft bracket.
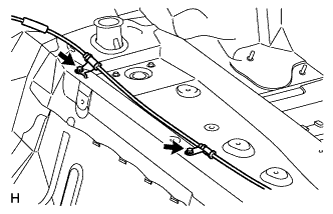 |
Remove the 2 bolts and disconnect the 2 cable clamps.
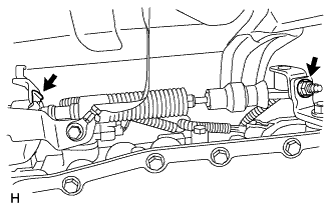 |
Remove the nut and clip, and disconnect the transmission control cable from the automatic transmission.
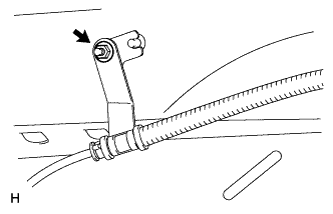 |
Remove the nut and disconnect the transmission control cable support.
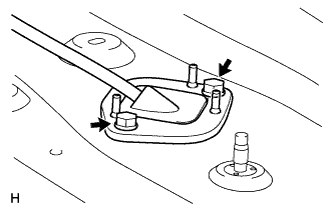 |
Remove the 2 bolts and remove the column shift transmission control cable toward the vehicle interior.
| 12. REMOVE COLUMN SHIFT SHIFT LEVER SUB-ASSEMBLY |
Move the shift lever to the N position.
|
Disconnect the column shift transmission control cable end from the column shift.
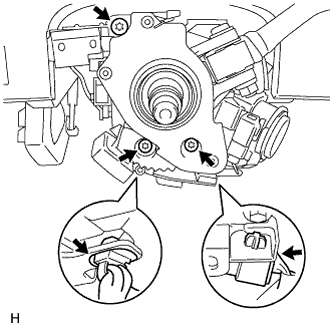 |
Disconnect the connector and detach the harness clamp.
Using a T30 "TORX" wrench, remove the 3 bolts and column shift.
| 13. REMOVE FRONT DOOR SCUFF PLATE LH (for Regular Cab) |
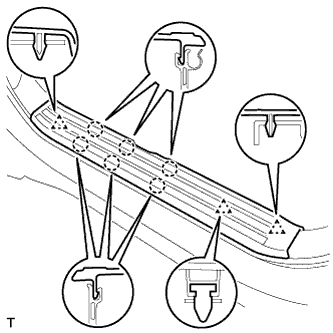 |
Detach the 6 claws and 3 clips, and remove the front door scuff plate LH.
| 14. REMOVE FRONT DOOR SCUFF PLATE LH (for Double Cab, CrewMax) |
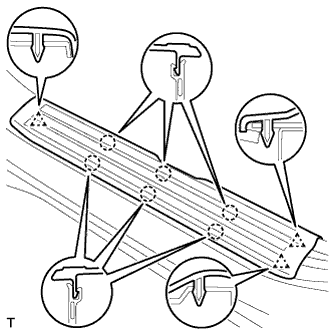 |
Detach the 6 claws and 3 clips, and remove the front door scuff plate LH.
| 15. REMOVE COWL SIDE TRIM BOARD LH |
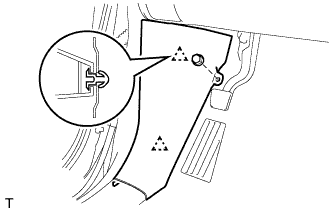 |
Remove the nut.
Detach the 2 clips and remove the cowl side trim board LH.
| 16. REMOVE INSTRUMENT SIDE PANEL LH |
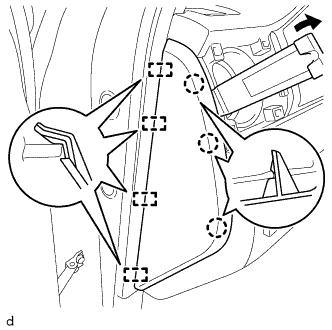 |
Using a moulding remover B, detach the 3 claws, 4 guides and remove the instrument side panel LH.
| 17. REMOVE LOWER INSTRUMENT PANEL FINISH PANEL SUB-ASSEMBLY LH |
Operate the tilt lever to fully extend and raise the steering column.
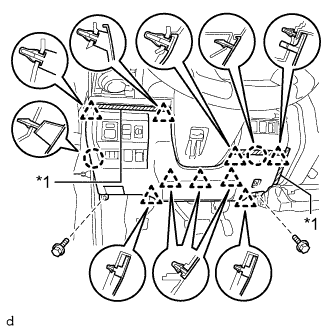 |
Apply protective tape as shown in the illustration.
| *1 | Protective Tape |
Remove the 2 bolts <A>.
Detach the 9 clips, 2 claws and remove the lower instrument panel finish panel sub-assembly LH.
Disconnect each connector.
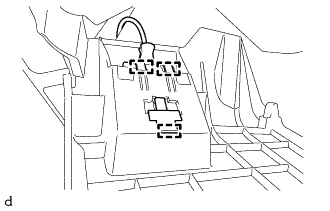 |
Detach the 3 hooks and disconnect the hood lock control lever from the lower instrument panel finish panel sub-assembly LH.
Pull and slide the hood lock control cable, rotate the hood lock control cable, and then disconnect the hood lock control cable from the hood lock control lever.
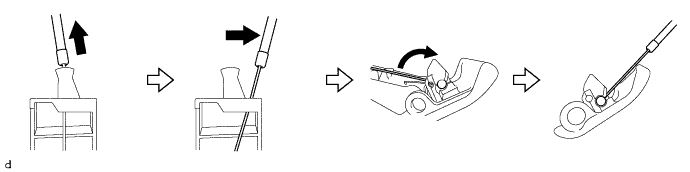
| 18. REMOVE LOWER NO. 1 INSTRUMENT PANEL AIRBAG ASSEMBLY |
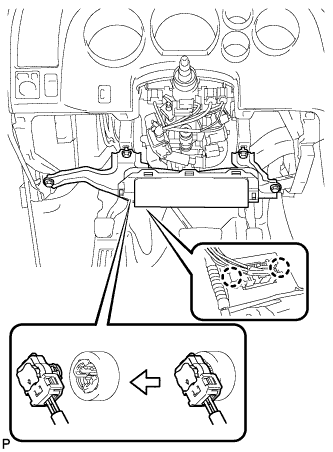 |
Remove the 4 bolts and remove the instrument panel airbag.
Detach the 2 claws and disconnect the DLC3.
Disconnect the connector.
| 19. REMOVE NO. 1 AIR DUCT SUB-ASSEMBLY |
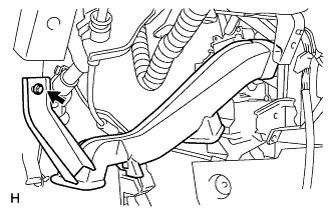 |
Remove the bolt and air duct.
| 20. REMOVE STEERING INTERMEDIATE SHAFT ASSEMBLY |
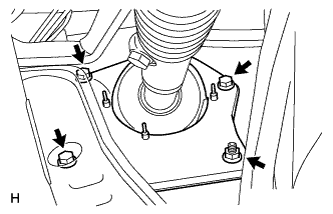 |
Remove the 3 bolts and nut.
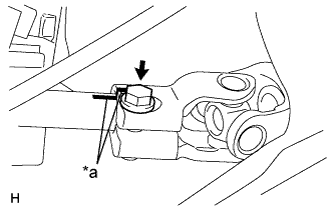 |
Put matchmarks on the steering intermediate shaft and the steering column.
| *a | Matchmark |
Remove the bolt and steering intermediate shaft from the steering column.
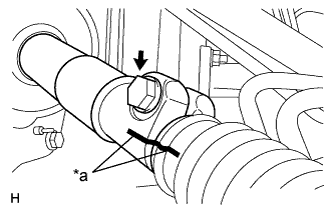 |
Put matchmarks on the No. 2 steering intermediate shaft and steering intermediate shaft.
| *a | Matchmark |
Remove the bolt and steering intermediate shaft from the No. 2 steering intermediate shaft.
| 21. REMOVE NO. 2 STEERING INTERMEDIATE SHAFT SUB-ASSEMBLY |
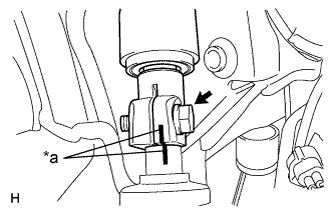 |
Put matchmarks on the No. 2 steering intermediate shaft and the power steering gear.
| *a | Matchmark |
Remove the bolt and No. 2 steering intermediate shaft from the power steering gear.
| 22. REMOVE STEERING COLUMN ASSEMBLY |
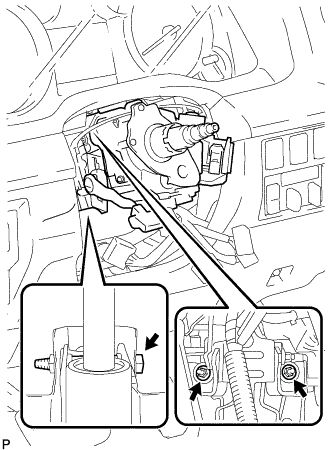 |
Remove the bolt and 2 nuts. Then remove the steering column from the instrument panel reinforcement.