 |
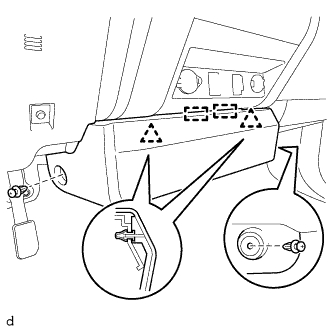
Remove the 2 clips.
STEREO JACK ADAPTER ASSEMBLY (for Column Shift Type) > REMOVAL |
| 1. REMOVE CENTER LOWER INSTRUMENT COVER |
|
Remove the 2 clips.
Detach the 2 clips, 2 guides and remove the lower center instrument cover.
| 2. REMOVE AIR CONDITIONING CONTROL ASSEMBLY |
Put protective tape around the air conditioning control assembly.
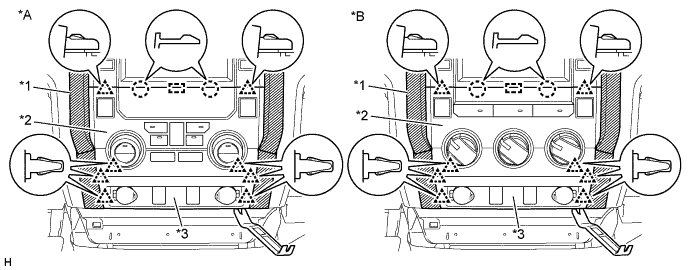
| *A | for Automatic Air Conditioning System | *B | for Manual Air Conditioning System |
| *1 | Protective Tape | *2 | Air Conditioning Control Assembly |
| *3 | Center Lower Instrument Panel Finish Panel | - | - |
Using moulding remover B, detach the 8 clips, 2 claws and guide.
Disconnect each connector and remove the air conditioning control assembly together with the center lower instrument panel finish panel.
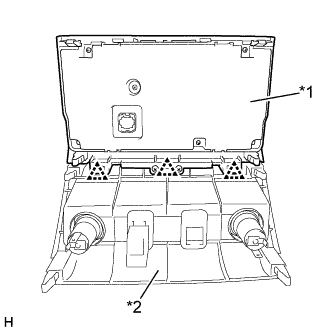 |
Detach the 3 clips and remove the air conditioning control assembly from the center lower instrument panel finish panel.
| *1 | Air Conditioning Control Assembly |
| *2 | Center Lower Instrument Panel Finish Panel |
| 3. REMOVE NO. 1 STEREO JACK ADAPTER ASSEMBLY |
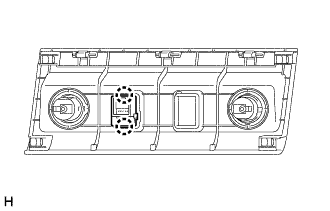 |
Detach the 2 claws and remove the No. 1 stereo jack adapter assembly.