Install the front No. 1 speaker assembly with the 4 screws.
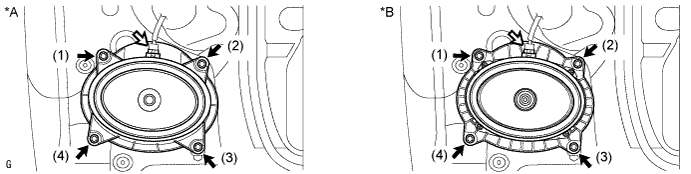
| *A | for Standard | *B | for 7 Speakers |
- NOTICE:
- Do not touch the cone part of the speaker.
- HINT:
- Install the screws in the order shown in the illustration.
FRONT DOOR SPEAKER (for Double Cab) > INSTALLATION |
| 1. INSTALL FRONT NO. 1 SPEAKER ASSEMBLY |
Connect the connector.
Install the front No. 1 speaker assembly with the 4 screws.
| *A | for Standard | *B | for 7 Speakers |
| 2. INSTALL FRONT DOOR TRIM BOARD SUB-ASSEMBLY LH |
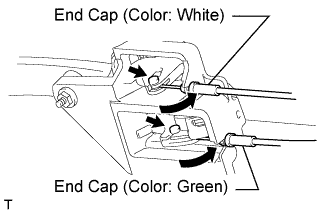 |
Connect the 2 cables to the inside handle.
Connect the connector.
Attach the inside handle's knob to the door trim board.
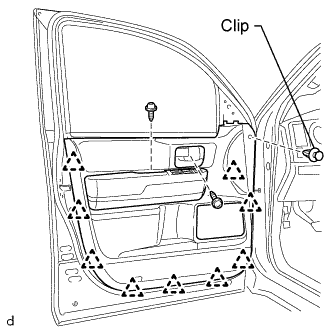 |
Attach the 9 clips to install the door trim board.
Install the inside handle and door trim board to the door trim panel with the screw.
Install the door trim board to the door panel with the screw.
Install the clip.
| 3. INSTALL FRONT DOOR ARMREST COVER LH |
| 4. INSTALL FRONT UPPER ARMREST BASE PANEL LH |
Connect the master switch connector.
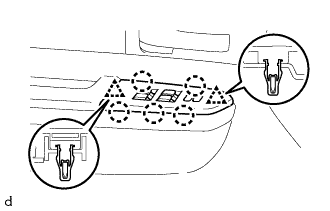 |
Attach the 2 clips and 5 claws to install the front upper armrest base panel LH.
| 5. INSTALL FRONT DOOR INSIDE HANDLE BEZEL PLUG LH |
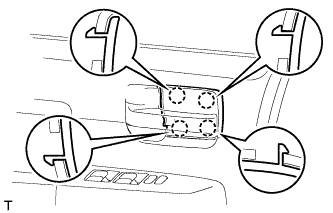 |
Attach the 4 claws to install the bezel plug.
| 6. INSTALL FRONT LOWER DOOR FRAME BRACKET GARNISH LH |
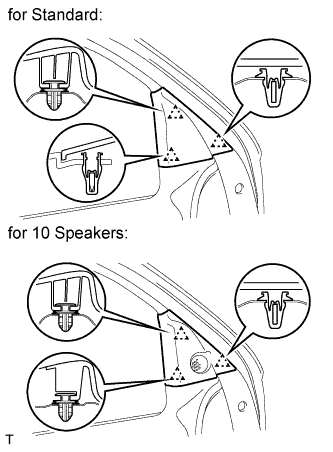 |
Attach the 3 clips to install the front door lower frame bracket garnish.