BACK WINDOW GLASS (for CrewMax) > INSTALLATION |
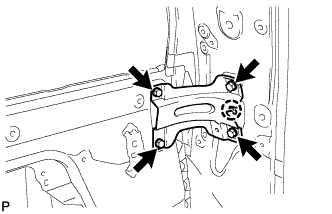
| 1. INSTALL UPPER CAB REAR PILLAR PLATE LH |
|
Align the positioning hole with the claw, and install the upper plate with the 4 bolts as shown in the illustration.
| 2. INSTALL UPPER CAB REAR PILLAR PLATE RH |
| 3. INSTALL BACK WINDOW OUTSIDE MOULDING |
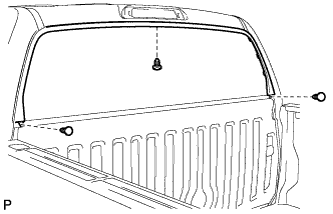 |
Install the outside moulding with the 3 clips.
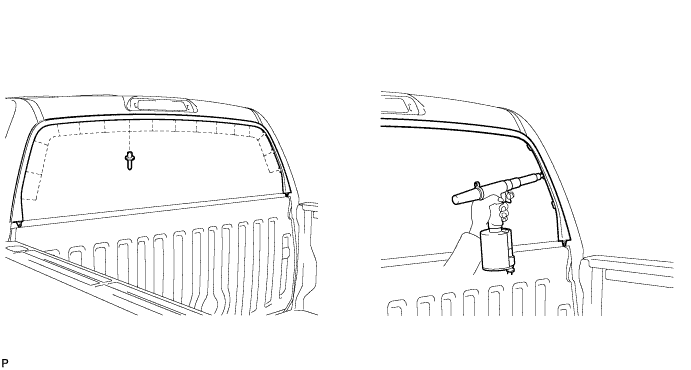
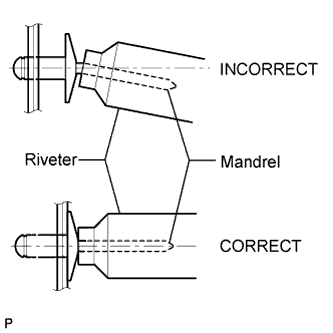
Using an air riveter or hand riveter with a nose piece, install the back window outside moulding with 16 new rivets.
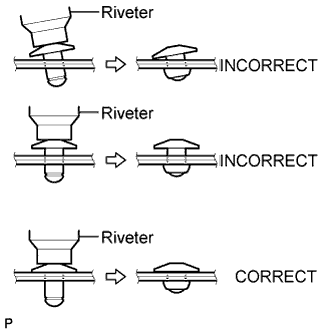 |
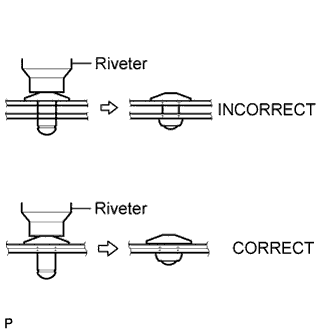 |
| 4. INSTALL BACK DOOR POWER WINDOW REGULATOR MOTOR |
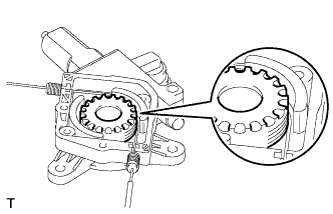 |
Install the drum and wire guide to the motor.
Install the cover with the 2 screws.
Apply MP grease to the rotating areas of the regulator motor.
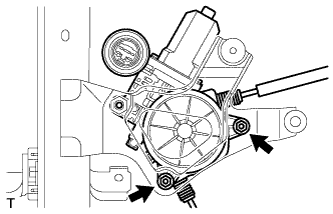 |
Install the motor with the 2 nuts.
| 5. INSTALL BACK DOOR POWER WINDOW REGULATOR SUB-ASSEMBLY |
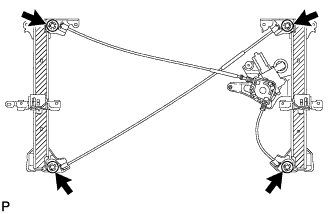 |
Apply MP grease to the sliding and rotating parts of the window regulator.
Temporarily install the window regulator by attaching the 3 upper claws.
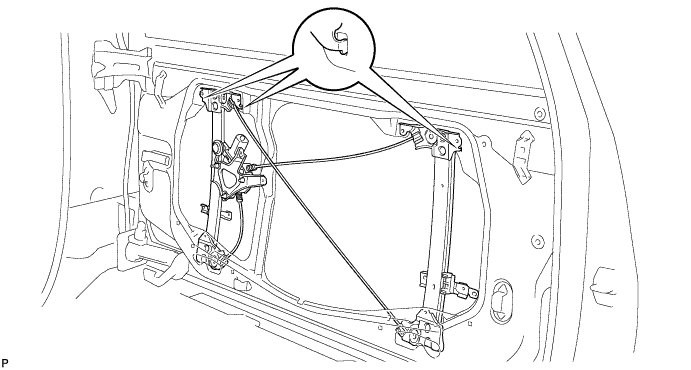
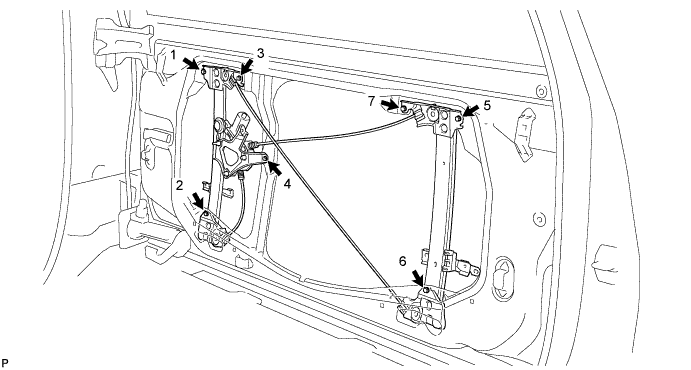
Loosely install the bolts onto the window regulator.
Tighten the 7 bolts in the order shown in the illustration.
| 6. INSTALL BACK WINDOW GLASS |
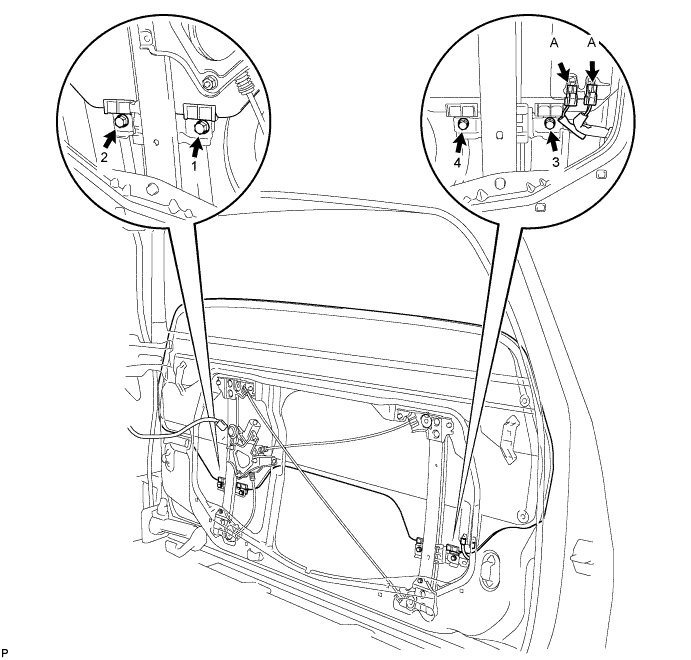
Temporarily install the back window glass to the window regulator with the 4 bolts.
Tighten the 4 bolts in the order shown in the illustration.
Connect the 2 defogger connectors labeled A.
| 7. INSTALL BACK DOOR GLASS RUN |
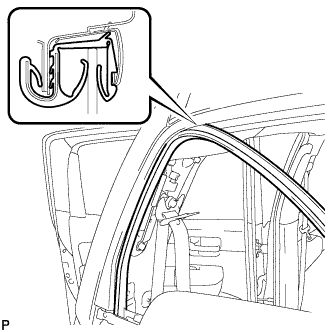 |
Install the glass run.
| 8. INSTALL INNER BACK DOOR GLASS WEATHERSTRIP |
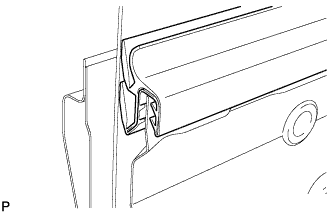 |
Install the inner weatherstrip.
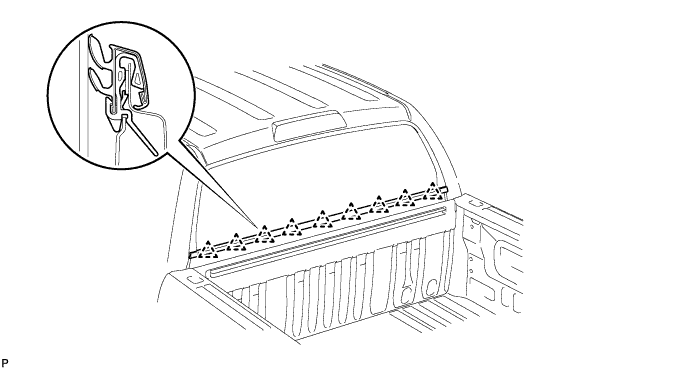
| 9. INSTALL OUTER BACK DOOR GLASS WEATHERSTRIP ASSEMBLY |
Install the outer weatherstrip with the 9 clips.
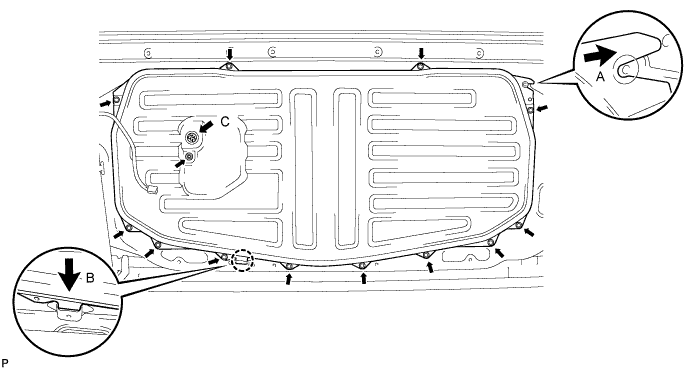
| 10. INSTALL BACK DOOR SERVICE HOLE COVER |
Slide the cover to the right to engage the retainer labeled A.
Attach the claw labeled B to the body.
Install the 12 bolts and nut.
Install the back window regulator connector labeled C.
| 11. INSTALL ROOF HEADLINING ASSEMBLY |
Return the roof headlining to its original position. Refer to the following procedures .
| 12. INSTALL NO. 1 ROOM LIGHT ASSEMBLY |
Attach the 3 guides and 2 clips to install the No. 1 room light assembly.
Attach the 2 guides and 4 claws to install the No. 1 room light lens.
| 13. INSTALL ASSIST GRIP SUB-ASSEMBLY |
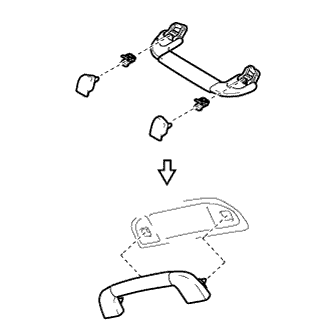 |
Assemble the assist grip sub-assembly as shown in the illustration.
Attach the 2 clips to install the assist grip sub-assembly.
| 14. INSTALL FRONT QUARTER TRIM PANEL ASSEMBLY LH |
Pass the rear seat outer belt assembly through the hole of the front quarter trim panel assembly LH.
Attach the 4 clips to install the front quarter trim panel assembly LH.
Install the 2 bolts.
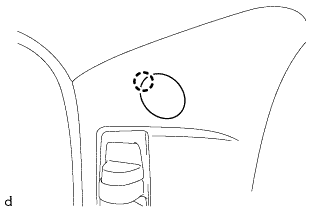 |
Attach the claw to close the cover.
| 15. INSTALL FRONT QUARTER TRIM PANEL ASSEMBLY RH |
| 16. INSTALL LOWER QUARTER TRIM PANEL ASSEMBLY LH |
Attach the 5 clips to install the lower quarter trim panel assembly LH.
Connect the rear seat outer belt assembly with the bolt.
Attach the 2 claws to install the cover.
| 17. INSTALL LOWER QUARTER TRIM PANEL ASSEMBLY RH |
| 18. INSTALL FRONT SHOULDER BELT ANCHOR PLATE SUB-ASSEMBLY LH |
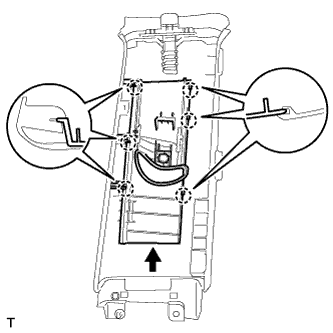 |
Slide the front shoulder belt anchor plate sub-assembly LH in the direction of the arrow and attach the 6 claws to install it.
| 19. INSTALL FRONT SHOULDER BELT ANCHOR PLATE SUB-ASSEMBLY RH |
| 20. INSTALL NO. 1 BOX SPEAKER ASSEMBLY |
Connect the connector.
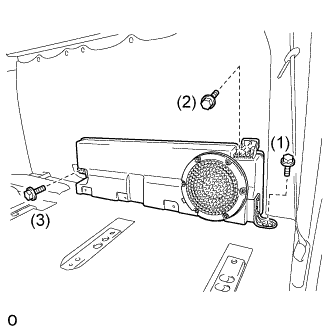 |
Install the No. 1 box speaker assembly with the 3 bolts.
| 21. INSTALL REAR DOOR OPENING TRIM WEATHERSTRIP LH |
| 22. INSTALL REAR DOOR OPENING TRIM WEATHERSTRIP RH |
| 23. INSTALL REAR DOOR SCUFF PLATE LH |
Attach the 8 claws and 2 clips to install the rear door scuff plate LH.
| 24. INSTALL REAR DOOR SCUFF PLATE RH |
| 25. INSTALL REAR SEAT ASSEMBLY LH |
Install the rear seat assembly LH with the 4 bolts.
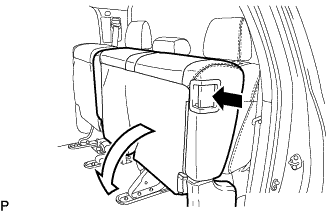 |
Pull the No. 1 reclining adjuster release handle LH and fold down the seat cushion.
| 26. INSTALL REAR SEAT ASSEMBLY RH |
Install the rear seat assembly RH with the 4 bolts.
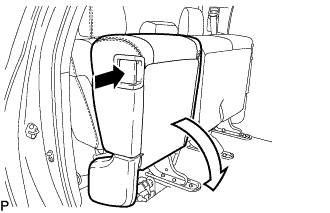 |
Pull the No. 1 reclining adjuster release handle RH and fold down the seat cushion.
| 27. INSTALL REAR ROOF DRIP SIDE FINISH MOULDING LH |
Clean the vehicle body surface.
Using a heat light, heat the vehicle body surface.
Remove the double-sided tape from the vehicle body.
Wipe off any tape adhesive residue with cleaner.
If reusing the moulding:
Clean the moulding.
Using a heat light, heat the moulding.
Remove the double-sided tape from the moulding.
Wipe off any tape adhesive residue with cleaner.
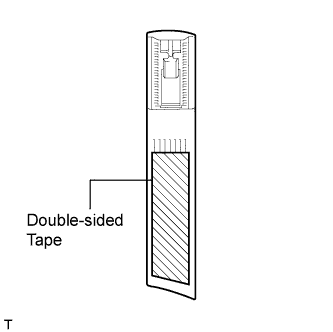 |
Apply new double-sided tape to the moulding, as shown in the illustration.
Install the moulding.
Using a heat light, heat the vehicle body and moulding.
Remove the peeling paper from the face of the moulding.
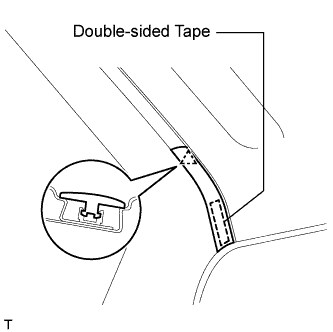 |
Attach the clip to install the moulding.
| 28. INSTALL REAR ROOF DRIP SIDE FINISH MOULDING RH |
| 29. CONNECT CABLE TO NEGATIVE BATTERY TERMINAL |