 |
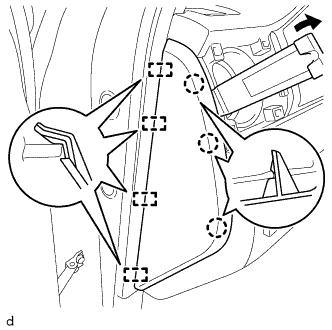
Using a moulding remover B, detach the 3 claws, 4 guides and remove the instrument side panel LH.
CLEARANCE SONAR MAIN SWITCH > REMOVAL |
| 1. REMOVE INSTRUMENT SIDE PANEL LH |
|
Using a moulding remover B, detach the 3 claws, 4 guides and remove the instrument side panel LH.
| 2. REMOVE FRONT DOOR SCUFF PLATE LH |
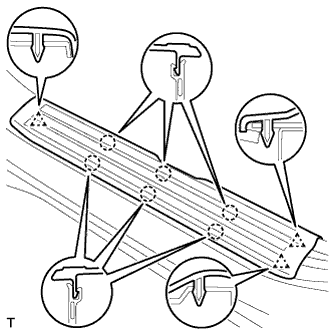 |
Detach the 6 claws and 3 clips, and remove the front door scuff plate LH.
| 3. REMOVE COWL SIDE TRIM BOARD LH |
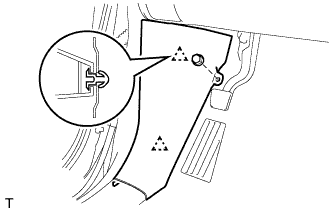 |
Remove the nut.
Detach the 2 clips and remove the cowl side trim board LH.
| 4. REMOVE LOWER INSTRUMENT PANEL FINISH PANEL SUB-ASSEMBLY LH |
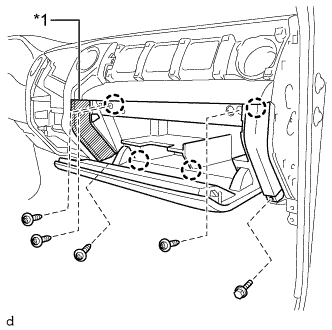 |
Apply protective tape as shown in the illustration.
| *1 | Protective Tape |
Remove the bolt <A> and 4 screws <F>.
Detach the 4 claws and remove the lower instrument panel finish panel sub-assembly RH.
| 5. REMOVE NO. 2 SWITCH HOLE BASE |
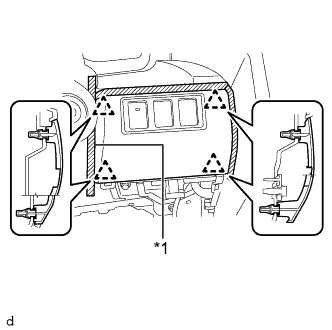 |
Apply protective tape as shown in the illustration.
| *1 | Protective Tape |
Detach the 4 clips and remove the No. 2 switch hole base.
Disconnect each connector.
| 6. REMOVE BACK SONAR OR CLEARANCE SONAR SWITCH ASSEMBLY |
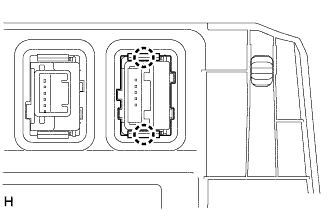 |
Detach the 2 claws and remove the back sonar or clearance sonar switch assembly.