 |
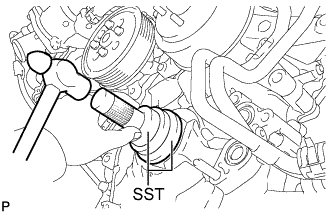
Using SST and a hammer, tap in the oil seal to a depth between 0 to 1.0 mm (0 to 0.0394 in.) from the timing chain cover edge.
- SST
- 09223-22010
09506-35010
- NOTICE:
- Keep the lip free from foreign matter.
- Do not tap the oil seal at an angle.
FRONT CRANKSHAFT OIL SEAL > INSTALLATION |
| 1. INSTALL FRONT CRANKSHAFT OIL SEAL |
Apply MP grease to the lip of a new oil seal.
|
Using SST and a hammer, tap in the oil seal to a depth between 0 to 1.0 mm (0 to 0.0394 in.) from the timing chain cover edge.
| 2. INSTALL CRANKSHAFT TIMING GEAR KEY |
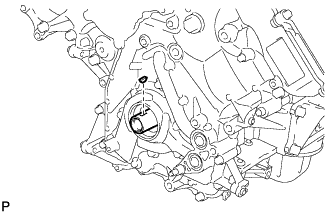 |
Install the crankshaft timing gear key.
| 3. INSTALL CRANKSHAFT PULLEY |
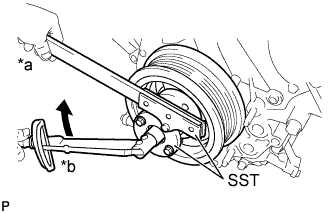 |
Align the key groove of the crankshaft pulley with the crankshaft pulley set key, and slide on the crankshaft pulley to install it.
| *a | Hold |
| *b | Turn |
Using SST, install the crankshaft pulley set bolt.
| 4. INSTALL OIL FILTER BRACKET |
Apply a light coat of engine oil to 2 new O-rings.
Install the 2 O-rings to the timing chain cover sub-assembly.
Install the oil filter bracket to the timing chain cover sub-assembly with the 2 nuts and 2 bolts.
| 5. INSTALL OIL PRESSURE SENDER GAUGE ASSEMBLY |
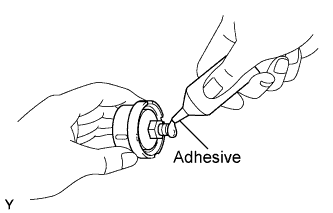 |
Apply adhesive to 2 or 3 threads of the oil pressure sender gauge.
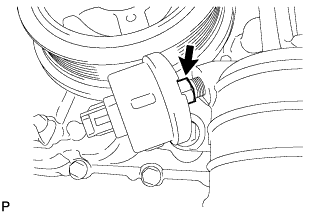 |
Install the oil pressure sender gauge.
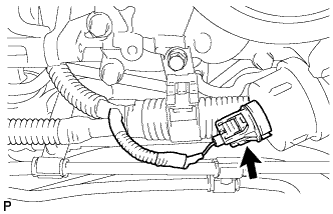 |
Connect the sender gauge connector.
| 6. CONNECT COOLER COMPRESSOR ASSEMBLY |
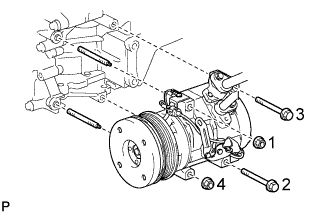 |
Connect the cooler compressor assembly with the 2 stud bolts.
Install the 2 bolts and 2 nuts.
| 7. CONNECT FRONT STABILIZER BAR |
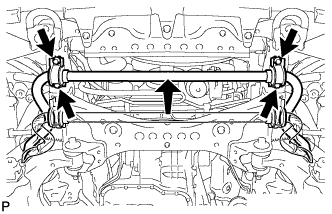 |
Connect the stabilizer bar and install the 2 stabilizer bushes and 2 stabilizer brackets with the 4 bolts.
| 8. INSTALL FAN SHROUD |
Install the fan pulley to the fan bracket.
Place the fan shroud together with the fluid coupling fan between the radiator and engine.
Temporarily install the fluid coupling fan to the fan bracket with the 4 nuts. Tighten the nuts as much as possible by hand.
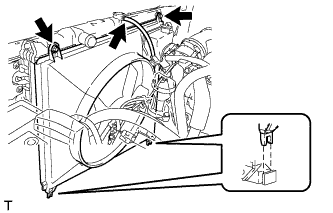 |
Attach the shroud's claws to the radiator as shown in the illustration.
Install the shroud with the 2 bolts.
Connect the reservoir hose to the upper radiator tank.
Install the fan and generator V-belt (Click here).
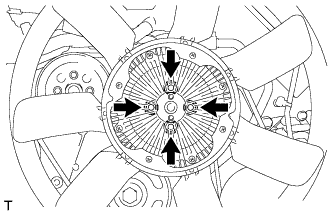 |
Tighten the 4 nuts of the fluid coupling fan.
| 9. INSTALL FAN AND GENERATOR V BELT |
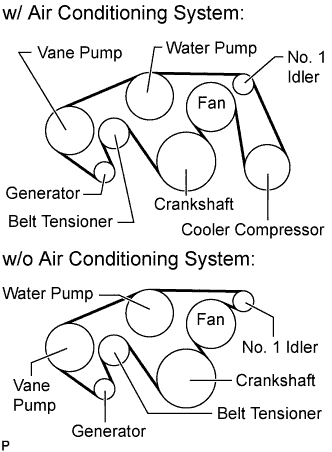 |
Set the V belt onto every part.
While turning the belt tensioner counterclockwise, remove the pin.
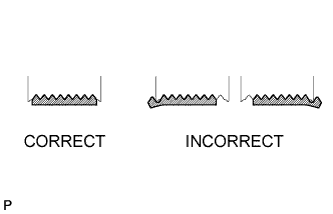 |
After installing the belt, check that it fits properly in the ribbed grooves.
| 10. INSTALL INLET RADIATOR HOSE |
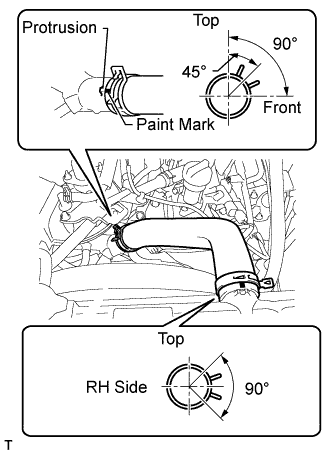 |
Install the inlet radiator hose.
| 11. ADD ENGINE COOLANT |
Add engine coolant.
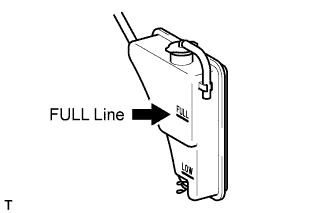 |
Slowly pour coolant into the radiator reservoir until it reaches the FULL line.
Install the reservoir cap.
Press the inlet and outlet radiator hoses several times by hand, and then check the coolant level. If the coolant level is low, add coolant.
Install the radiator cap.
Start the engine and warm it up until the thermostat opens.
Maintain the engine speed at 2000 to 2500 rpm.
Press the inlet and outlet radiator hoses several times by hand to bleed air.
Stop the engine, and wait until the engine coolant cools down to ambient temperature.
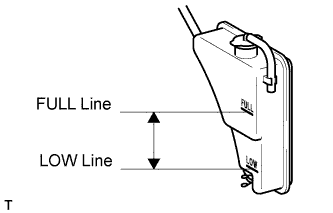 |
Check that the coolant level is between the FULL and LOW lines.
If the coolant level is below the LOW line, repeat all of the procedures above.
If the coolant level is above the FULL line, drain coolant so that the coolant level is between the FULL and LOW lines.
| 12. INSPECT FOR COOLANT LEAK |
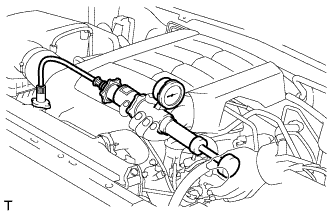 |
Fill the radiator with coolant and attach a radiator cap tester.
Warm up the engine.
Using the radiator cap tester, increase the pressure inside the radiator to 118 kPa (1.2 kgf/cm2, 17 psi), and check that the pressure does not drop.
If the pressure drops, check the hoses, radiator and water pump for leaks. If no external leaks are found, check the heater core, cylinder block and head.
| 13. INSPECT FOR OIL LEAK |
Start the engine. Make sure that there are no oil leaks from the area that was worked on.
| 14. CHECK ENGINE OIL LEVEL |
Warm up the engine, then stop the engine and wait for 5 minutes.
Check that the engine oil level is between the low level and full level marks on the dipstick.
If low, check for leakage and add oil up to the full level mark.
| 15. INSTALL NO. 1 ENGINE UNDER COVER |
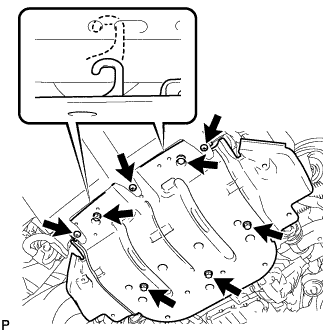 |
Hook the engine under cover to the vehicle body as shown in the illustration.
Install the 3 screws and 5 bolts.
| 16. INSTALL V-BANK COVER SUB-ASSEMBLY |
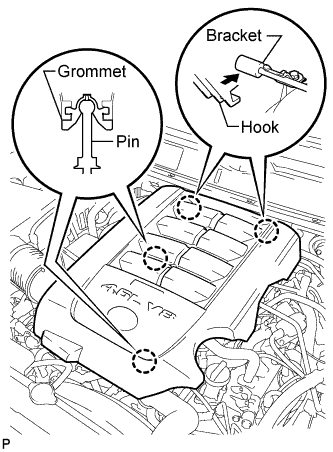 |
Attach the 2 V-bank cover hooks to the bracket. Then align the 2 V-bank cover grommets with the 2 pins, and press down on the V-bank cover to attach the pins.