 |
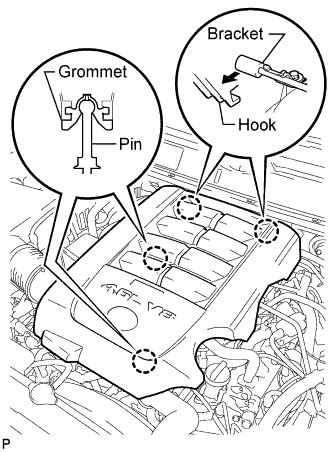
Raise the front of the V-bank cover to detach the 2 pins. Then remove the 2 V-bank cover hooks from the bracket, and remove the V-bank cover.
ECM > REMOVAL |
| 1. REMOVE V-BANK COVER SUB-ASSEMBLY |
|
Raise the front of the V-bank cover to detach the 2 pins. Then remove the 2 V-bank cover hooks from the bracket, and remove the V-bank cover.
| 2. REMOVE AIR CLEANER ASSEMBLY |
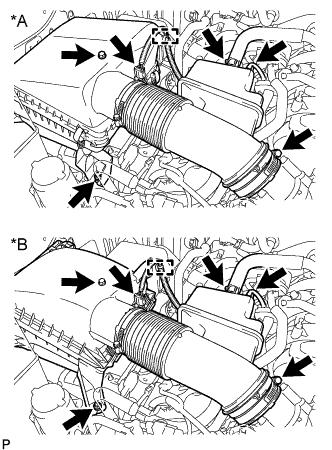 |
Detach the clamp and disconnect the mass air flow meter connector.
| *A | for Type A |
| *B | for Type B |
Disconnect the ventilation hose and vacuum hose.
Loosen the hose clamp.
Remove the 2 bolts and air cleaner assembly.
| 3. DISCONNECT CONNECTOR HOLDER BLOCK |
Remove the connector holder block cover.
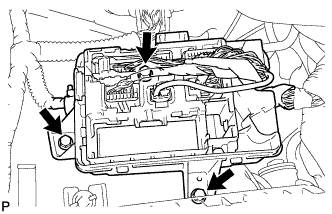 |
Remove the 3 bolts and move the connector holder block so that the ECM can be removed in the next step.
| 4. REMOVE ECM |
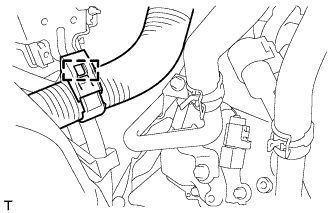 |
Disconnect the wire harness clamp.
Raise the 2 levers while pushing the locks on the 2 levers shown in the illustration.
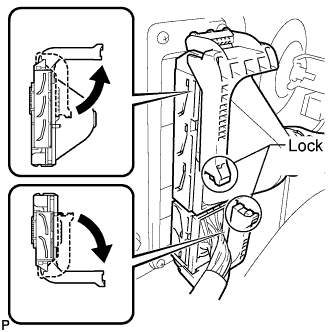 |
Disconnect the 2 connectors.
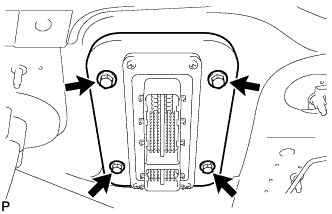 |
Remove the 4 bolts and ECM.
| 5. REMOVE GASKET |
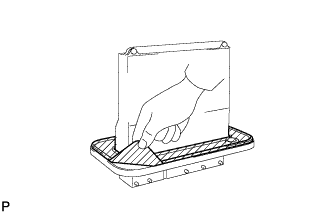 |
Peel off the rubber part of the gasket.
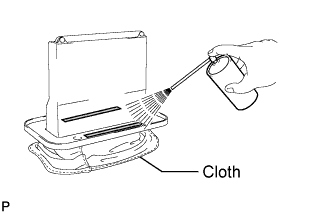 |
Spray gasket remover or equivalent on the remaining tape of the gasket.
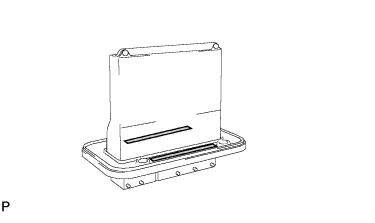 |
Remove the tape of the gasket without using bladed objects.