 |
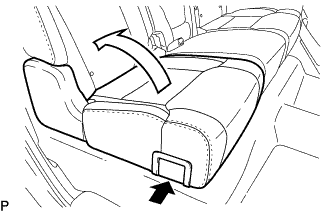
Pull the No. 1 reclining adjuster release handle RH and fold up the seat cushion.
REAR SEAT ASSEMBLY (for CrewMax LH Side) > REMOVAL |
| 1. REMOVE REAR SEAT ASSEMBLY RH |
|
Pull the No. 1 reclining adjuster release handle RH and fold up the seat cushion.
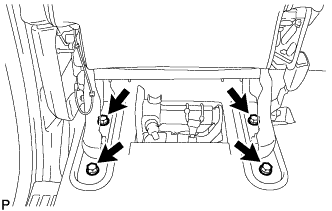 |
Remove the 4 bolts and rear seat assembly RH.
| 2. REMOVE REAR SEAT INNER BELT ASSEMBLY |
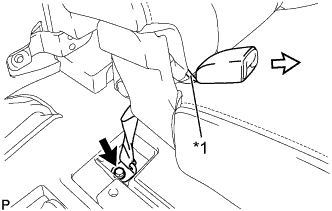 |
Remove the bolt.
Pass the rear seat inner belt assembly through the rubber band of the separate type rear seatback cover in the direction indicated by the arrow shown in the illustration, and then remove the rear seat inner belt assembly.
| *1 | Rubber Band |
| 3. REMOVE REAR SEAT ASSEMBLY LH |
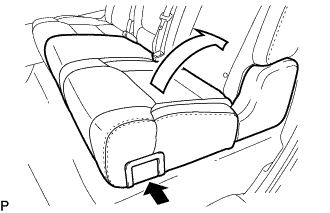 |
Pull the No. 1 reclining adjuster release handle LH and fold up the seat cushion.
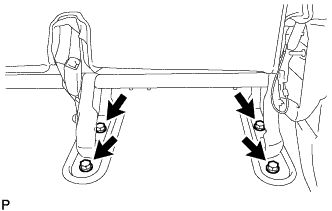 |
Remove the 4 bolts and rear seat assembly LH.
| 4. REMOVE REAR NO. 1 SEAT OUTER LAP BELT ANCHOR COVER |
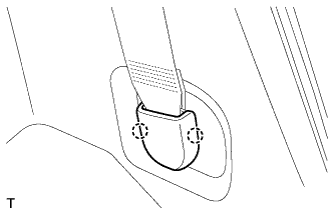 |
Detach the 2 claws and remove the rear No. 1 seat outer lap belt anchor cover.
| 5. DISCONNECT REAR SEAT OUTER BELT ASSEMBLY LH |
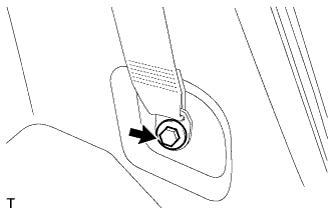 |
Remove the bolt and disconnect the floor anchor of the rear seat outer belt assembly LH.
| 6. DISCONNECT REAR SEAT OUTER BELT ASSEMBLY RH |
| 7. REMOVE NO. 1 BOX SPEAKER ASSEMBLY (w/ Woofer) |
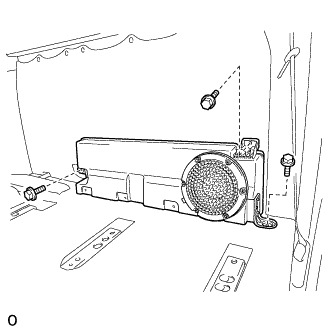 |
Remove the 3 bolts.
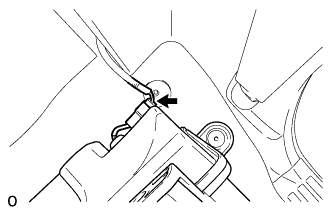 |
Disconnect the connector and remove the No. 1 box speaker assembly.
| 8. REMOVE REAR DOOR SCUFF PLATE LH |
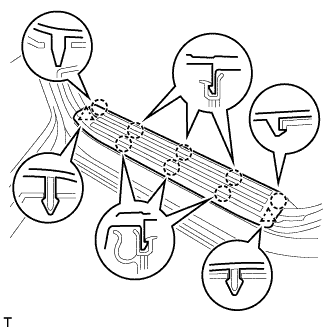 |
Detach the 8 claws and 2 clips, and remove the rear door scuff plate LH.
| 9. REMOVE REAR DOOR SCUFF PLATE RH |
| 10. REMOVE REAR DOOR WEATHERSTRIP LH |
Partially remove the rear door weatherstrip LH so that the lower quarter trim panel assembly LH can be removed .
| 11. REMOVE REAR DOOR WEATHERSTRIP RH |
Partially remove the rear door weatherstrip RH so that the lower quarter trim panel assembly RH can be removed .
| 12. REMOVE LOWER QUARTER TRIM PANEL ASSEMBLY LH |
|
Detach the 2 claws and remove the cover.
|
Loosen the bolt and disconnect the rear seat outer belt assembly.
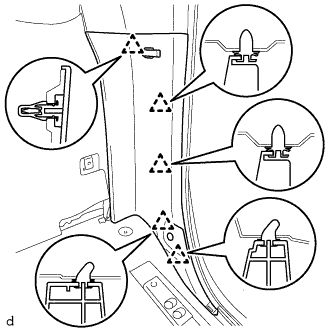 |
Detach the 5 clips and remove the lower quarter trim panel assembly LH.
| 13. REMOVE LOWER QUARTER TRIM PANEL ASSEMBLY RH |
| 14. REMOVE FRONT FLOOR CARPET ASSEMBLY |
Remove the tool bag.
Detach the 6 clamps.
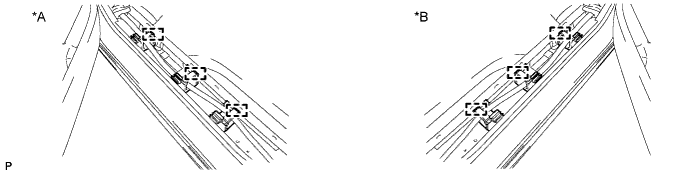
| *A | for LH Side | *B | for RH Side |
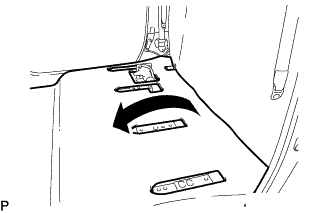 |
Fold down the front floor carpet assembly.
| 15. REMOVE REAR FLOOR BOARD SPACER |
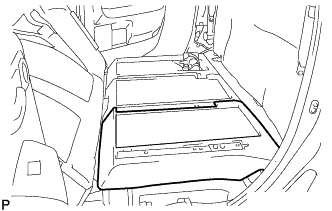 |
Remove the rear floor board spacer.
| 16. REMOVE NO. 2 REAR FLOOR BOARD SPACER |
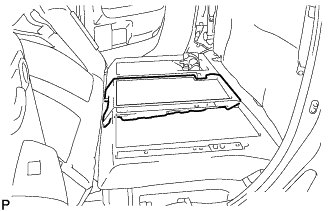 |
Remove the No. 2 rear floor board spacer.
| 17. REMOVE REAR FLOOR BOARD RH |
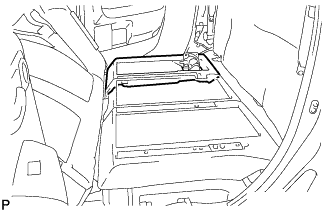 |
Remove the rear floor board RH.
| 18. REMOVE REAR INNER SEAT LEG BRACKET SUB-ASSEMBLY LH |
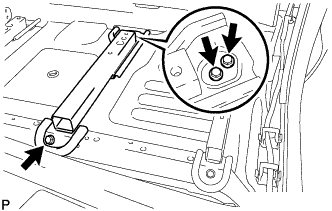 |
Remove the 3 bolts and rear inner seat leg bracket sub-assembly LH.
| 19. REMOVE REAR OUTER SEAT LEG BRACKET SUB-ASSEMBLY LH |
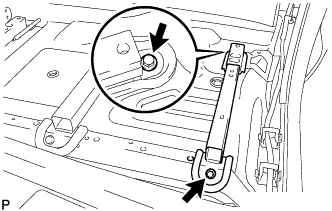 |
Remove the 2 bolts and rear outer seat leg bracket sub-assembly LH.
| 20. REMOVE REAR INNER SEAT LEG BRACKET SUB-ASSEMBLY RH |
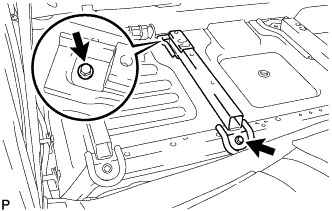 |
Remove the 2 bolts and rear inner seat leg bracket sub-assembly RH.
| 21. REMOVE REAR OUTER SEAT LEG BRACKET SUB-ASSEMBLY RH |
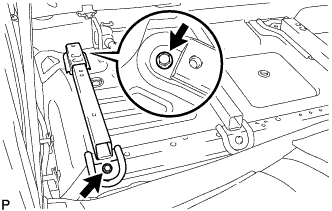 |
Remove the 2 bolts and rear outer seat leg bracket sub-assembly RH.