 |
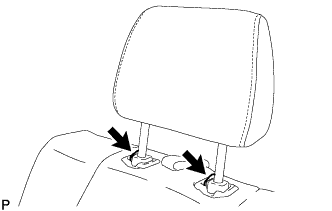
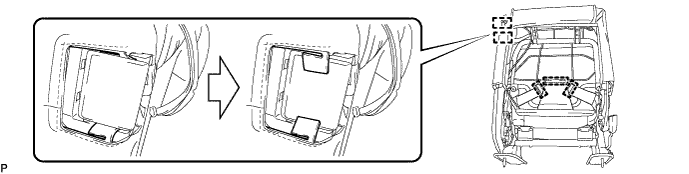
Push the 2 lock release buttons indicated by the arrows in the illustration to release the lock, and then remove the rear seat headrest assembly.
REAR SEAT ASSEMBLY (for CrewMax RH Side) > DISASSEMBLY |
| 1. REMOVE REAR SEAT HEADREST ASSEMBLY |
|
Push the 2 lock release buttons indicated by the arrows in the illustration to release the lock, and then remove the rear seat headrest assembly.
| 2. REMOVE REAR SEATBACK LOCK CONTROL BEZEL |
Pull out the 2 fasteners.
 |
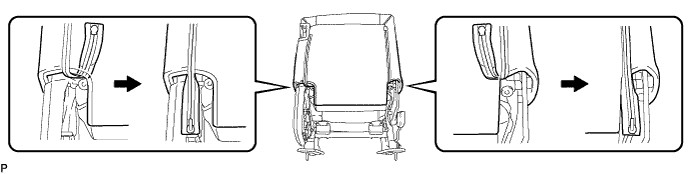
Detach the hook and open the 2 fasteners, and then open the separate type rear seat cushion cover.
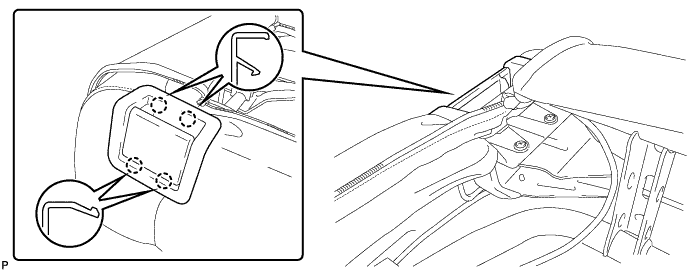
Detach the 4 claws on the backside of the rear seatback lock control bezel and remove the rear seatback lock control bezel.
| 3. REMOVE SEPARATE TYPE REAR SEAT CUSHION COVER WITH PAD |
Detach the 5 hooks and remove the separate type rear seat cushion cover with pad.
| 4. REMOVE SEPARATE TYPE REAR SEAT CUSHION COVER |
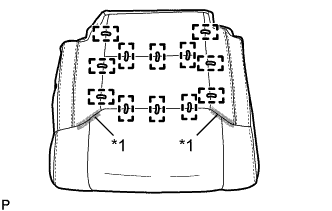 |
Remove the 12 hog rings and detach the 2 fasteners to remove the separate type rear seat cushion cover.
| *1 | Fastener |
| 5. REMOVE REAR SEAT RECLINING COVER RH |
Using a T25 "TORX" socket wrench, remove the 2 screws.
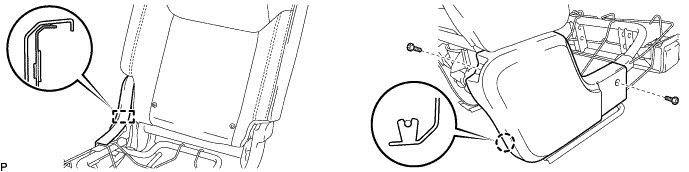
Detach the guide and claw, and then remove the rear seat reclining cover RH.
| 6. REMOVE REAR SEAT INNER RECLINING COVER RH |
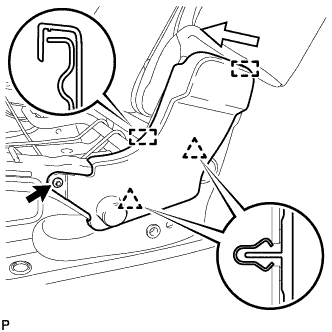 |
Using a T25 "TORX" socket wrench, remove the screw.
Detach the 2 clips.
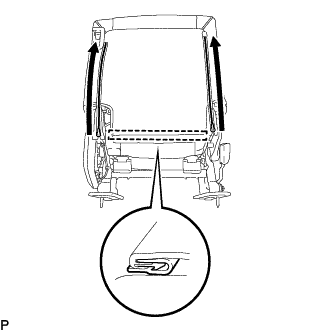
Detach the 2 guides in the direction indicated by the arrow shown in the illustration, and then remove the rear seat inner reclining cover RH.
| 7. REMOVE REAR NO. 1 SEAT INNER BELT ASSEMBLY RH |
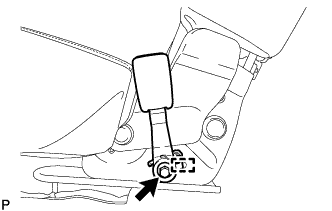 |
Loosen the bolt.
Detach the guide and remove the rear No. 1 seat inner belt assembly RH.
| 8. REMOVE TETHER ANCHOR BRACKET SUB-ASSEMBLY |
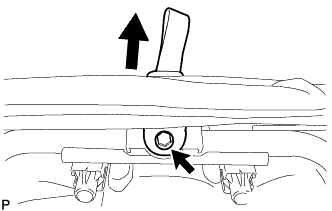 |
Remove the bolt and tether anchor bracket sub-assembly.
| 9. REMOVE REAR SEAT HEADREST SUPPORT |
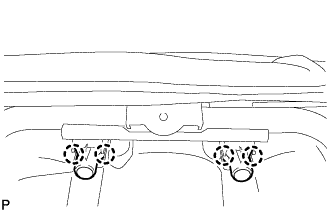 |
Detach the 4 claws and remove the 2 rear seat headrest supports.
| 10. REMOVE SEPARATE TYPE REAR SEATBACK COVER WITH PAD |
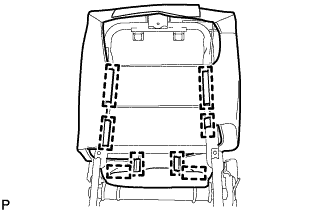 |
Detach the 8 hooks and separate type rear seatback cover with pad.
| 11. REMOVE SEPARATE TYPE REAR SEATBACK COVER |
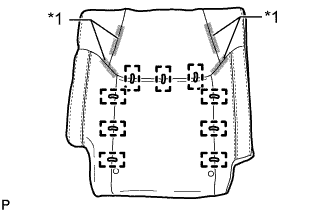 |
Remove the 9 hog rings and detach the 4 fasteners to remove the separate type rear seatback cover.
| *1 | Fastener |
| 12. REMOVE NO. 1 RECLINING ADJUSTER RELEASE HANDLE RH |
Pull the No. 1 reclining adjuster release handle RH and fold up the rear seat cushion frame sub-assembly RH.
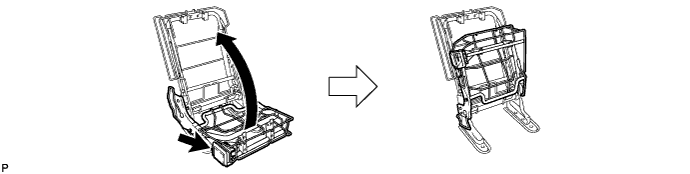
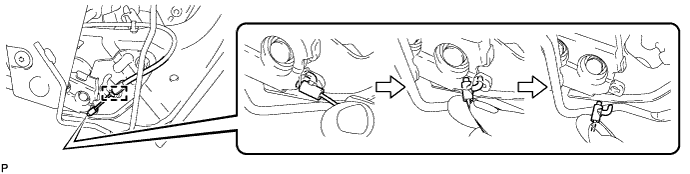
Detach the clamp and disconnect the cable end of the No. 1 reclining adjuster release handle RH as shown in the illustration.
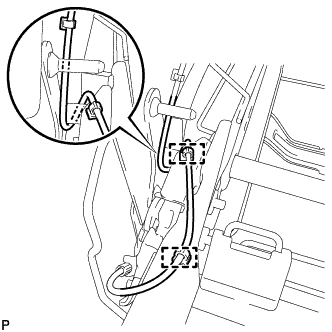 |
Detach the 2 cable clamps.
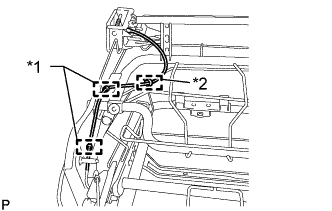 |
Detach the 2 cable clamps.
| *1 | Clamp |
| *2 | Cable Tie |
Cut off the cable tie.
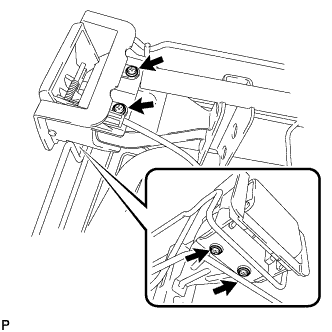 |
Remove the 4 screws and No. 1 reclining adjuster release handle RH.
| 13. REMOVE REAR SEAT CUSHION FRAME SUB-ASSEMBLY RH |
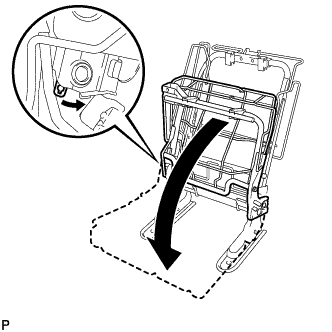 |
Operate the lever of the rear seat ture lock sub-assembly and fold down the rear seat cushion frame sub-assembly RH.
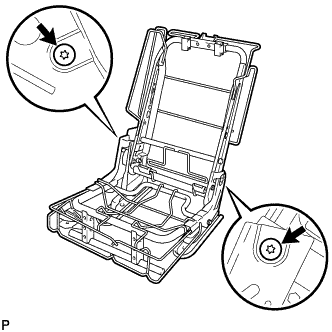 |
Using a T40 "TORX" socket wrench, remove the 2 bolts and rear seat cushion frame sub-assembly RH.
| 14. REMOVE REAR SEAT TURN LOCK SUB-ASSEMBLY |
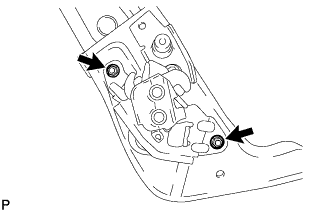 |
Remove the 2 nuts and rear seat turn lock sub-assembly.
| 15. REMOVE REAR SEATBACK FRAME SUB-ASSEMBLY RH |
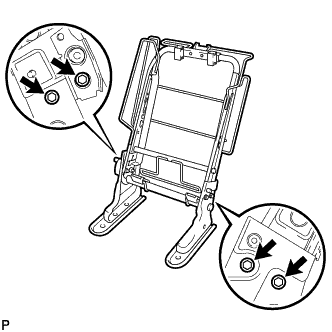 |
Remove the 4 bolts and rear seatback frame sub-assembly RH.