 |
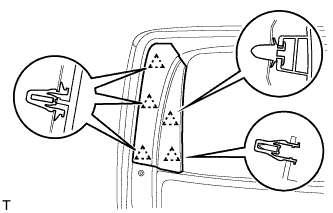
Detach the 5 clips and remove the rear door frame garnish.
REAR DOOR SPEAKER (for CrewMax) > REMOVAL |
| 1. REMOVE REAR DOOR FRAME GARNISH LH |
|
Detach the 5 clips and remove the rear door frame garnish.
| 2. REMOVE REAR DOOR INSIDE HANDLE BEZEL PLUG LH |
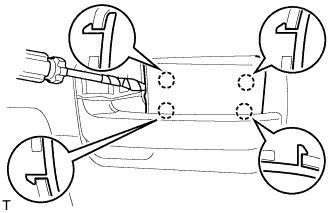 |
Using a screwdriver, detach the 4 claws and remove the inside handle bezel.
| 3. REMOVE REAR UPPER DOOR ARMREST BASE PANEL LH |
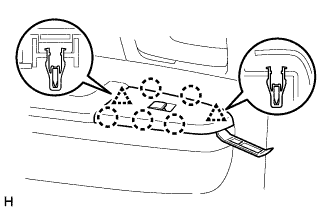 |
Using a moulding remover A, detach the 2 clips and 5 claws, and remove the rear upper door armrest base panel LH.
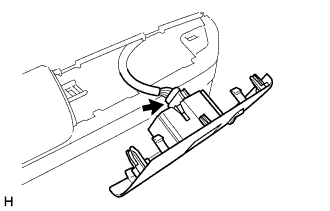 |
Disconnect the connector.
| 4. REMOVE REAR DOOR ARMREST COVER LH |
| 5. REMOVE REAR DOOR TRIM BOARD SUB-ASSEMBLY LH |
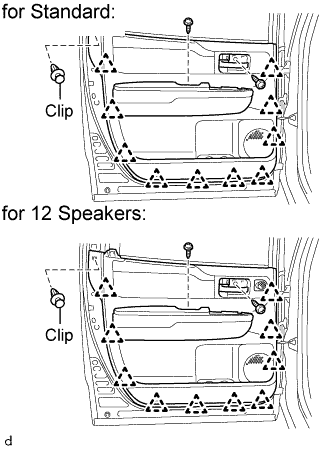 |
Remove the 2 screws.
Using a clip remover, remove the clip.
for Standard:
Detach the 10 clips and remove the trim board.
for 12 Speakers:
Detach the 10 clips and remove the trim board. Then disconnect the connector.
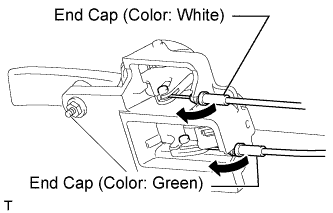 |
Disconnect the 2 cables from the inside handle.
Remove the inside handle.
| 6. REMOVE REAR NO. 1 SPEAKER ASSEMBLY |
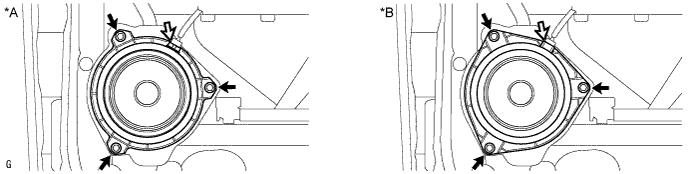
Remove the 3 screws.
| *A | for Standard | *B | for 12 Speakers |
Disconnect the connector and remove the rear No. 1 speaker assembly.
| 7. REMOVE REAR NO. 2 SPEAKER ASSEMBLY |
| *A | for Standard | *B | for 12 Speakers |
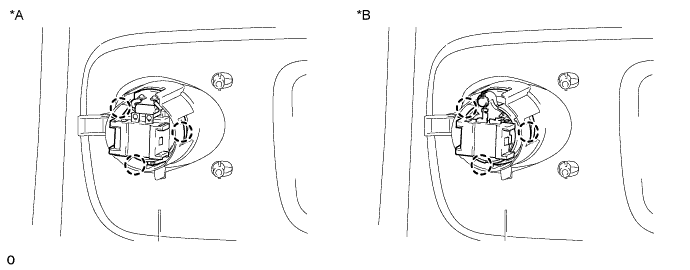
Detach the 3 claws and remove the rear No. 2 speaker assembly.