Loosen the radiator drain cock plug and 2 cylinder block drain cock plugs.
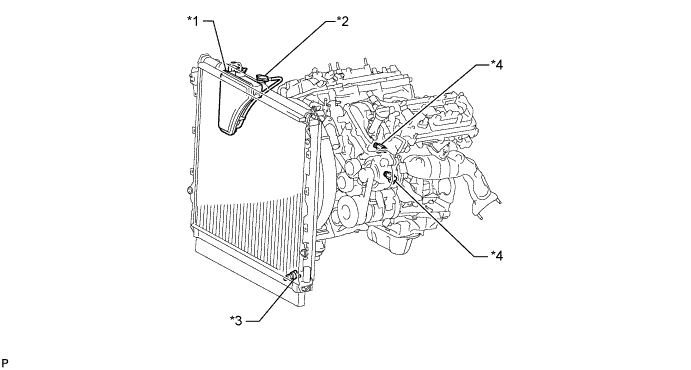
| *1 | Radiator Reservoir | *2 | Radiator Cap |
| *3 | Radiator Drain Cook Plug | *4 | Cylinder Block Drain Cock Plug |
INTAKE MANIFOLD > REMOVAL |
| 1. DISCHARGE FUEL SYSTEM PRESSURE |
| 2. PRECAUTION |
| 3. DISCONNECT CABLE FROM NEGATIVE BATTERY TERMINAL |
| 4. DRAIN ENGINE COOLANT |
Loosen the radiator drain cock plug and 2 cylinder block drain cock plugs.
| *1 | Radiator Reservoir | *2 | Radiator Cap |
| *3 | Radiator Drain Cook Plug | *4 | Cylinder Block Drain Cock Plug |
Remove the radiator cap. Then drain the coolant.
Tighten the 2 cylinder block drain cock plugs.
Tighten the radiator drain cock plug by hand.
| 5. REMOVE FRONT WIPER MOTOR AND LINK ASSEMBLY |
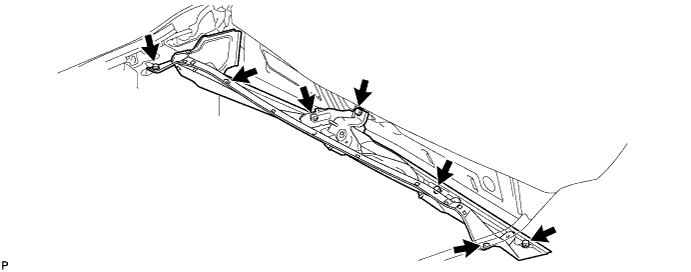
| 6. REMOVE FRONT COWL TOP OUTER PANEL SUB-ASSEMBLY |
Disconnect the washer hose.
Remove the 7 bolts and front cowl top outer panel.
| 7. REMOVE AIR CLEANER HOSE ASSEMBLY |
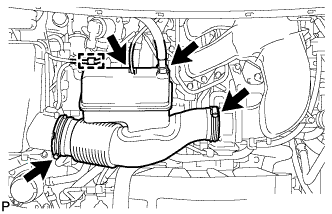 |
Disconnect the ventilation hose and vacuum hose.
Detach the wire harness clamp.
Loosen the 2 hose clamps.
Remove the air cleaner hose.
| 8. REMOVE AIR TUBE ASSEMBLY |
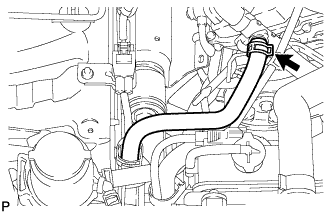 |
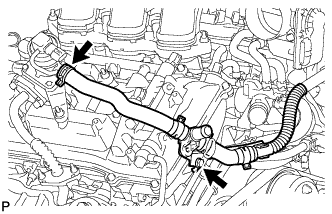
Disconnect the air injection system hose from the air tube assembly.
 |
for Bank 1 Side:
Remove the bolt and disconnect the air tube assembly from the emission control valve set.
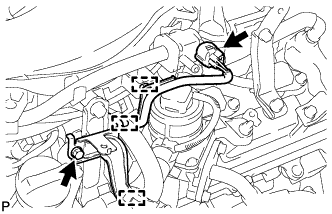 |
Disconnect the purge VSV connector.
Detach the 3 wire harness clamps from the intake air surge tank and bracket.
Remove the bolt and wire harness clamp bracket.
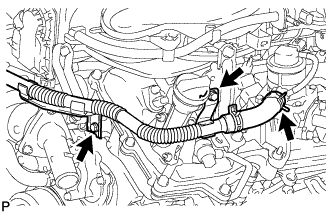 |
for Bank 2 Side:
Remove the 2 bolts and disconnect the air tube assembly from the No. 2 emission control valve set.
| 9. REMOVE INTAKE AIR SURGE TANK |
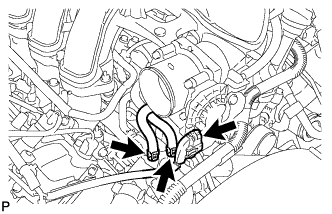 |
Disconnect the throttle body connector.
Disconnect the No. 4 water by-pass hose.
Disconnect the No. 5 water by-pass hose.
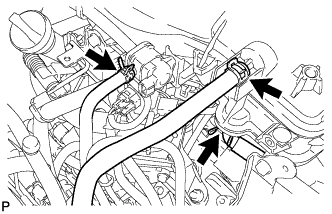 |
Disconnect the No. 1 fuel vapor feed hose.
Disconnect the vacuum hose.
Disconnect the No. 1 ventilation hose.
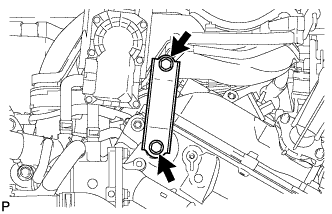 |
Remove the 2 bolts and throttle body bracket.
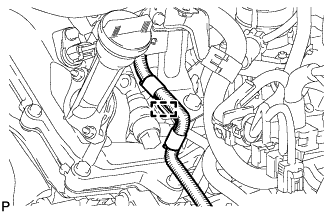 |
Using a clip remover, detach the wire harness clamp.
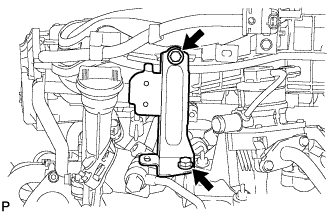 |
Remove the 2 bolts and No. 1 surge tank stay.
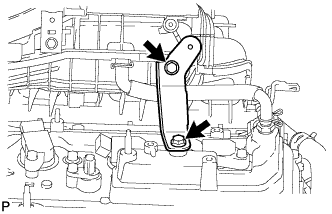 |
Remove the 2 bolts and No. 2 surge tank stay.
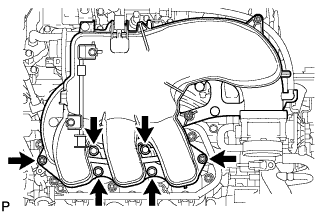 |
Remove the 2 nuts, 4 bolts and intake air surge tank.
Remove the gasket.
| 10. REMOVE FUEL DELIVERY PIPE SUB-ASSEMBLY |
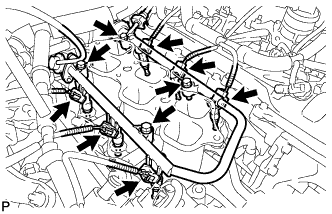 |
Disconnect the 6 fuel injector connectors.
Remove the 4 bolts and fuel delivery pipe together with the 6 fuel injectors.
| 11. REMOVE INTAKE MANIFOLD |
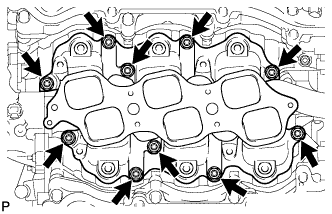 |
Remove the 4 nuts, 6 bolts and 2 gaskets.