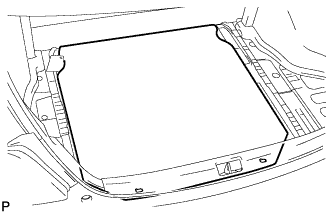
 |
Remove the spare wheel cover assembly.
BACK WINDOW GLASS (for Sedan) > REMOVAL |
| 1. REMOVE REAR SEATBACK ASSEMBLY RH |
| 2. REMOVE REAR SEATBACK ASSEMBLY LH |
| 3. REMOVE SPARE WHEEL COVER ASSEMBLY |
|
Remove the spare wheel cover assembly.
| 4. REMOVE LUGGAGE COMPARTMENT TRIM INNER PAD |
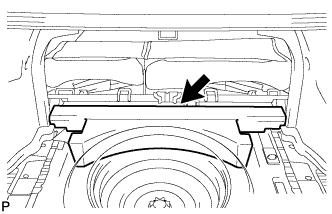 |
Remove the luggage compartment trim inner pad.
| 5. REMOVE REAR DOOR SCUFF PLATE RH |
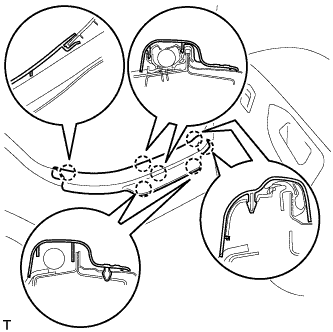 |
Disengage the 7 claws and remove the rear door scuff plate.
| 6. REMOVE REAR DOOR SCUFF PLATE LH |
| 7. REMOVE REAR DOOR OPENING TRIM WEATHERSTRIP RH |
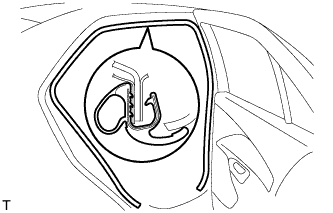 |
Remove the rear door opening trim weatherstrip.
| 8. REMOVE REAR DOOR OPENING TRIM WEATHERSTRIP LH |
| 9. REMOVE REAR SEAT SIDE COVER RH |
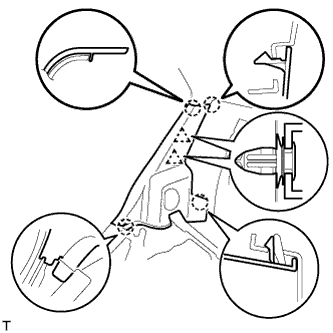 |
Disengage the 2 clips and the 4 claws and remove the rear seat side cover.
| 10. REMOVE REAR SEAT SIDE COVER LH |
| 11. REMOVE ROOF SIDE INNER GARNISH RH |
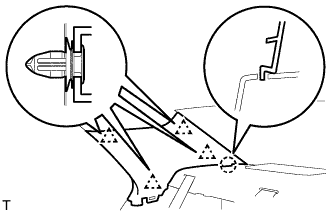 |
Disengage the 4 clips and the claw and remove the roof side inner garnish.
| 12. REMOVE ROOF SIDE INNER GARNISH LH |
| 13. REMOVE ASSIST GRIP COVER |
 |
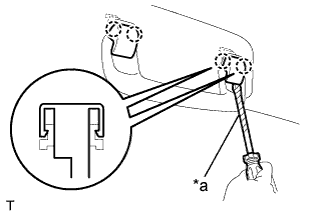 |
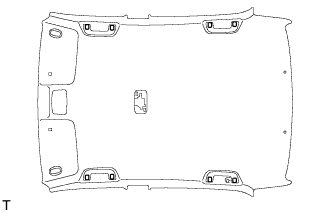
Using a screwdriver with its tip wrapped in protective tape, disengage the 2 claws and remove the assist grip cover.
| *a | Protective Tape |
| 14. REMOVE ASSIST GRIP SUB-ASSEMBLY |
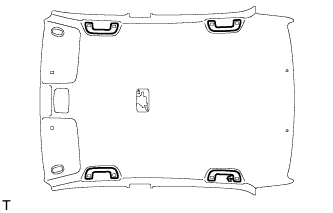 |
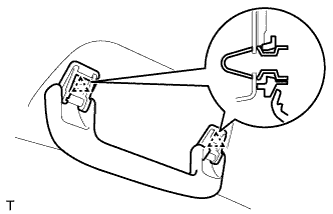 |
Disengage the 2 clips and remove the assist grip.
| 15. REMOVE HIGH MOUNTED STOP LIGHT ASSEMBLY |
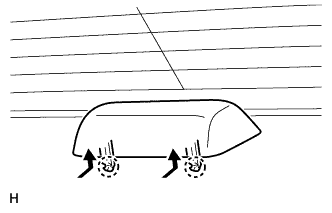 |
Disengage the 2 claws.
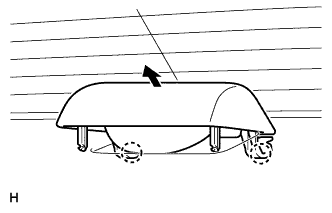 |
Disengage the 2 claws.
Disconnect the connector and remove the high mounted stop light assembly.
| 16. REMOVE PACKAGE TRAY TRIM PANEL ASSEMBLY |
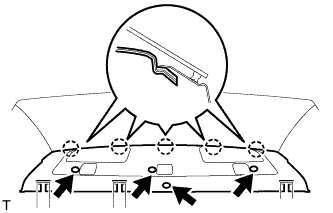 |
Using a clip remover, remove the 4 clips.
Disengage the 5 claws and remove the package tray trim panel.
| 17. REMOVE ROOF HEADLINING ASSEMBLY |
| 18. REMOVE BACK WINDOW OUTSIDE MOULDING |
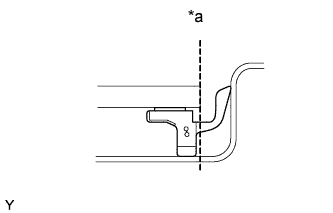 |
Using a knife, cut off the back window outside moulding, as shown in the illustration.
| *a | Cut |
Remove the back window outside moulding.
| 19. REMOVE BACK WINDOW GLASS |
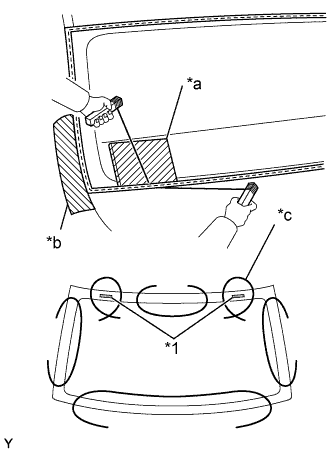 |
Apply protective tape to the outer circumference of the back window glass, as shown in the illustration.
| *1 | Back Window Glass Stopper |
| *a | Plastic Sheet |
| *b | Protective Tape |
| *c | Piano Wire |
From the interior, insert piano wires between the vehicle body and the back window glass, as shown in the illustration.
Tie objects that can serve as handles (for example, wooden blocks) to all wire ends.
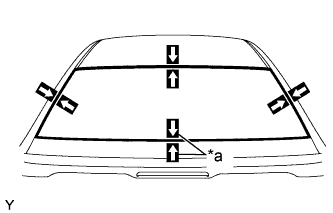 |
Place matchmarks on the back window glass and vehicle body in the locations indicated in the illustration.
| *a | Matchmarks |
Cut through the adhesive by pulling the piano wire around the back window glass.
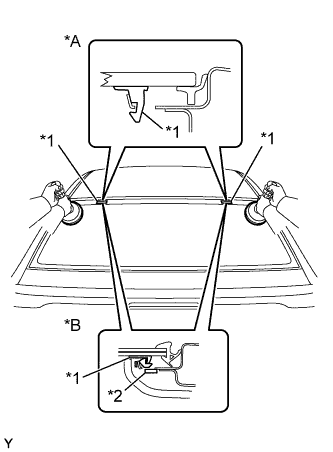 |
Disengage the 2 back window glass stoppers.
| *A | 1 Piece Type |
| *B | 2 Piece Type |
| *1 | Back Window Glass Stoppers No. 1 |
| *2 | Back Window Glass Stoppers No. 2 |
Using suction cups, remove the back window glass.