 |
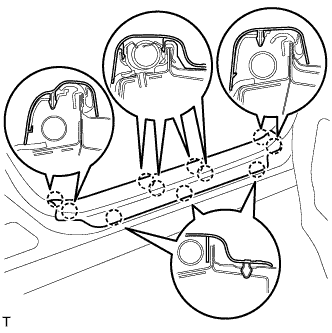
Disengage the 11 claws and remove the front door scuff plate.
WINDSHIELD GLASS (for Sedan) > REMOVAL |
| 1. REMOVE COWL TOP VENTILATOR LOUVER SUB-ASSEMBLY |
| 2. REMOVE FRONT DOOR SCUFF PLATE RH |
|
Disengage the 11 claws and remove the front door scuff plate.
| 3. REMOVE FRONT DOOR SCUFF PLATE LH |
| 4. REMOVE COWL SIDE TRIM BOARD RH |
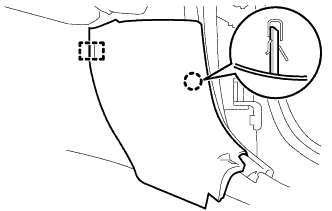 |
Disengage the claw and the stud bolt and remove the cowl side trim board.
| 5. REMOVE COWL SIDE TRIM BOARD LH |
| 6. REMOVE FRONT DOOR OPENING TRIM WEATHERSTRIP RH |
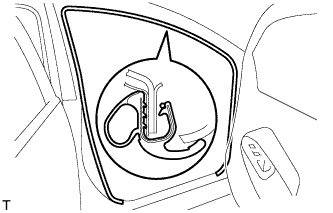 |
Remove the front door opening trim weatherstrip.
| 7. REMOVE FRONT DOOR OPENING TRIM WEATHERSTRIP LH |
| 8. REMOVE FRONT PILLAR GARNISH RH |
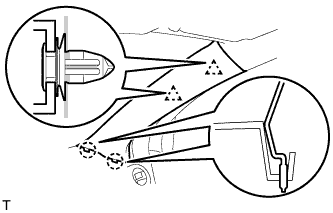 |
Disengage the 2 clips and the 2 claws and remove the front pillar garnish.
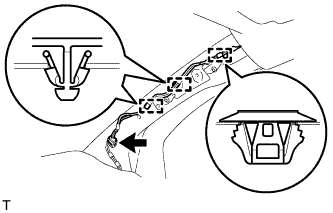 |
Disconnect the antenna connector.
Using a clip remover, remove the 3 clamps.
| 9. REMOVE FRONT PILLAR GARNISH LH |
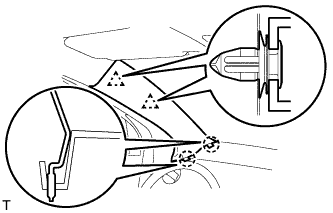 |
Disengage the 2 clips and the 2 claws and remove the front pillar garnish.
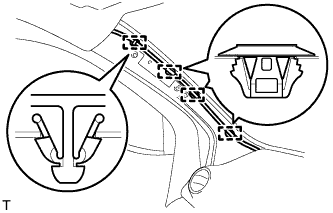 |
Using a clip remover, remove the 4 clamps.
| 10. REMOVE ASSIST GRIP COVER |
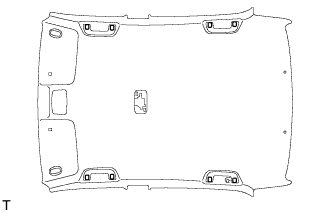 |
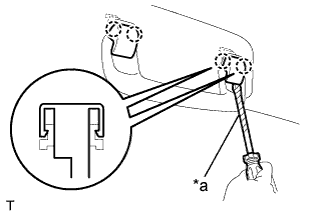 |
Using a screwdriver with its tip wrapped in protective tape, disengage the 2 claws and remove the assist grip cover.
| *a | Protective Tape |
| 11. REMOVE ASSIST GRIP SUB-ASSEMBLY |
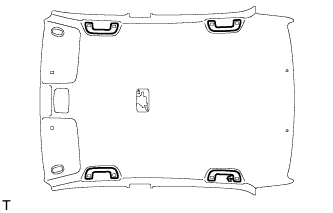 |
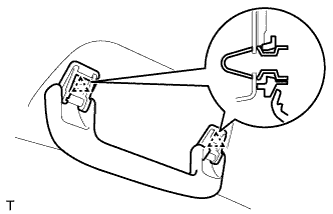 |
Disengage the 2 clips and remove the assist grip.
| 12. REMOVE VISOR ASSEMBLY RH |
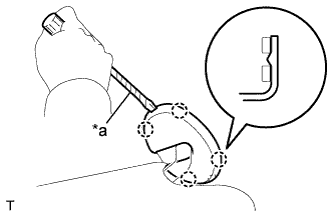 |
Using a screwdriver with its tip wrapped in protective tape, disengage the 4 claws and remove the visor bracket cover.
| *a | Protective Tape |
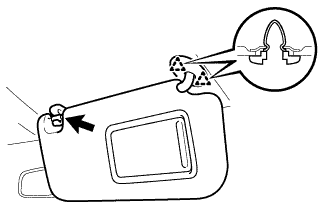 |
Remove the visor shaft from the visor holder.
Disengage the 2 clips and remove the visor.
| 13. REMOVE VISOR ASSEMBLY LH |
| 14. REMOVE VISOR HOLDER RH |
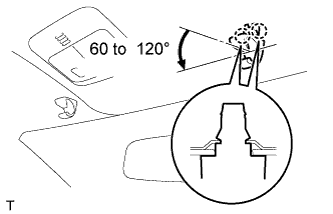 |
Disengage the 2 claws by turning the visor holder counterclockwise between 60 to 120° and remove the visor holder.
| 15. REMOVE VISOR HOLDER LH |
| 16. REMOVE ROOM LIGHT ASSEMBLY |
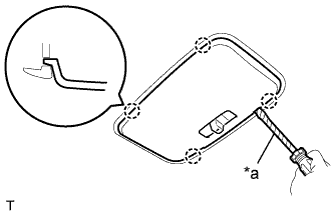 |
Using a screwdriver with its tip wrapped in protective tape, disengage the 4 claws and remove the room light lens.
| *a | Protective Tape |
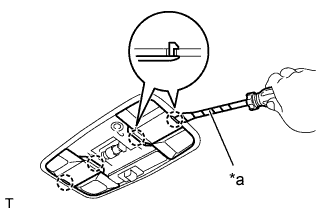 |
Using a screwdriver with its tip wrapped in protective tape, disengage the 2 claws and remove the cover.
| *a | Protective Tape |
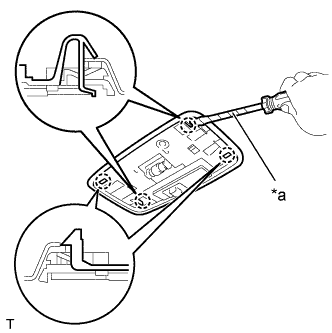 |
Using a screwdriver with its tip wrapped in protective tape, disengage the 4 claws and remove the room light holder.
| *a | Protective Tape |
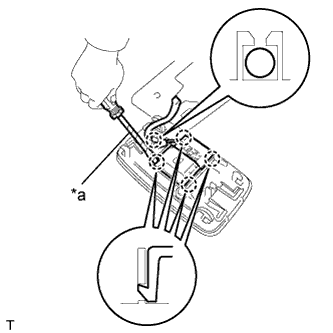 |
Remove the roof wire from the claw of the room light holder.
| *a | Protective Tape |
Using a screwdriver with its tip wrapped in protective tape, disengage the 4 claws and disconnect the room light switch base.
| 17. REMOVE MAP LIGHT ASSEMBLY |
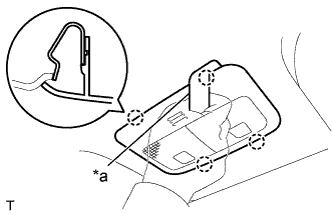 |
Using a moulding remover, disengage the 4 claws and remove the map light.
| *a | Molding Remover |
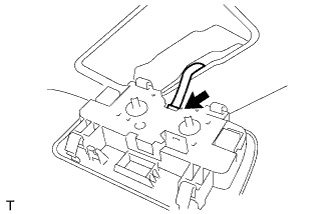 |
Disconnect the map light connector.
| 18. REMOVE INNER REAR VIEW MIRROR |
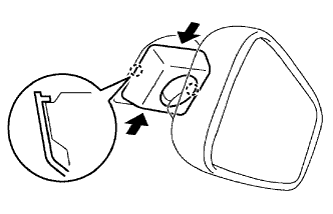 |
Pinch the cover, disengage the 2 claws and remove the cover.
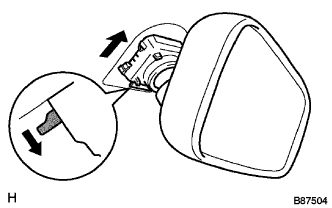 |
Push the lever, and slide and remove the inner rear view mirror.
| 19. REMOVE ROOF HEADLINING ASSEMBLY |
| 20. REMOVE WINDSHIELD OUTSIDE MOULDING |
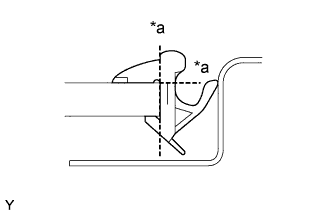 |
Using a knife, cut off the windshield outside moulding, as shown in the illustration.
| *a | Cut |
Remove the windshield outside moulding.
| 21. REMOVE WINDSHIELD GLASS |
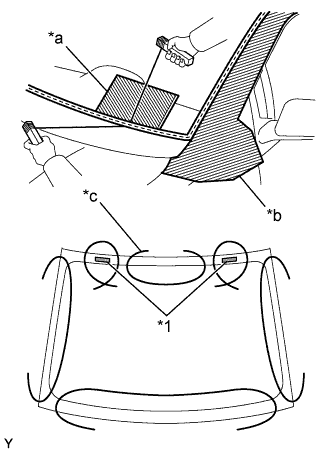 |
Apply protective tape to the outer circumference of the windshield glass, as shown in the illustration.
| *1 | Windshield Glass Stopper |
| *a | Plastic Sheet |
| *b | Protective Tape |
| *c | Piano Wire |
From the interior, insert piano wires between the vehicle body and the windshield glass, as shown in the illustration.
Tie objects that can serve as handles (for example, wooden blocks) to all wire ends.
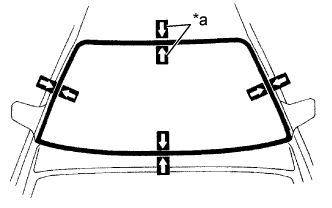 |
Place matchmarks on the windshield glass and vehicle body in the locations indicated in the illustration.
| *a | Matchmarks |
Cut through the adhesive by pulling the piano wire around the windshield glass.
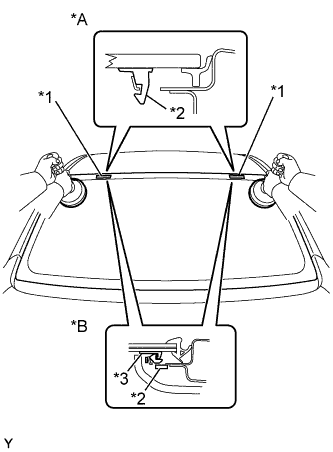 |
Disengage the 2 stoppers.
| *A | 1 Piece Type |
| *B | 2 Piece Type |
| *1 | Windshield Glass Stopper |
| *2 | Windshield Glass Stopper No. 1 |
| *3 | Windshield Glass Stopper No. 2 |
Using suction cups, remove the windshield glass.