FRONT DRIVE SHAFT ASSEMBLY (for TMMF Made Hatchback) > REMOVAL |
| 1. REMOVE ENGINE UNDER COVER LH |
| 2. REMOVE ENGINE UNDER COVER RH |
| 3. DRAIN TRANSAXLE OIL (for Manual Transaxle) |
Remove the manual transmission filler plug and the gasket.
Remove the drain plug sub-assembly and gasket, and then drain the manual transaxle oil.
Install a new gasket and the drain plug sub-assembly.
| 4. DRAIN AUTOMATIC TRANSAXLE FLUID (for Automatic Transaxle) |
Remove the drain plug and gasket, and drain ATF.
Install a new gasket and the drain plug.
| 5. REMOVE FRONT WHEEL |
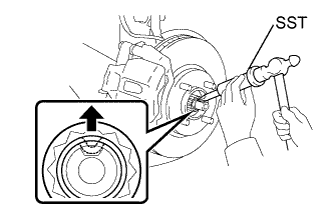
| 6. REMOVE FRONT AXLE SHAFT NUT LH |
|
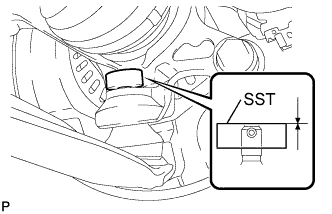
Using SST and a hammer, release the staked part of the front axle shaft nut.
Using a deep socket wrench 30 mm, remove the front axle shaft nut.
| 7. REMOVE FRONT AXLE SHAFT NUT RH |
| 8. SEPARATE FRONT SPEED SENSOR LH |
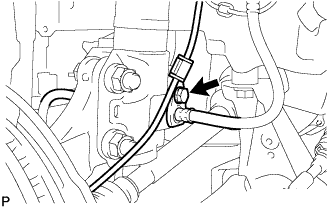 |
Remove the bolt and separate the front speed sensor and the front flexible hose.
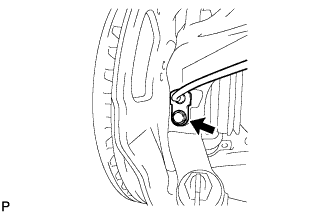 |
Remove the bolt and separate the front speed sensor from the front axle assembly.
| 9. SEPARATE FRONT SPEED SENSOR RH |
| 10. SEPARATE FRONT STABILIZER LINK ASSEMBLY LH |
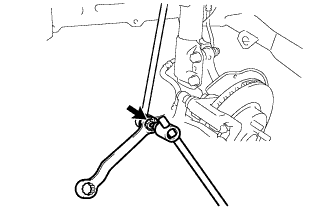 |
Remove the nut and separate the stabilizer link assembly LH from the front stabilizer bar.
| 11. SEPARATE FRONT STABILIZER LINK ASSEMBLY RH |
| 12. SEPARATE TIE ROD END SUB-ASSEMBLY LH |
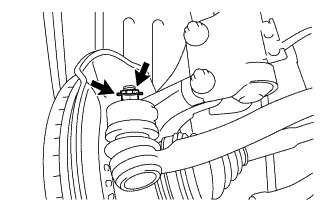 |
Remove the cotter pin and the castle nut.
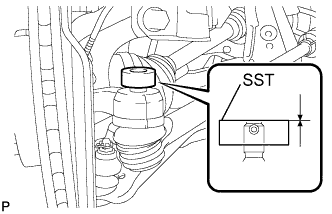 |
Install SST to the threaded section of the tie rod end sub-assembly.
Using SST, separate the tie rod end sub-assembly from the front axle assembly.
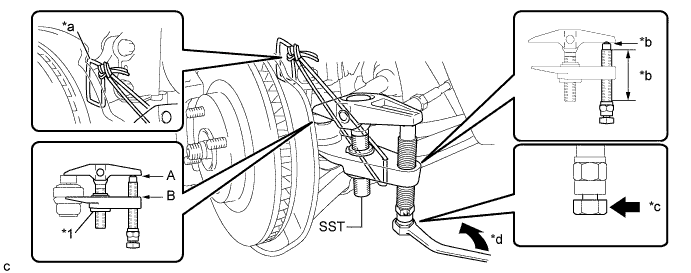
| *1 | Center Nut | - | - |
| *a | String | *b | Molybdenum Grease Application Area |
| *c | Place the wrench here | *d | Turn |
| 13. SEPARATE TIE ROD END SUB-ASSEMBLY RH |
| 14. SEPARATE FRONT LOWER SUSPENSION ARM SUB-ASSEMBLY LH |
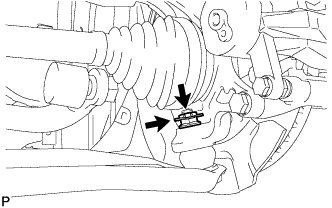 |
Remove the clip and the castle nut.
 |
Install SST to the threaded section of the lower ball joint.
Using SST, separate the front lower suspension arm from the front axle assembly.
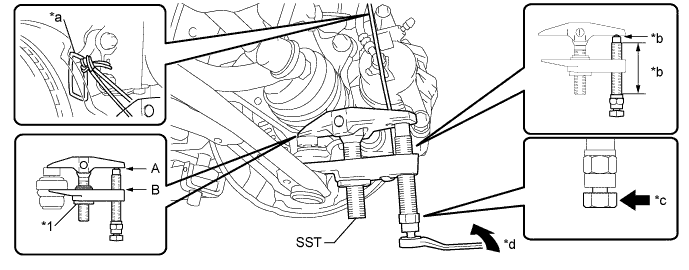
| *1 | Center Nut | - | - |
| *a | String | *b | Molybdenum Grease Application Area |
| *c | Place the wrench here | *d | Turn |
| 15. SEPARATE FRONT LOWER SUSPENSION ARM SUB-ASSEMBLY RH |
| 16. SEPARATE FRONT AXLE ASSEMBLY LH |
Using a plastic hammer, tap the end of the drive shaft and disengage the fitting between the drive shaft and front axle.
Push the front axle out of the vehicle to remove the drive shaft from the front axle.
| 17. SEPARATE FRONT AXLE ASSEMBLY RH |
| 18. REMOVE FRONT DRIVE SHAFT ASSEMBLY LH |
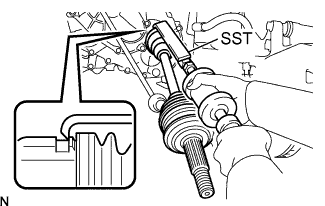 |
Using SST, remove the drive shaft as shown in the illustration.
| 19. REMOVE FRONT DRIVE SHAFT ASSEMBLY RH |
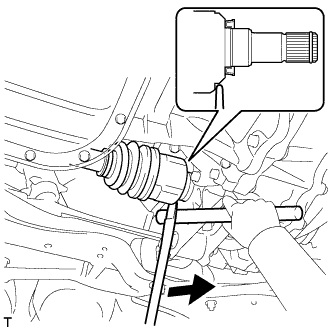 |
Using a tire lever and brass bar, remove the drive shaft.
| 20. REMOVE FRONT DRIVE SHAFT HOLE SNAP RING |
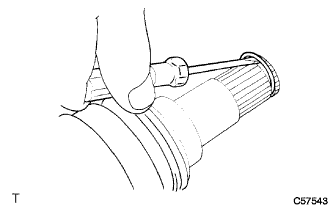 |
Using a screwdriver, remove the front drive shaft hole snap ring.
| 21. FIX FRONT AXLE ASSEMBLY |
 |