Home › Audio / Visual / Telematics › AUDIO / VIDEO › FRONT DOOR SPEAKER (for Sedan)

FRONT DOOR SPEAKER (for Sedan) > INSTALLATION


HINT:
The procedure described below is for the RH side. Use the same procedure for both the RH and LH sides, unless otherwise specified.


1. INSTALL FRONT NO. 1 SPEAKER ASSEMBLY


    B134970E01
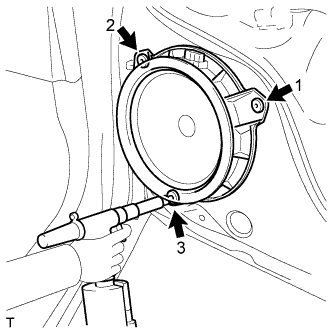
  1. Using an air riveter or hand riveter, install the front No. 1 speaker with 3 new strike rivets.

    HINT:
    Install the new strike rivets in the order shown in the illustration.

    NOTICE:

    1. B130465
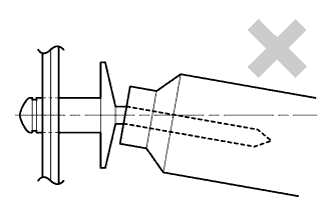
      Do not pry the rivet with the riveter, as this will cause damage to the riveter and mandrel.
    2. B130466
      Confirm that the rivets are seated properly against the speaker.
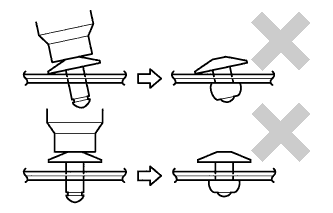
    3. Do not tilt the riveter when installing the rivet onto the speaker.
    4. Do not leave any space between the rivet head and speaker.

    5. B130467
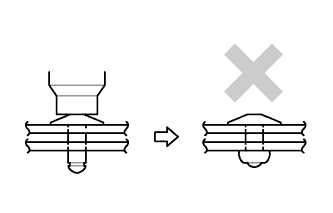
      Do not leave any space between the speaker and door. Firmly hold the 2 items together while installing the rivet.
  1. Connect the speaker connector.


2. INSTALL FRONT DOOR TRIM BOARD SUB-ASSEMBLY


    B136161
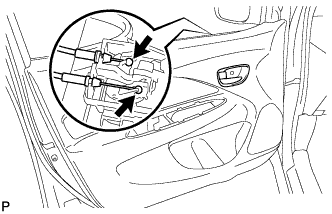
  1. Connect the front door lock remote control cable assembly and front door inside locking cable assembly.


    B351468
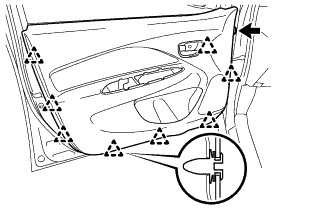
  1. Engage the 8 clips and install the front door trim board sub-assembly.

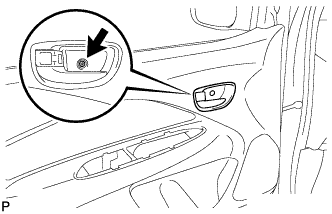
  1. Install the clip.


    B136159
  1. Install the screw.


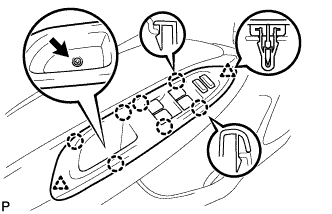
3. INSTALL FRONT DOOR ARMREST BASE UPPER PANEL


  1. for Driver Side:

    1. Connect the connector.


    2. B136158
    3. Engage the 7 claws and 2 clips, and install the front armrest base upper panel.

    4. Install the screw.


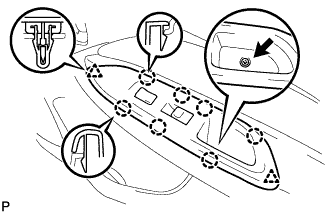
  1. for Front Passenger Side:

    1. Connect the 2 connectors.


    2. B141925
    3. Engage the 7 claws and 2 clips, and install the front armrest base upper panel.

    4. Install the screw.


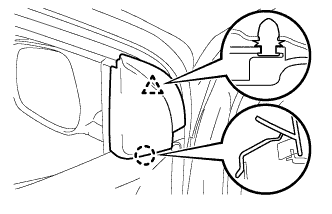
4. INSTALL FRONT DOOR LOWER FRAME BRACKET GARNISH


B349416
  1. Engage the claw and the clip, and install the front door lower frame bracket garnish.