FRONT DOOR SPEAKER (for Sedan) > REMOVAL |
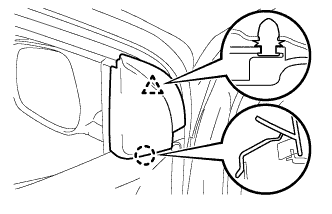
| 1. REMOVE FRONT DOOR LOWER FRAME BRACKET GARNISH |
|
Disengage the clip and the claw, and remove the front door lower frame bracket garnish.
| 2. REMOVE FRONT DOOR ARMREST BASE UPPER PANEL |
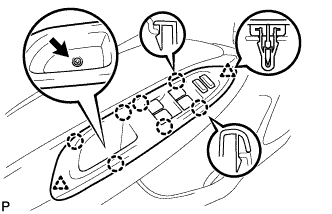 |
for Driver Side:
Remove the screw.
Disengage the 2 clips and the 7 claws.
Disconnect the connector and remove the front armrest base upper panel.
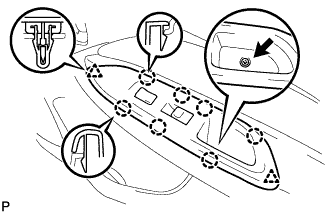 |
for Front Passenger Side:
Remove the screw.
Disengage the 2 clips and the 7 claws.
Disconnect the 2 connectors and remove the front armrest base upper panel.
| 3. REMOVE FRONT DOOR TRIM BOARD SUB-ASSEMBLY |
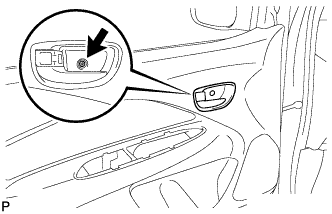 |
Remove the screw.
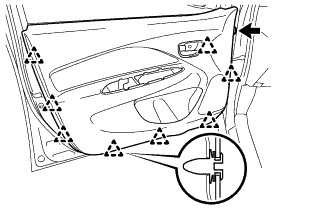 |
Remove the clip.
Disengage the 8 clips.
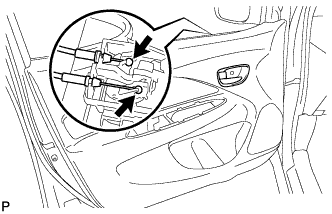 |
Disconnect the front door lock remote control cable assembly and front door inside locking cable assembly, and remove the front door trim board sub-assembly.
| 4. REMOVE FRONT NO. 1 SPEAKER ASSEMBLY |
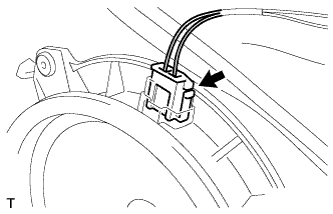 |
Disconnect the speaker connector.
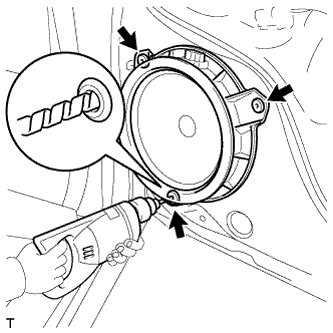 |
Drill out the 3 rivet heads using a drill with a bit diameter of less than 4 mm (0.157 in.), and remove the front No. 1 speaker.
Operate the drill around the rivet head circumference and cut out the flange.
After drilling out the flange, continue drilling to push out the shards on the drill.
Using a vacuum cleaner, remove the rivet fragments and shavings from the inside of the door.