Engage the grommet and install the hood lock control cable assembly to the 5 clamps as shown in the illustration.
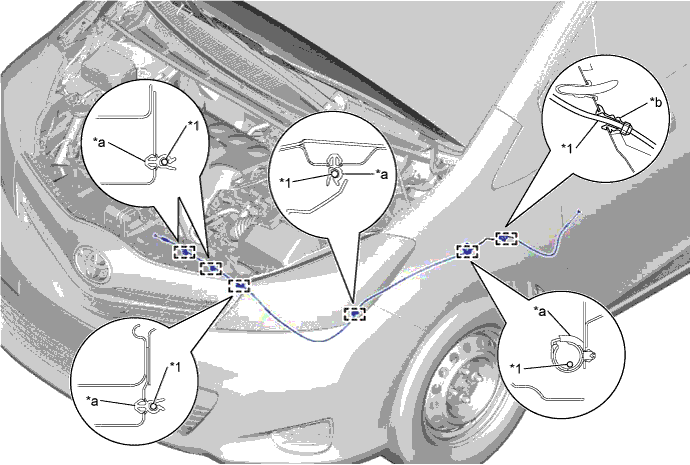
| *1 | Hood Lock Control Cable Assembly | - | - |
| *a | Clamp | *b | Grommet |
HOOD LOCK CONTROL CABLE ASSEMBLY (for Hatchback) > INSTALLATION |
| 1. INSTALL HOOD LOCK CONTROL CABLE ASSEMBLY (for TMC Made) |
Engage the grommet and install the hood lock control cable assembly to the 5 clamps as shown in the illustration.
| *1 | Hood Lock Control Cable Assembly | - | - |
| *a | Clamp | *b | Grommet |
| 2. INSTALL HOOD LOCK CONTROL CABLE ASSEMBLY (for TMMF Made) |
Engage the grommet and install the hood lock control cable assembly to the 4 clamps as shown in the illustration.
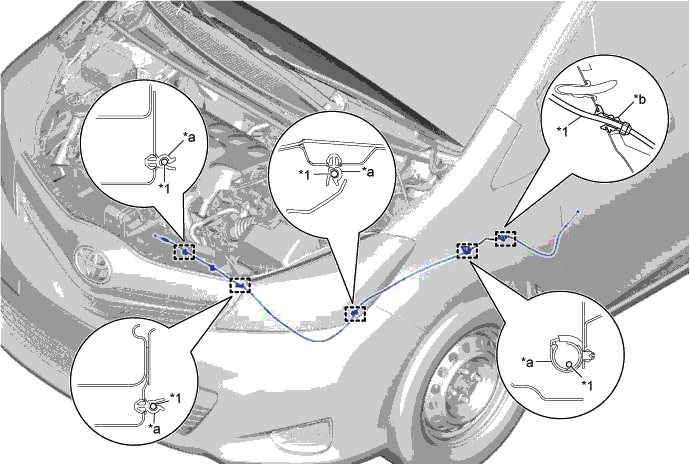
| *1 | Hood Lock Control Cable Assembly | - | - |
| *a | Clamp | *b | Grommet |
| 3. INSTALL HOOD LOCK CONTROL LEVER SUB-ASSEMBLY |
Connect the hood lock control lever sub-assembly to the hood lock control cable assembly.
Engage the 3 claws and install the hood lock control lever sub-assembly.
| 4. INSTALL HOOD LOCK ASSEMBLY |
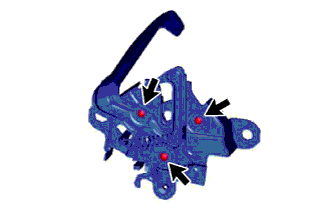 |
Apply MP grease to the sliding areas of the hood lock assembly as shown in the illustration.
Connect the hood lock assembly to the hood lock control cable assembly.
Install the hood lock assembly with the 3 bolts.
Connect the connector.
| 5. INSPECT HOOD SUB-ASSEMBLY |
Check that the clearance measurements are within the standard ranges.
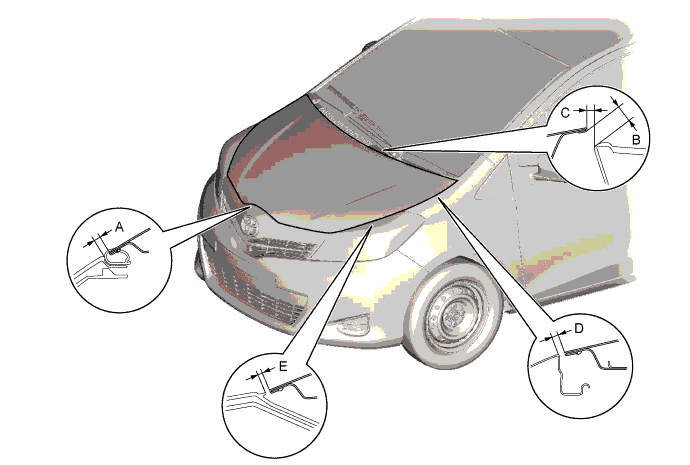
| Area | Measurement | Area | Measurement |
| A | 2.0 to 6.0 mm (0.0787 to 0.236 in.) | D | 2.3 to 5.3 mm (0.0905 to 0.208 in.) |
| B | 11.0 mm (0.433 in.) | E | 1.2 to 5.2 mm (0.0472 to 0.204 in.) |
| C | 5.0 mm (0.196 in.) | - | - |
| 6. ADJUST HOOD SUB-ASSEMBLY |
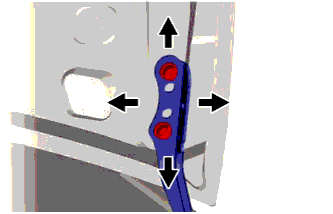 |
Loosen the 4 hood side hinge bolts.
Move the hood to adjust the clearance to within the standard range (Click here).
Tighten the 4 hood side hinge bolts after the adjustment.
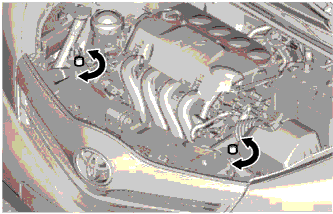 |
Adjust the height of the hood front end by turning the 2 center hood cushions (Click here).
Adjust the hood lock.
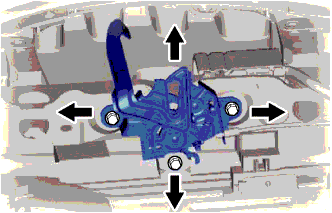 |
Loosen the 3 bolts.
Adjust the hood lock position so that the striker can enter it smoothly (Click here).
Tighten the 3 bolts after the adjustment.
| 7. INSTALL FRONT FENDER LINER LH |
Install the front fender liner with 7 clips, 2 screws and 4 new grommets.