HOOD LOCK CONTROL CABLE ASSEMBLY (for Hatchback) > REMOVAL |
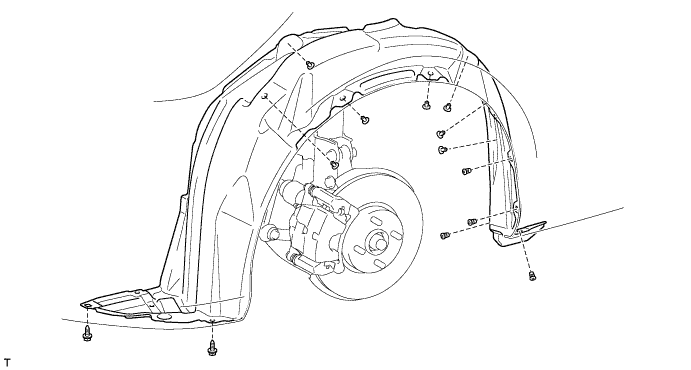
| 1. REMOVE FRONT FENDER LINER LH |
Remove the 7 clips, 2 screws and 4 grommets and remove the front fender liner.
| 2. REMOVE HOOD LOCK ASSEMBLY |
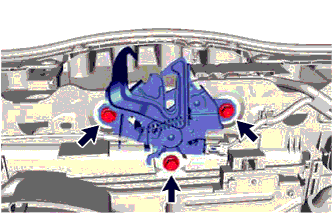 |
Remove the 3 bolts.
Disconnect the hood lock control cable assembly and remove the hood lock assembly.
Disconnect the connector.
| 3. REMOVE HOOD LOCK CONTROL LEVER SUB-ASSEMBLY |
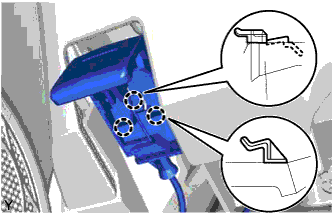 |
Disengage the 3 claws.
Disconnect the hood lock control cable assembly and remove the hood lock control lever sub-assembly.
| 4. REMOVE HOOD LOCK CONTROL CABLE ASSEMBLY (for TMC Made) |
Using a screwdriver with its tip wrapped in protective tape, separate the hood lock control cable assembly from the 5 clamps as shown in the illustration.
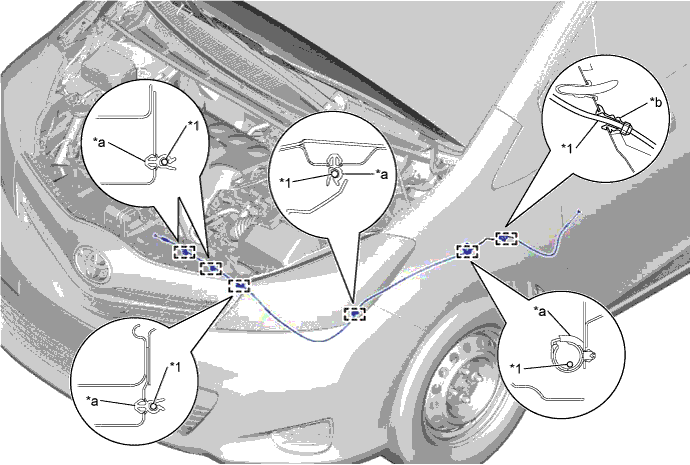
| *1 | Hood Lock Control Cable Assembly | - | - |
| *a | Clamp | *b | Grommet |
Disengage the grommet and remove the hood lock control cable assembly.
| 5. REMOVE HOOD LOCK CONTROL CABLE ASSEMBLY (for TMMF Made) |
Using a screwdriver with its tip wrapped in protective tape, separate the hood lock control cable assembly from the 4 clamps as shown in the illustration.
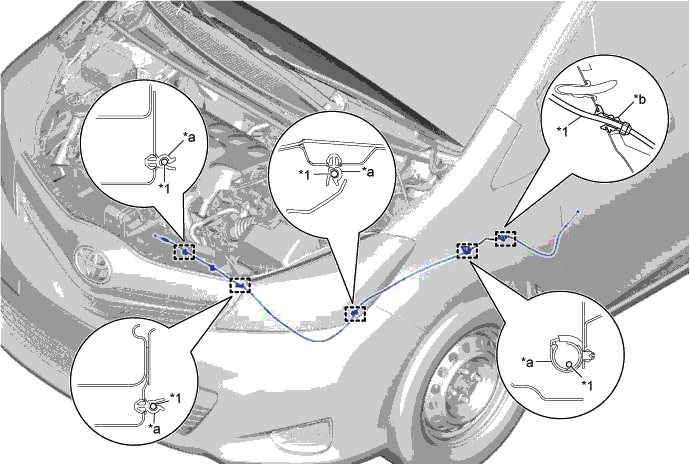
| *1 | Hood Lock Control Cable Assembly | - | - |
| *a | Clamp | *b | Grommet |
Disengage the grommet and remove the hood lock control cable assembly.