MANUAL TRANSAXLE UNIT (for Hatchback) > REASSEMBLY |
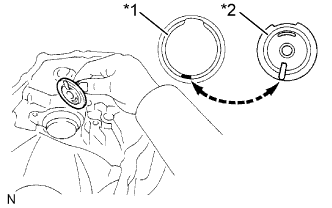
| 1. INSTALL OUTPUT SHAFT COVER |
|
| *1 | Front Transaxle Case |
| *2 | Output Shaft Cover |
Coat the output shaft cover with MP grease and install it onto the front transaxle case.
| 2. INSTALL OUTPUT SHAFT FRONT BEARING |
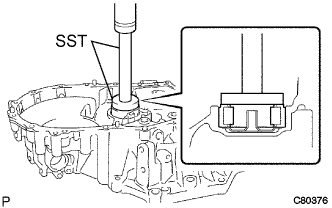 |
Coat a new output shaft front bearing with gear oil. Using SST and a press, install it onto the front transaxle case.
| 3. INSTALL FRONT TRANSAXLE CASE OIL SEAL |
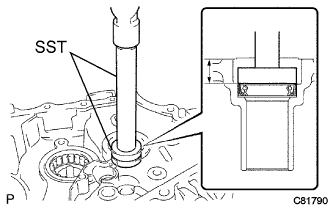 |
Using SST and a hammer, install a new front transaxle case oil seal onto the front transaxle case.
Coat the lip of the front transaxle case oil seal with MP grease.
| 4. INSTALL INPUT SHAFT FRONT BEARING |
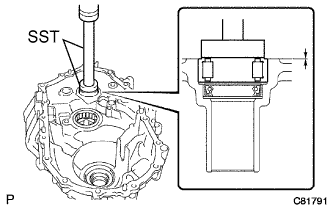 |
Coat a new input shaft front bearing with gear oil, and using SST and a press, install it onto the front transaxle case.
| 5. INSTALL SHIFT AND SELECT LEVER SHAFT SLIDE BALL BEARING |
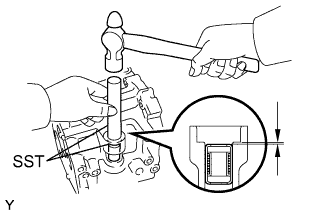 |
Using SST and a hammer, install the shift and select lever shaft slide ball bearing onto the manual transmission case.
| 6. INSTALL SHIFT AND SELECT LEVER SHAFT OIL SEAL |
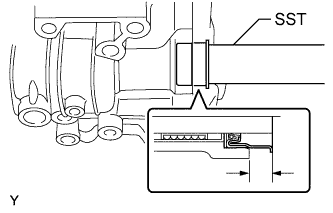 |
Using SST, install the shift and select lever shaft oil seal onto the manual transmission case.
| 7. INSTALL FRONT DIFFERENTIAL CASE FRONT TAPERED ROLLER BEARING |
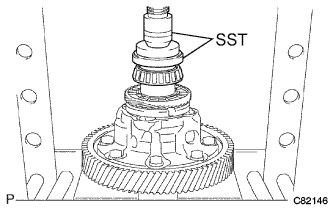 |
Using SST and a press, install the front differential case front tapered roller bearing (inner race) onto the front differential case.
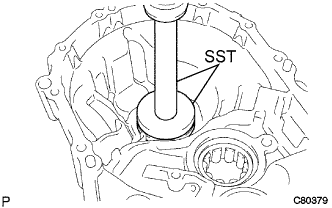 |
Using SST and a press, install the front differential case front tapered roller bearing (outer race) together with the front differential case front plate washer onto the front transaxle case.
| 8. INSTALL FRONT DIFFERENTIAL CASE REAR TAPERED ROLLER BEARING |
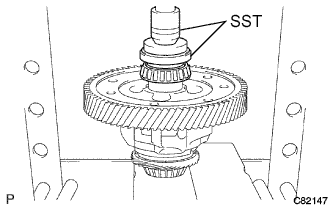 |
Using SST and a press, install the front differential case rear tapered roller bearing (inner race) onto the differential case.
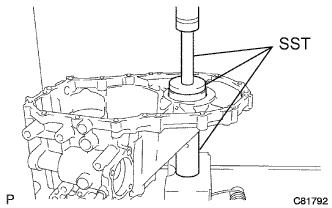 |
Using SST and a press, install the front differential case rear tapered roller bearing (outer race) with front differential case rear plate washer onto the manual transmission case.
| 9. ADJUST DIFFERENTIAL SIDE BEARING PRELOAD |
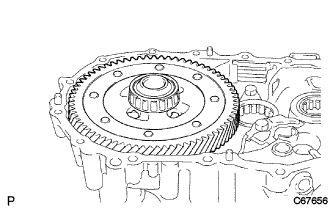 |
Coat the differential case assembly with gear oil, and install it onto the front transaxle case.
Install the manual transmission case with the 16 bolts.
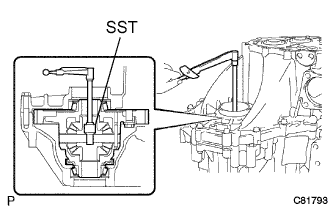 |
Using SST and a torque wrench, turn the differential case assembly to the right and left 2 or 3 times to allow the bearings to settle.
|
Using SST and a torque wrench, measure the preload.
| Part No. | Mark | Thickness mm (in.) |
| 90564-41014 | AA | 2.10 (0.0827) |
| 90564-41015 | BB | 2.15 (0.0846) |
| 90564-41016 | CC | 2.20 (0.0866) |
| 90564-41017 | DD | 2.25 (0.0886) |
| 90564-41018 | EE | 2.30 (0.0906) |
| 90564-41019 | FF | 2.35 (0.0925) |
| 90564-41020 | GG | 2.40 (0.0945) |
| 90564-41021 | HH | 2.45 (0.0965) |
| 90564-41022 | JJ | 2.50 (0.0984) |
| 90564-41023 | KK | 2.55 (0.1004) |
| 90564-41024 | LL | 2.60 (0.1024) |
| 90564-41025 | MM | 2.65 (0.1043) |
| 90564-41026 | NN | 2.70 (0.1063) |
| 90564-41027 | PP | 2.75 (0.1083) |
| 90564-41028 | QQ | 2.80 (0.1102) |
| 90564-41029 | RR | 2.85 (0.1122) |
| 90564-41030 | SS | 2.90 (0.1142) |
| 90564-41031 | TT | 2.95 (0.1161) |
| 90564-41032 | UU | 3.00 (0.1181) |
Remove the 16 bolts and the manual transmission case.
Remove the differential case assembly from the front transaxle case.
| 10. INSTALL TRANSMISSION CASE OIL SEAL |
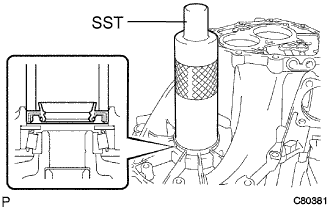 |
Using SST and a hammer, install a new transmission case oil seal onto the manual transmission case.
Coat the lip of the front transmission case oil seal with MP grease.
| 11. INSTALL TRANSAXLE CASE OIL SEAL |
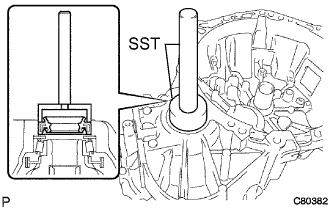 |
Using SST and a hammer, install a new transaxle case oil seal onto the front transaxle case.
Coat the lip of the transaxle case oil seal with MP grease.
| 12. INSTALL TRANSMISSION MAGNET |
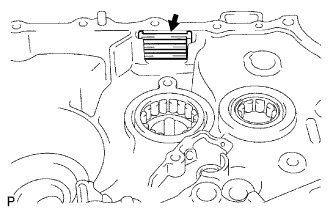 |
Clean the transmission magnet and install it onto the front transaxle case.
| 13. INSTALL BEARING LOCK PLATE |
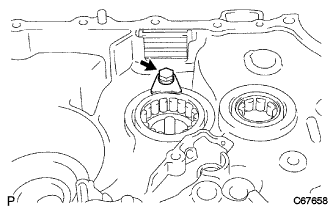 |
Install the bearing lock plate onto the front transaxle case with the bolt.
| 14. INSTALL NO. 1 OIL RECEIVER PIPE |
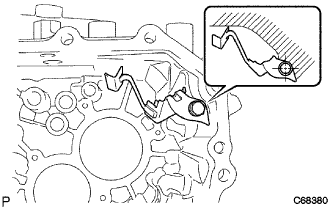 |
Install the No. 1 oil receiver pipe onto the manual transmission case with the bolt.
| 15. INSTALL NO. 2 OIL RECEIVER PIPE |
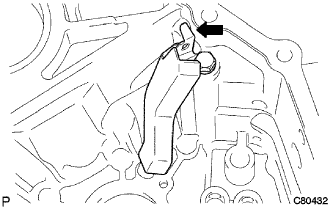 |
Install the No. 2 oil receiver pipe onto the manual transmission case with the bolt.
| 16. INSTALL REVERSE RESTRICT PIN ASSEMBLY |
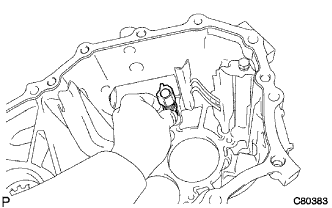 |
Install the reverse restrict pin assembly onto the manual transmission case.
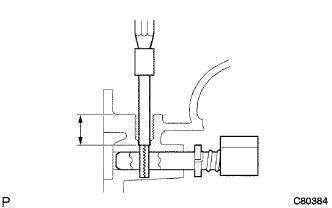 |
Using a pin punch (φ5 mm) and a hammer, install the slotted pin onto the reverse restrict pin assembly.
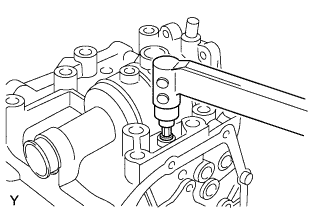 |
Apply adhesive to the reverse restrict pin plug.
Using a hexagon wrench and a torque wrench, install the reverse restrict pin plug onto the manual transmission case.
| 17. INSTALL MANUAL TRANSAXLE CASE RECEIVER |
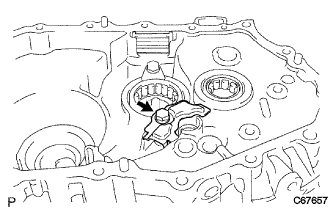 |
Install the manual transaxle case receiver onto the front transaxle case with the bolt.
| 18. INSTALL DIFFERENTIAL CASE ASSEMBLY |
|
Coat the differential case tapered roller bearing with gear oil and install the differential case assembly onto the front transaxle case.
| 19. INSTALL INPUT SHAFT ASSEMBLY |
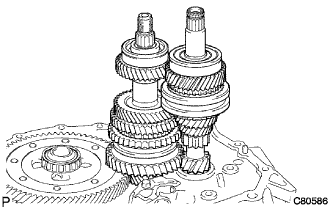 |
Coat the sliding and rotating surfaces of the input shaft assembly and output shaft assembly with gear oil and install them onto the front transaxle case.
| 20. INSTALL REVERSE IDLER GEAR SUB-ASSEMBLY |
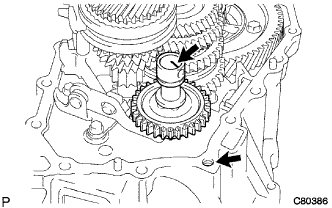 |
Coat the reverse idler gear sub-assembly, reverse idler thrust washer and reverse idler gear shaft with gear oil and install them as shown in the illustration.
 | Align Alignment Mark |
| 21. INSTALL NO. 1 GEAR SHIFT FORK SHAFT |
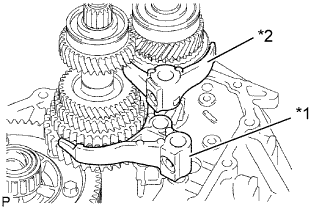 |
Coat the No. 1 gear shift fork and the No. 2 gear shift fork with gear oil and install them.
| *1 | No. 1 Gear Shift Fork |
| *2 | No. 2 Gear Shift Fork |
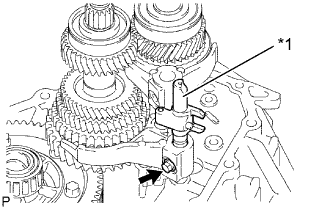 |
Coat the No. 1 gear shift fork shaft with gear oil and install it.
| *1 | No. 1 Gear Shift Fork Shaft |
Apply adhesive to the shift fork set bolt.
Install the shift fork set bolt.
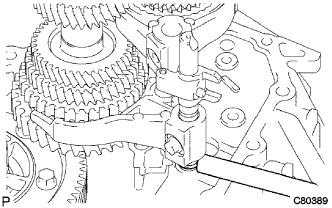 |
Using a brass bar and a hammer, install a new snap ring onto the No. 1 gear shift fork shaft.
| 22. INSTALL NO. 3 GEAR SHIFT FORK SHAFT |
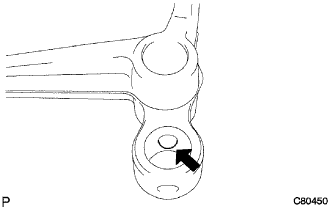 |
Coat the 2 shift fork balls with MP grease and install them onto the reverse shift fork.
Install the reverse shift fork onto the No. 3 shift fork shaft gear.
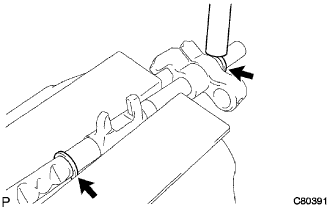 |
Using a brass bar and a hammer, install 2 new snap rings onto the No. 3 shift fork shaft.
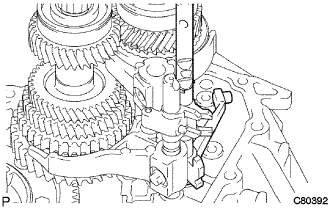 |
Coat the No. 3 shift fork shaft gear with gear oil and install it.
| 23. INSTALL NO. 2 GEAR SHIFT FORK SHAFT |
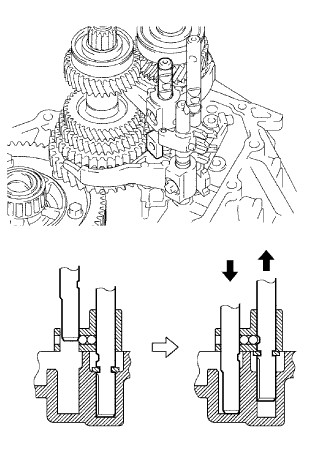 |
Coat the No. 1 gear shift head and the No. 2 gear shift fork shaft with gear oil and install them.
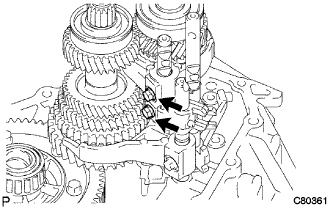 |
Coat the 2 shift fork set bolts with adhesive and install them onto the No. 2 gear shift fork and the No. 1 shift head.
| 24. INSTALL REVERSE SHIFT ARM BRACKET ASSEMBLY |
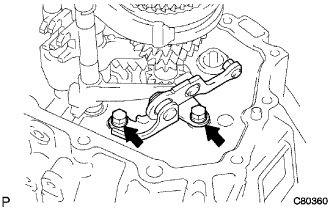 |
Install the reverse shift arm bracket assembly onto the front transaxle case with 2 bolts.
| 25. INSTALL MANUAL TRANSMISSION CASE |
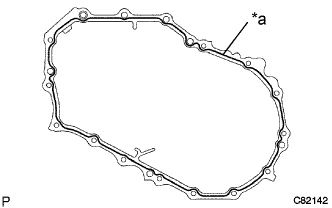 |
Apply a continuous bead of seal packing (Diameter 1.2 mm (0.0472 in.)) to the manual transmission case as shown in the illustration.
| *a | Seal Packing (Seal Diameter: 1.2 mm (0.0472 in.)) |
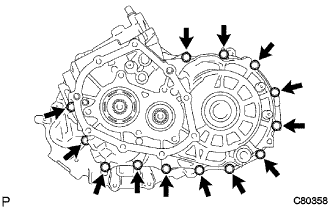 |
Install the 13 bolts onto the manual transmission side.
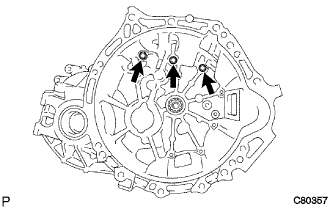 |
Install the 3 bolts onto the manual transaxle side.
| 26. INSTALL REVERSE IDLER GEAR SHAFT BOLT |
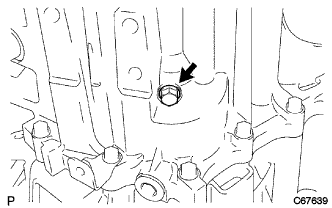 |
Coat the reverse idler gear shaft bolt with adhesive and install it with a new gasket.
| 27. INSTALL NO. 2 LOCK BALL ASSEMBLY |
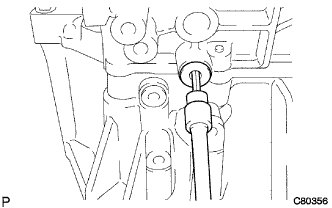 |
Coat the No. 2 lock ball assembly with adhesive and install it with a hexagon wrench.
| 28. INSTALL SHIFT DETENT BALL |
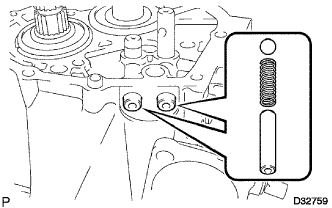 |
Install the 2 shift detent balls, 2 compression springs and 2 spring seats onto the manual transmission case.
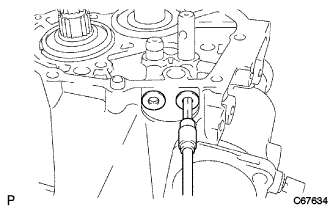 |
Coat the 2 shift detent ball plugs with adhesive and install them using a hexagon wrench.
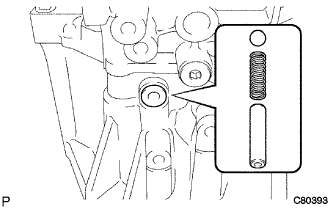 |
Install the shift detent ball, compression spring and the spring seat onto the front transaxle case.
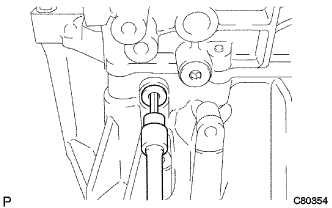 |
Coat the shift detent ball plug with adhesive and install it using a hexagon wrench.
| 29. INSTALL INPUT SHAFT REAR BEARING HOLE SNAP RING |
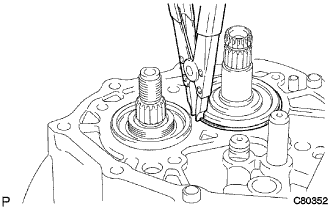 |
Using a snap ring expander, install the input shaft rear bearing hole snap ring onto the input shaft assembly.
| 30. INSTALL OUTPUT SHAFT REAR BEARING HOLE SNAP RING |
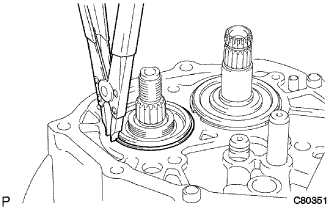 |
Using a snap ring expander, install the output shaft rear bearing hole snap ring onto the output shaft assembly.
| 31. INSTALL SHIFT FORK SHAFT SHAFT SNAP RING |
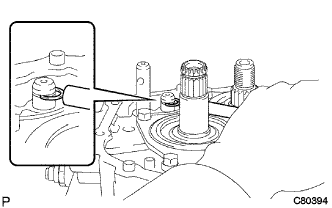 |
Using a brass bar and a hammer, install a new shift fork shaft shaft snap ring onto the No. 2 shift fork shaft.
| 32. INSTALL REAR BEARING RETAINER |
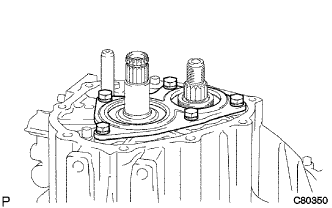 |
Coat the 5 bolts with adhesive, and install the rear bearing retainer onto the manual transmission case with the 5 bolts.
| 33. INSTALL 5TH DRIVEN GEAR |
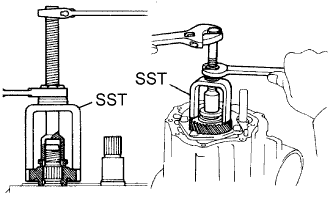 |
Using SST, install the 5th driven gear onto the output shaft assembly.
| 34. INSTALL 5TH GEAR NEEDLE ROLLER BEARING |
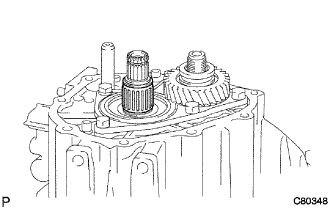 |
Coat the 5th gear needle roller bearing and 5th gear bearing spacer with gear oil, and install them onto the input shaft assembly.
| 35. INSTALL 5TH GEAR |
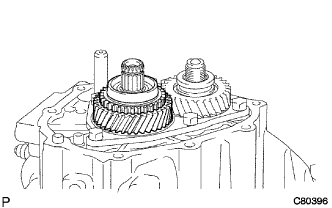 |
Coat the 5th gear with gear oil and install it onto the input shaft assembly.
| 36. INSTALL NO. 3 SYNCHRONIZER RING |
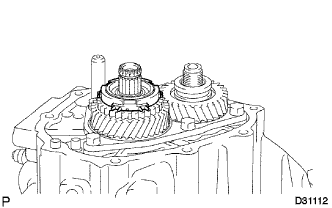 |
Coat the No. 3 synchronizer ring with gear oil and install it onto the 5th gear.
| 37. INSTALL NO. 3 TRANSMISSION CLUTCH HUB |
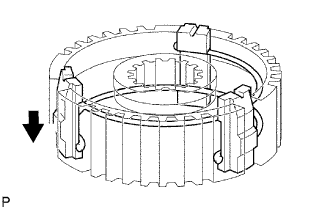 |
Install the 3 synchromesh shifting keys and 2 synchromesh shifting key springs onto the No. 3 transmission clutch hub as shown in the illustration.
| Engine Side |
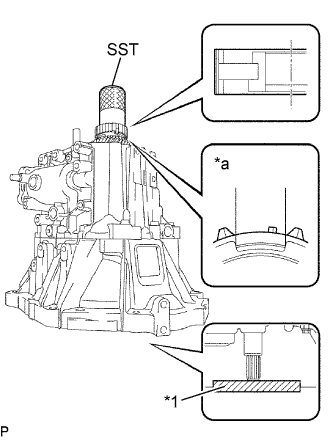 |
Using SST and a hammer, install the No. 3 transmission clutch hub onto the input shaft assembly.
| *1 | Wooden Block |
| *a | Key Position |
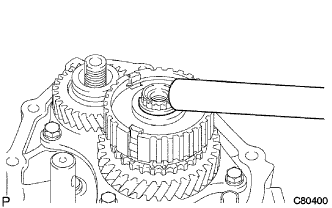 |
Select a No. 3 clutch hub shaft snap ring that will allow minimum axial play.
| Part No. | Mark | Thickness mm (in.) |
| 90520-18002 | A | 2.25 (0.0886) |
| 90520-18003 | B | 2.31 (0.0909) |
| 90520-18004 | C | 2.37 (0.0933) |
| 90520-18006 | D | 2.43 (0.0957) |
| 90520-18007 | E | 2.49 (0.0980) |
| 90520-18008 | F | 2.55 (0.1004) |
| 90520-18009 | G | 2.61 (0.1028) |
Using a brass bar and a hammer, install the No. 3 clutch hub shaft snap ring onto the input shaft assembly.
| 38. INSPECT 5TH GEAR THRUST CLEARANCE |
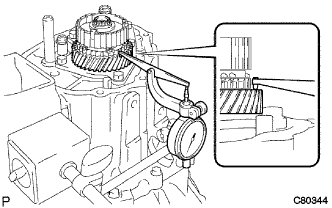 |
Using a dial indicator, measure the 5th gear thrust clearance.
| 39. INSPECT 5TH GEAR RADIAL CLEARANCE |
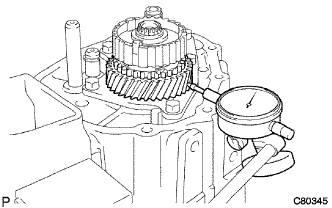 |
Using a dial indicator, measure 5th gear radial clearance.
| 40. INSTALL NO. 3 GEAR SHIFT FORK |
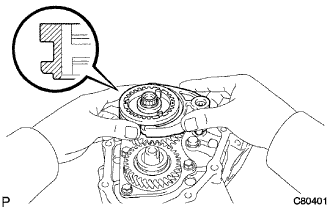 |
Coat the No. 3 transmission hub sleeve with gear oil and install it together with the No. 3 gear shift fork onto the No. 3 transmission clutch hub.
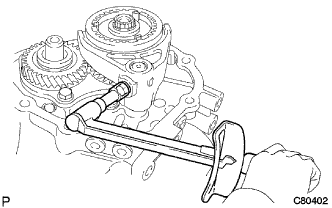 |
Coat the shift fork set bolt with adhesive, and install it onto the No. 3 gear shift fork.
| 41. INSTALL MANUAL TRANSMISSION OUTPUT SHAFT REAR SET NUT |
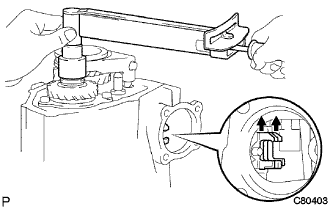 |
Engage the 2 gears simultaneously to lock the transmission.
Coat a new manual transmission output shaft rear set nut with adhesive.
Install the new manual transmission output shaft rear set nut.
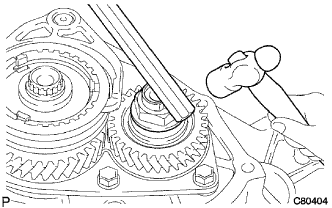 |
Using a chisel and a hammer, stake the manual transmission output shaft rear set nut.
Disengage the 2 gears.
| 42. INSTALL MANUAL TRANSMISSION CASE COVER SUB-ASSEMBLY |
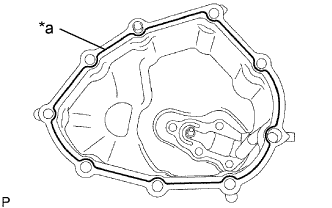 |
Apply a continuous bead of seal packing (Diameter 1.2 mm (0.0472 in.)) to the manual transaxle case cover sub-assembly as shown in the illustration.
| *a | Seal Packing (Seal Diameter: 1.2 mm (0.0472 in.)) |
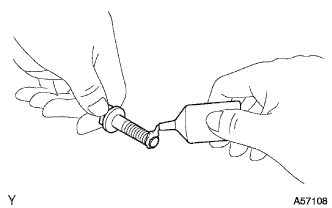 |
Apply adhesive to 2 or 3 threads on the end of the 9 bolts.
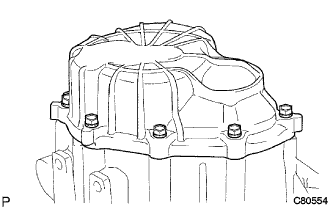 |
Install the manual transmission case cover sub-assembly onto the manual transmission case with the 9 bolts.
| 43. INSTALL SHIFT AND SELECT LEVER SHAFT ASSEMBLY |
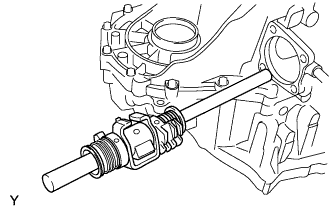 |
Coat the shift and select lever shaft assembly with gear oil, and install it onto the manual transmission case.
| 44. INSTALL CONTROL SHAFT COVER OIL SEAL |
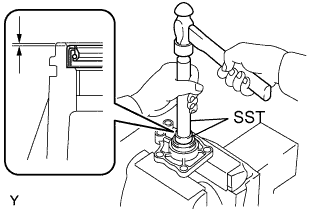 |
Using SST and a hammer, install a new control shaft cover oil seal onto the control shaft cover.
Coat the control shaft cover oil seal with MP grease.
| 45. INSTALL CONTROL SHAFT COVER |
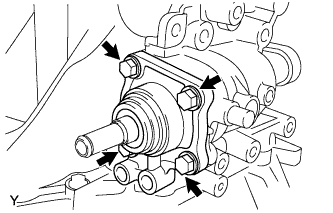 |
Coat the 4 bolts with adhesive. Install a new gasket and control shaft cover onto the manual transmission case with the 4 bolts.
| 46. INSTALL SHIFT GATE PIN |
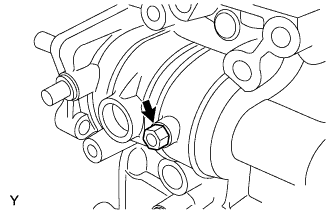 |
Coat the shift gate pin with adhesive.
Install the washer and shift gate pin.
| 47. INSTALL NO. 1 LOCK BALL ASSEMBLY |
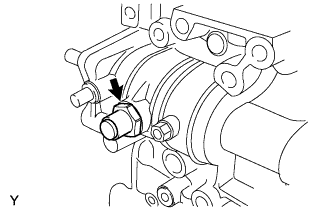 |
Coat No. 1 lock ball assembly with adhesive, install it onto the manual transmission case.
| 48. INSTALL SHIFT LEVER DAMPER |
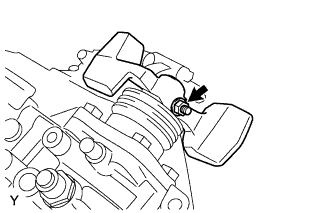 |
Install the dust boot onto the control shaft cover.
Install the shift lever damper with the lock pin onto the shift and select lever shaft assembly.
Install the spring washer with the nut.
| 49. INSTALL FLOOR SHIFT CONTROL SHIFT LEVER |
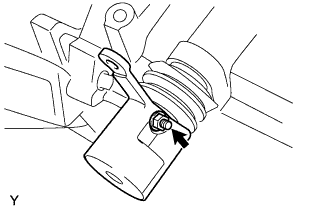 |
Install the dust boot onto the shift and select lever shaft oil seal.
Install the floor shift control shift lever with the lock pin onto the shift and select lever shaft assembly.
Install the spring washer with the nut.
| 50. INSTALL SELECTING BELL CRANK ASSEMBLY |
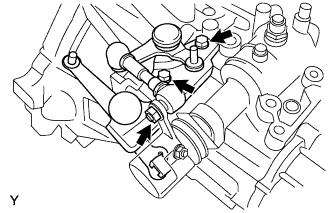 |
Install the selecting bell crank assembly together with the control bell crank dust cover onto the manual transmission case with the 2 bolts and nut.
| 51. INSTALL BACK UP LIGHT SWITCH ASSEMBLY |
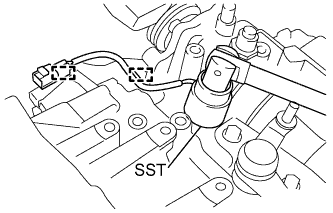 |
Using SST, install the back up light switch assembly onto the manual transmission case with a new gasket.
Install the back up light switch wire harness into the 2 clamps.
| 52. INSTALL MANUAL TRANSMISSION FILLER PLUG |
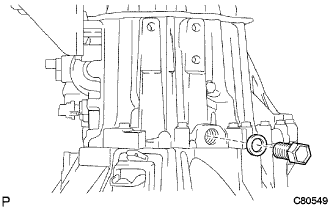 |
Install the manual transmission filler plug onto the manual transmission case with a new gasket.
| 53. INSTALL DRAIN PLUG SUB-ASSEMBLY |
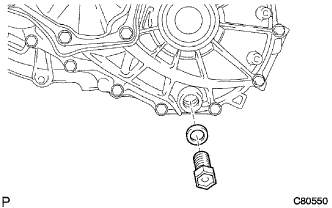 |
Install the drain plug sub-assembly onto the manual transmission case with a new gasket.