BRAKE ACTUATOR (for Sedan) > INSTALLATION |
| 1. INSTALL BRAKE ACTUATOR BRACKET ASSEMBLY |
![]() |
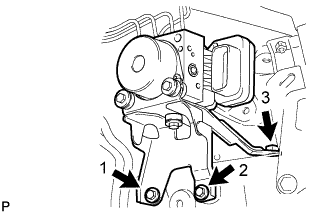
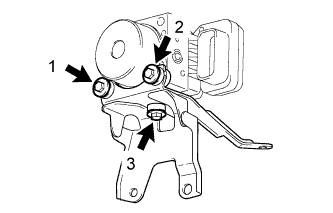
Install the brake actuator bracket assembly with the 3 bolts in the sequence shown in the illustration.
| 2. INSTALL BRAKE ACTUATOR ASSEMBLY |
![]() |
Install the brake actuator assembly with brake actuator bracket assembly with the 3 bolts in the sequence shown in the illustration.
![]() |
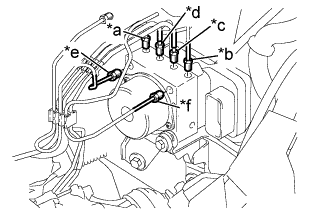
Temporarily install each brake tube in the correct positions of the brake actuator assembly as shown in the illustration.
| *a | to Front Wheel Cylinder RH |
| *b | to Front Wheel Cylinder LH |
| *c | to Rear Wheel Cylinder RH |
| *d | to Rear Wheel Cylinder LH |
| *e | from 1st Master Cylinder |
| *f | from 2nd Master Cylinder |
Using a 10 mm union nut wrench, install the 6 brake tubes to the brake actuator assembly.
![]() |
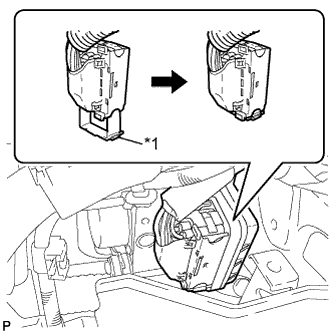
Connect the brake actuator connector.
| *1 | Lock Lever |
| 3. INSTALL BATTERY CARRIER |
Install the battery carrier with the 5 bolts.
Install the clamp.
| 4. INSTALL BATTERY TRAY |
| 5. INSTALL BATTERY |
Install the battery onto the vehicle with the battery clamp.
Connect the cable to the battery terminal.
| 6. CONNECT CABLE TO NEGATIVE BATTERY TERMINAL |
| 7. BLEED BRAKE LINE |
![]() |
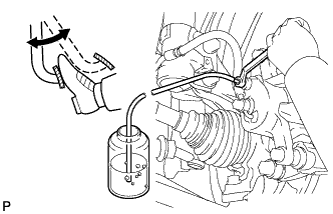
Connect the vinyl tube to the bleeder plug.
Depress the brake pedal several times, then loosen the bleeder plug with the pedal depressed (Step C).
At the point where the fluid stops coming out, tighten the bleeder plug, then release the brake pedal (Step D).
Repeat step C and D until all the air in the fluid is completely bled out.
Tighten the bleeder plug.
Repeat the above procedure to bleed the air out of the brake line for each wheel.