 |
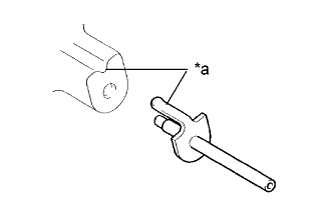
Align the groove on the cylinder block sub-assembly with the oil jet positioning bracket and tap in a new oil jet.
| *a | Align |
- NOTICE:
- Do not tap the tip of the oil jet.
CYLINDER BLOCK (for Hatchback) > REASSEMBLY |
| 1. INSTALL OIL JET |
|
Align the groove on the cylinder block sub-assembly with the oil jet positioning bracket and tap in a new oil jet.
| *a | Align |
| 2. INSTALL NO. 1 HEAD TAPER SCREW PLUG |
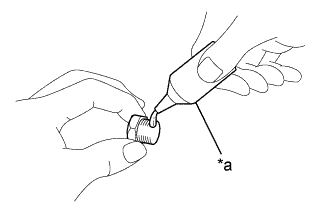 |
Apply adhesive to the end 2 or 3 threads of the No. 1 head taper screw plug.
| *a | Adhesive |
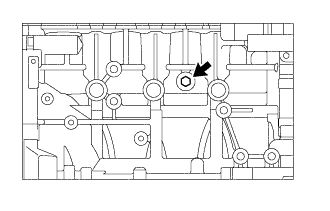 |
Install the No. 1 head taper screw plug to the cylinder block sub-assembly.
| 3. INSTALL STRAIGHT PIN |
Using a plastic-faced hammer, tap in 7 new straight pins to the cylinder block sub-assembly.
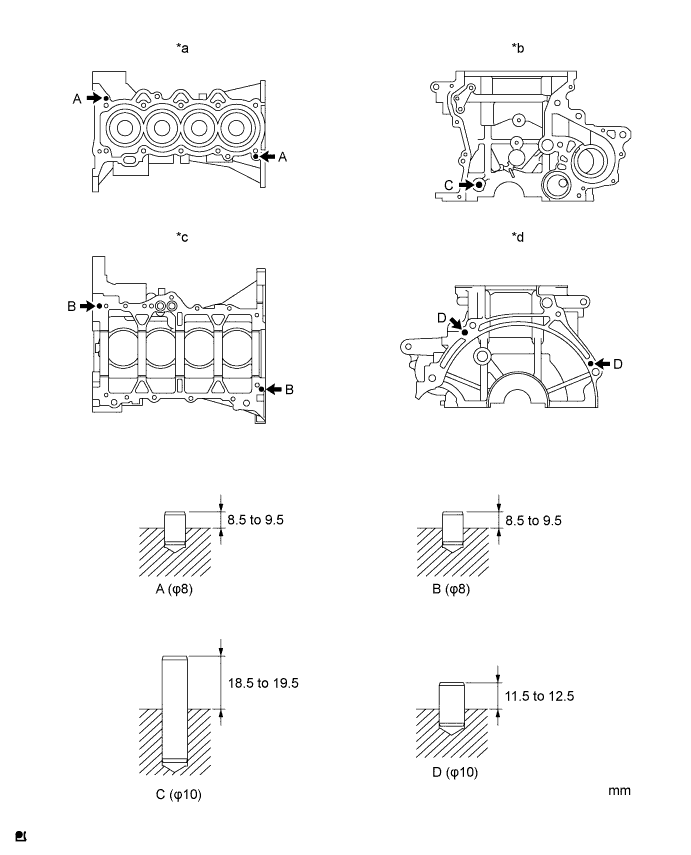
| *a | Upper Side | *b | Front Side |
| *c | Lower Side | *d | Rear Side |
| 4. INSTALL OIL PUMP SET RING PIN |
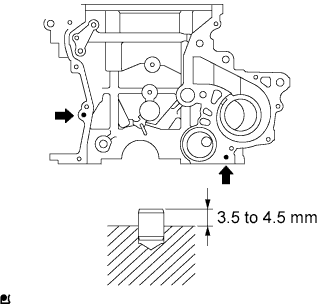 |
Using a plastic-faced hammer, tap in 2 new oil pump set ring pins to the cylinder block sub-assembly.
| 5. INSTALL STUD BOLT |
Using an E5 and E7 "TORX" wrench, install the 7 stud bolts to the cylinder block sub-assembly.
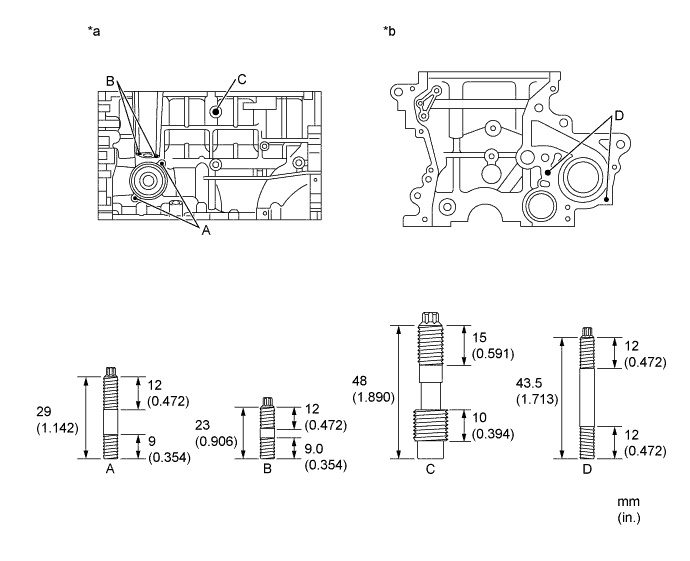
| *a | Intake Side | *b | Front Side |
| 6. INSTALL CRANKSHAFT BEARING |
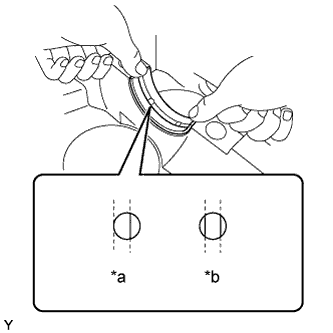 |
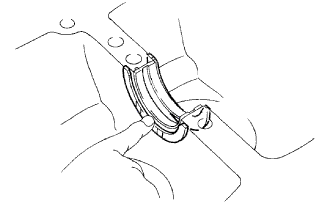
Align the crankshaft bearing (upper) with the oil hole of the cylinder block sub-assembly and install the crankshaft bearing.
| *a | Incorrect |
| *b | Correct |
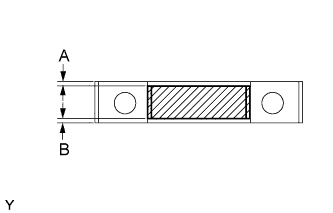 |
Align the crankshaft bearing (lower) with the crankshaft bearing cap and install the crankshaft bearing cap.
| 7. INSTALL UPPER CRANKSHAFT THRUST WASHER |
 |
Install the 2 upper crankshaft thrust washers to the No. 3 journal position of the cylinder block sub-assembly with the oil grooves facing outward.
Apply engine oil to the 2 upper crankshaft thrust washers.
| 8. INSTALL CRANKSHAFT |
Apply engine oil to the crankshaft main journal.
Install the crankshaft to the cylinder block sub-assembly.
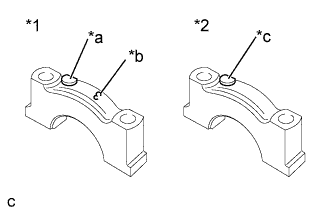 |
Examine the front marks and numbers and install the 5 crankshaft bearing caps to the cylinder block sub-assembly.
| *1 | No. 3 Crankshaft Bearing Cap |
| *2 | No. 1, 2, 4, 5 Crankshaft Bearing Cap |
| *a | Front Mark |
| *b | Number |
| *c | Front Mark and Number |
Apply a light coat of engine oil to the threads of the crankshaft bearing cap set bolts.
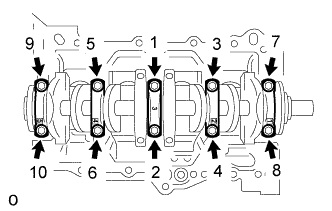 |
Tighten the crankshaft bearing cap set bolts in several steps to the specified torque in the sequence shown in the illustration. (*1)
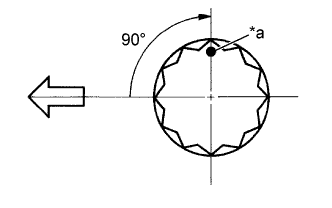 |
Mark the front of the crankshaft bearing cap set bolts with paint.
| *a | Paint Mark |
 | Engine Front |
Further tighten the crankshaft bearing cap set bolts by 90° in the same sequence as step (*1).
Check that the painted mark is now at a 90° angle from the front.
| 9. INSPECT CRANKSHAFT THRUST CLEARANCE |
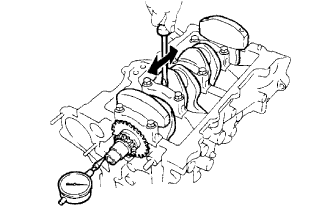 |
Using a dial indicator, measure the thrust clearance while moving the crankshaft back and forth with a screwdriver.
| 10. INSTALL PISTON WITH PIN SUB-ASSEMBLY |
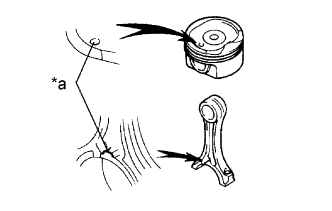 |
Coat the piston pin and pin holes in the piston with engine oil.
| *a | Front Mark |
Align the cavity of the piston with the protruding portion on the connecting rod.
Using SST, press in the piston pin.
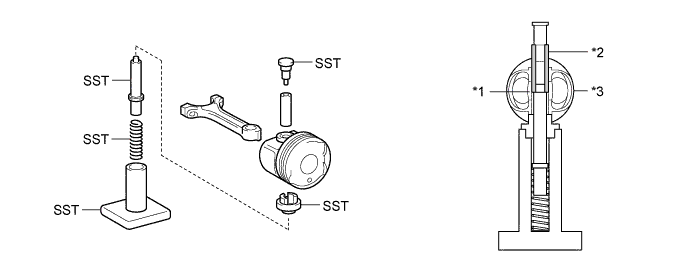
| *1 | Connecting Rod | *2 | Piston Pin |
| *3 | Piston | - | - |
| 11. INSTALL CONNECTING ROD BEARING |
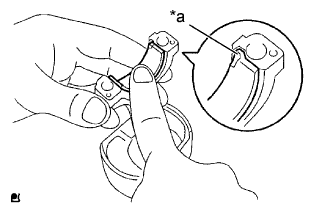 |
Align the bearing claw with the groove of the connecting rod or connecting rod cap.
| *a | Claw |
| 12. INSTALL PISTON RING SET |
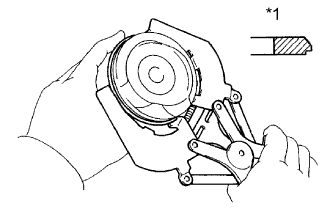 |
Install the oil ring and 2 side rails by hand.
Using a piston ring expander, install the No. 2 compression ring and No. 1 compression ring.
| *1 | No. 2 Compression Ring |
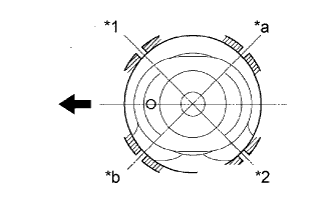 |
Position the piston rings so that the ring ends are as shown.
| *1 | No. 1 Compression Ring and Oil Ring |
| *2 | No. 2 Compression Ring |
| *a | Side Rail (Lower) |
| *b | Side Rail (Upper ) |
 | Engine Front |
| 13. INSTALL PISTON WITH PIN SUB-ASSEMBLY WITH CONNECTING ROD SUB-ASSEMBLY |
Apply engine oil to the cylinder walls, the pistons, and the surfaces of connecting rod bearings.
Check the position of the piston ring ends.
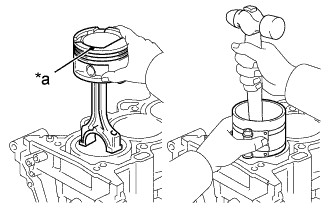 |
Using a piston ring compressor, push the correctly numbered piston and connecting rod assemblies into each cylinder with the front mark on the piston facing forward.
| *a | Front Mark |
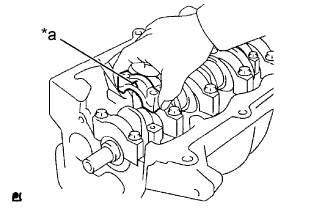 |
Make sure that the connecting rod and connecting rod cap are in the correct combination and that the front mark of the connecting rod cap is facing in the correct mounting orientation, then install the connecting rod cap to the connecting rod.
| *a | Front Mark |
Apply a light coat of engine oil to the threads of the connecting rod bolts.
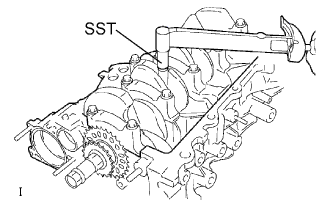 |
Using SST, tighten the connecting rod bolts in several steps to the specified torque.
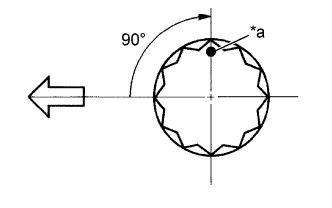 |
Mark the front of the connecting rod bolts with paint.
| *a | Paint Mark |
| Engine Front |
Further tighten the connecting rod bolts by 90° as shown.
Check that the crankshaft turns smoothly.
| 14. INSPECT CONNECTING ROD THRUST CLEARANCE |
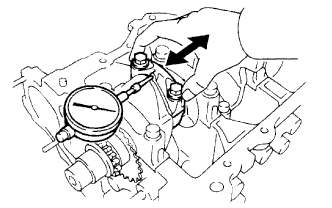 |
Using a dial indicator, measure the thrust clearance while moving the connecting rod back and forth.