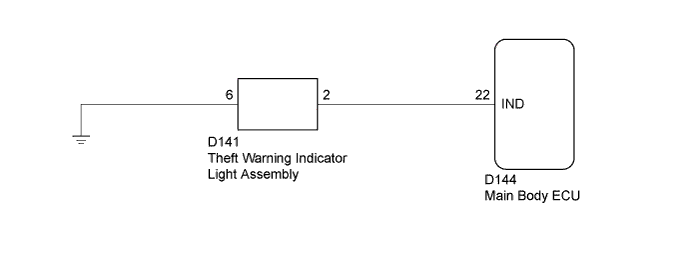
THEFT DETERRENT SYSTEM (for Hatchback) > Security Indicator Light Circuit |
| 1.PERFORM ACTIVE TEST USING TECHSTREAM (SECURITY INDICATOR) |
Connect the Techstream to the DLC3.
Turn the ignition switch to ON.
Turn the Techstream on.
Enter the following menus: Body Electrical / Main Body / Active Test.
According to the display on the Techstream, perform the Active Test.
| Tester Display | Test Part | Control Range | Diagnostic Note |
| Security Indicator | Theft warning indicator light | OFF / ON | - |
|
| ||||
| OK | ||
 | ||
| ||
| 2.CHECK HARNESS AND CONNECTOR (MAIN BODY ECU - THEFT WARNING INDICATOR LIGHT ASSEMBLY) |
Disconnect the D144 main body ECU connector.
Disconnect the D141 theft warning indicator light assembly connector.
Measure the resistance according to the value(s) in the table below.
| Tester Connection | Condition | Specified Condition |
| D144-22 (IND) - D141-2 | Always | Below 1 Ω |
| D141-6 - Body ground | Always | Below 1 Ω |
| D144-22 (IND) - Body ground | Always | 10 kΩ or higher |
|
| ||||
| OK | |
 |
| 3.INSPECT THEFT WARNING INDICATOR LIGHT ASSEMBLY |
Inspect the theft warning indicator light assembly (Click here).
|
| ||||
| OK | ||
| ||
| ||

