 |
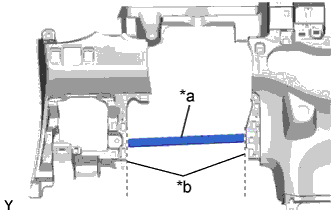
Using a nipper, cut off both ends of the runner portion shown in the illustration (When installing a new one).
| *a | Runner Portion |
| *b | Cut Off |
LOWER INSTRUMENT PANEL (for Hatchback) > INSTALLATION |
| 1. INSTALL LOWER INSTRUMENT PANEL SUB-ASSEMBLY |
|
Using a nipper, cut off both ends of the runner portion shown in the illustration (When installing a new one).
| *a | Runner Portion |
| *b | Cut Off |
Engage the 10 guides and install the lower instrument panel.
for TMC Made:
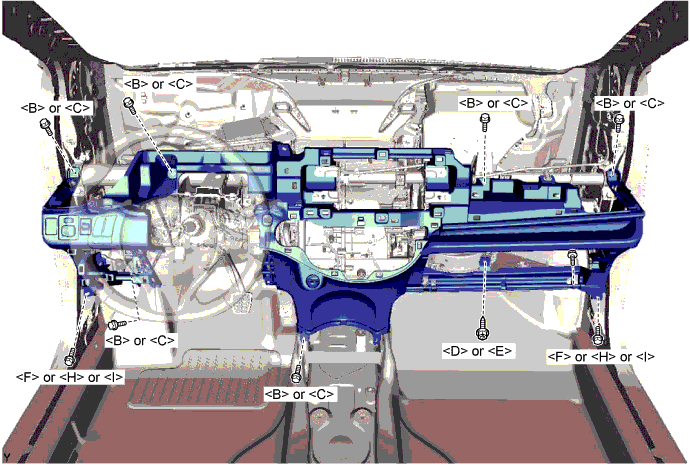
Install the lower instrument panel with the 6 <B> or <C> bolts, <D> or <E> screw, 2 <F> or <H> or <I> bolts and bolt.
for TMMF Made:
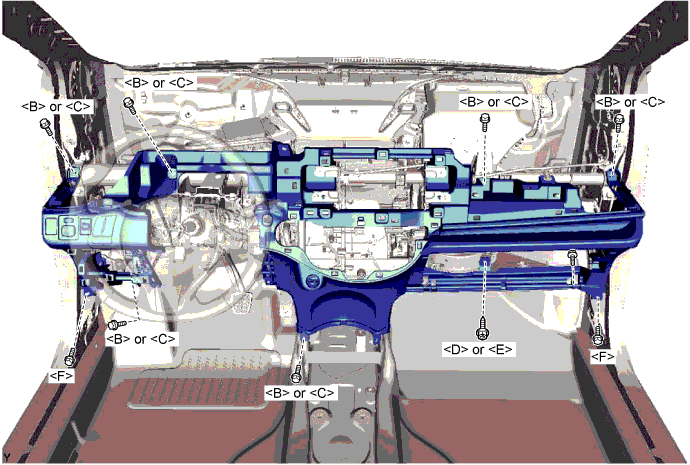
Install the lower instrument panel with the 6 <B> or <C> bolts, <D> or <E> screw, 2 <F> bolts and bolt.
Connect the clamps and connectors.
Engage the 2 claws and install the DLC3 connector.
| 2. INSTALL HOOD LOCK CONTROL LEVER SUB-ASSEMBLY |
Engage the 3 claws and install the hood lock control lever.
| 3. INSTALL REAR CONSOLE BOX ASSEMBLY |
| 4. CONNECT AIR MIX DAMPER CONTROL CABLE SUB-ASSEMBLY |
Engage the 2 claws and connect the air mix damper control cable.
| 5. CONNECT DEFROSTER DAMPER CONTROL CABLE SUB-ASSEMBLY |
Engage the 2 claws and connect the defroster damper control cable.
| 6. INSTALL AIR CONDITIONING PANEL ASSEMBLY |
Connect the connector.
Engage the claw and 7 clips and install the air conditioning panel.
| 7. INSTALL STEREO OPENING COVER WITH BRACKET (for TMC Made) |
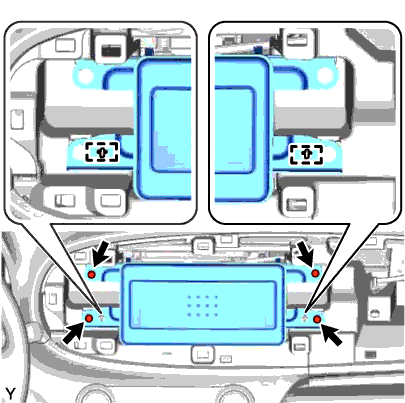 |
Align the 2 holes in the radio bracket with the 2 bosses of the instrument panel.
Install the stereo opening cover with bracket with the 4 screws.
| 8. INSTALL STEREO OPENING COVER WITH BRACKET (for TMMF Made) |
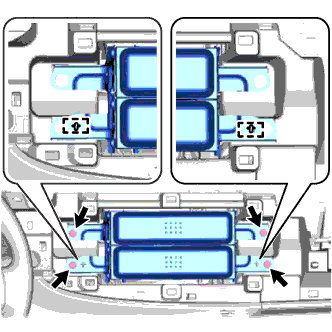 |
Align the 2 holes in the radio bracket with the 2 bosses of the instrument panel.
Install the stereo opening cover with bracket with the 4 screws.
| 9. INSTALL LOWER INSTRUMENT PANEL FINISH PANEL (w/o Knee Airbag) |
Engage the 5 claws and 2 clips and install the instrument panel finish panel.
| 10. INSTALL LOWER NO. 1 INSTRUMENT PANEL AIRBAG ASSEMBLY (w/ Knee Airbag) |
Check that the ignition switch is off.
Check that the cable is disconnected from the negative (-) battery terminal.
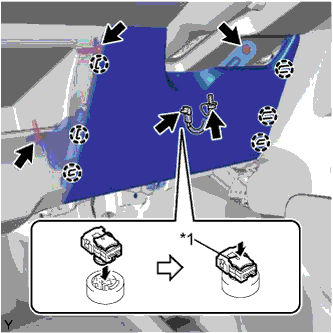 |
Connect the airbag connector.
| *1 | Locking Button |
Push in the locking button to the lower No. 1 instrument panel airbag assembly.
Engage the 6 claws and install the lower No. 1 instrument panel airbag assembly.
Install the 4 bolts.
| 11. INSTALL LOWER NO. 2 INSTRUMENT PANEL FINISH PANEL |
Engage the 2 claws and 5 clips and install the instrument panel finish panel.
| 12. INSTALL NO. 1 INSTRUMENT PANEL UNDER COVER SUB-ASSEMBLY |
Engage the guide and the claw.
Install the instrument panel under cover with the 2 <A> screws.
| 13. INSTALL GLOVE COMPARTMENT DOOR ASSEMBLY |
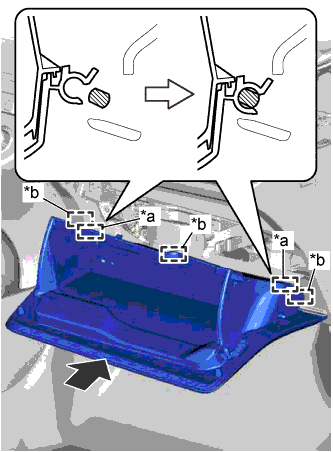 |
Engage the 3 guides and 2 hinges in the horizontal direction to install the glove compartment door.
| *a | Hinge |
| *b | Guide |
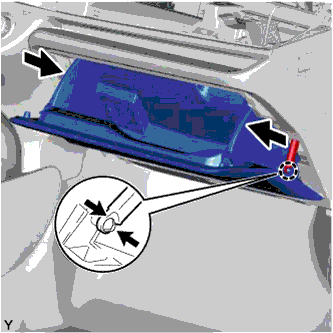 |
While pushing in the sides of the glove compartment door as indicated by the arrows in the illustration, close the door to engage it to the 2 stoppers.
Engage the claw and connect the glove compartment door stopper.
| 14. INSTALL UPPER INSTRUMENT PANEL SUB-ASSEMBLY |