 |
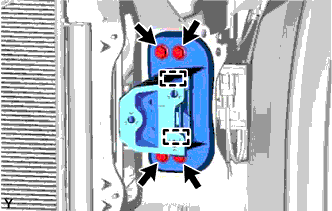
Engage the 2 guides and install the front side member bracket.
FRONT BUMPER (for Hatchback without Sport Package) > REASSEMBLY |
| 1. INSTALL FRONT SIDE MEMBER BRACKET SUB-ASSEMBLY LH |
|
Engage the 2 guides and install the front side member bracket.
Tighten the 4 bolts.
| 2. INSTALL FRONT SIDE MEMBER BRACKET SUB-ASSEMBLY RH |
| 3. INSTALL FRONT NO. 1 BUMPER STONE DEFLECTOR BRACKET |
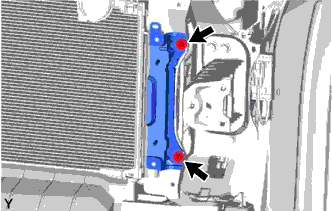 |
Install the front No. 1 bumper stone deflector bracket with the 2 nuts.
| 4. INSTALL WINDSHIELD WASHER JAR ASSEMBLY (for Cold Area Specification Vehicles) |
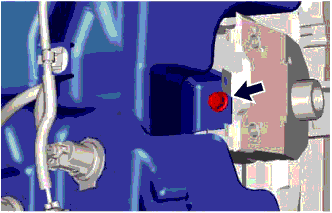 |
Install the windshield washer jar with the bolt.
| 5. INSTALL WINDSHIELD WASHER JAR ASSEMBLY (except Cold Area Specification Vehicles) |
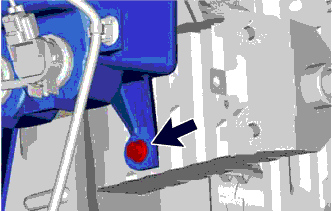 |
Install the windshield washer jar with the bolt.
| 6. INSTALL FRONT BUMPER REINFORCEMENT |
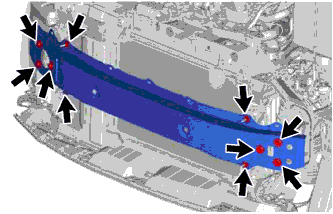 |
Install the front bumper reinforcement with the 4 nuts.
Tighten the 6 bolts.
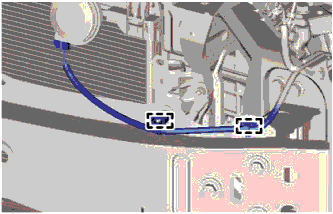 |
Engage the 2 clamps and install the wire harness.
| 7. INSTALL NO. 2 RADIATOR SIDE AIR SEAL |
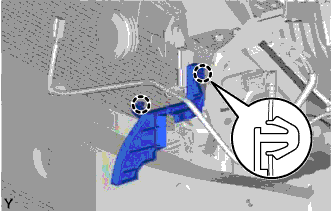 |
Engage the 2 claws and install the radiator side air seal.
| 8. INSTALL NO. 1 RADIATOR SIDE AIR SEAL |
| 9. INSTALL RADIATOR SUPPORT EXTENSION LH |
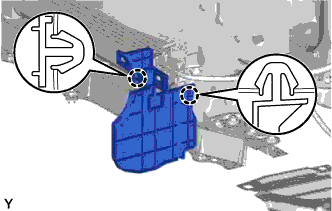 |
Engage the 2 claws and install the radiator support extension.
| 10. INSTALL RADIATOR SUPPORT EXTENSION RH |
| 11. INSTALL THERMISTOR ASSEMBLY |
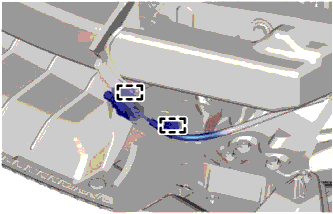 |
Engage the 2 clamps and install the thermistor.
| 12. INSTALL FRONT BUMPER SIDE RETAINER LH |
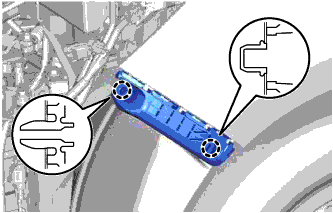 |
Engage the 2 claws and install the front bumper side retainer.
| 13. INSTALL FRONT BUMPER SIDE RETAINER RH |
| 14. INSTALL HEADLIGHT ASSEMBLY LH |
Connect the connectors.
Install the headlight assembly with the 3 screws.
| 15. INSTALL HEADLIGHT ASSEMBLY RH |
| 16. INSTALL FOG LIGHT COVER LH |
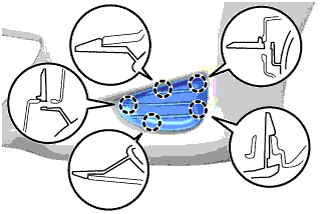 |
Engage the 5 claws and install the fog light cover.
| 17. INSTALL FOG LIGHT COVER RH |
| 18. INSTALL FOG LIGHT ASSEMBLY LH (w/ Fog Light) |
Engage the guide to install the fog light assembly.
Install the 2 screws.
Connect the connector.
| 19. INSTALL FOG LIGHT ASSEMBLY RH (w/ Fog Light) |
| 20. INSTALL LOWER NO. 1 RADIATOR GRILLE |
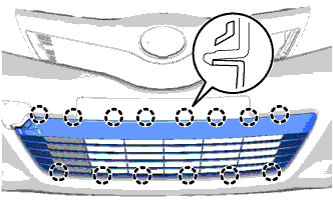 |
Engage the 14 claws and install the lower No. 1 radiator grille.
| 21. INSTALL FRONT BUMPER HOLE COVER |
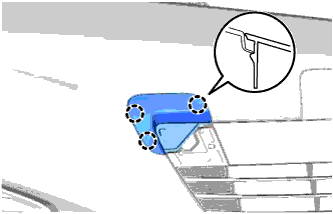 |
Engage the 3 claws and install the front bumper hole cover.
| 22. INSTALL FRONT BUMPER LOWER COVER |
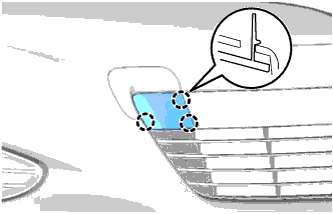 |
Engage the 3 claws and install the front bumper lower cover.
| 23. INSTALL RADIATOR GRILLE (OR FRONT PANEL) EMBLEM |
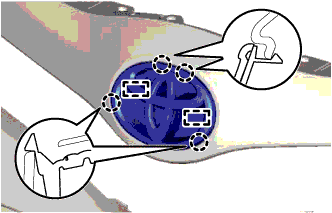 |
Engage the 2 guides, 4 claws and install the radiator grille (or front panel) emblem.
| 24. INSTALL RADIATOR GRILLE |
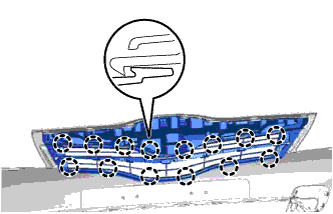 |
Engage the 14 claws and install the radiator grille.
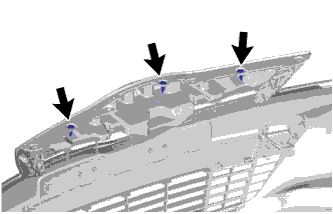 |
Install the 3 clips.
| 25. INSTALL RADIATOR GRILLE SIDE MOULDING LH |
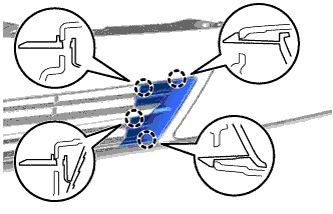 |
Engage the 4 claws and install the radiator grille side moulding.
| 26. INSTALL RADIATOR GRILLE SIDE MOULDING RH |
| 27. INSTALL HOOD TO FRONT END PANEL SEAL |
Clean the attachment surface.
Using an infrared light, heat the double-sided adhesive tape remaining on the front bumper cover.
Using a piece of cloth, rub the remaining double-sided adhesive tape off the front bumper cover while it is hot from the infrared light.
Using a non-residue solvent, clean the attachment surface.
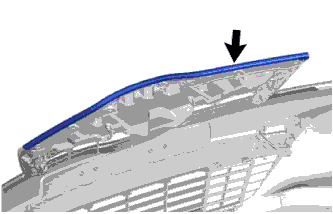 |
Install a new hood to front end panel seal onto the front bumper cover, as shown in the illustration.
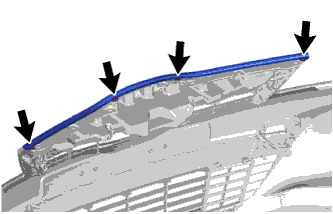 |
Install the 4 clips.