 |
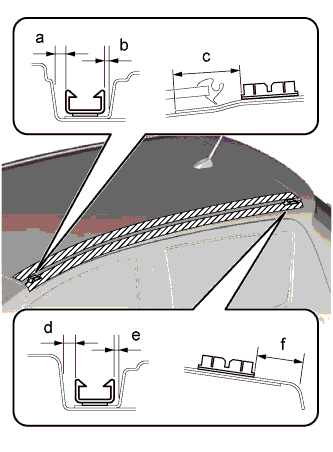
Install the 2 new clips in the positions shown in the illustration. Press in the clips by hand.
- Standard Measurement:
Dimension Measurement a 3.7 mm (0.146 in.) b 1.1 to 2.1 mm (0.043 to 0.083 in.) c 34.3 to 35.3 mm (1.350 to 1.390 in.) d 4.8 mm (0.189 in.) e 0.6 to 1.6 mm (0.024 to 0.063 in.) f 16.5 to 17.5 mm (0.650 to 0.689 in.)
- NOTICE:
- After pressing in the clips, wait 30 minutes or more before installing the roof drip side finish moulding.
- HINT:
- Minimum hardening time: 30 minutes
- Time needed for complete hardening: 24 hours