 |
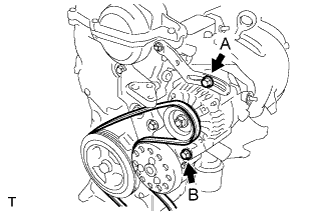
Loosen bolts A and B.
FRONT CRANKSHAFT OIL SEAL (for Hatchback) > REMOVAL |
| 1. REMOVE FRONT WHEEL RH |
| 2. REMOVE ENGINE UNDER COVER RH |
| 3. REMOVE FAN AND GENERATOR V BELT |
|
Loosen bolts A and B.
Release the fan and generator V belt tension and remove the fan and generator V belt.
| 4. REMOVE ENGINE MOUNTING INSULATOR SUB-ASSEMBLY RH |
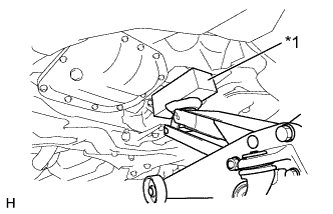 |
Place a wooden block on a jack underneath the oil pan sub-assembly.
| *1 | Wooden Block |
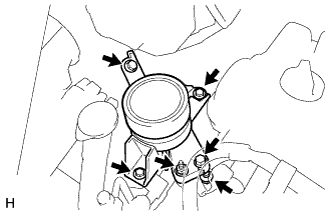 |
Remove the 4 bolts, the 2 nuts and the engine mounting insulator sub-assembly RH from the transverse engine engine mounting bracket and the vehicle.
| 5. REMOVE CRANKSHAFT DAMPER SUB-ASSEMBLY |
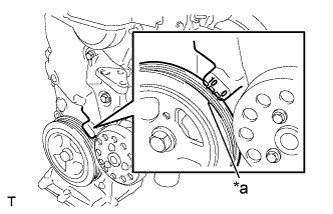 |
Set the No. 1 cylinder to TDC/compression.
Turn the crankshaft damper sub-assembly, and align its timing notch with timing mark "0" of the oil pump.
| *a | Timing Notch |
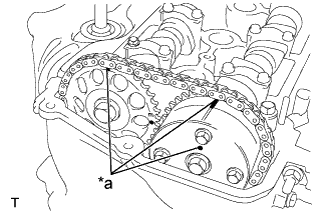 |
Check that the timing marks on the camshaft timing sprocket and the camshaft timing gear are all facing upward as shown in the illustration.
| *a | Timing Mark |
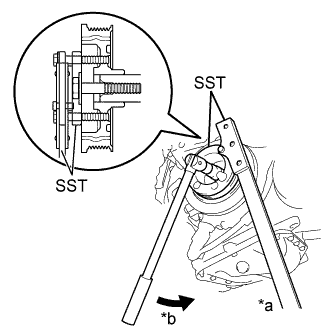 |
Using SST, loosen the bolt while holding the crankshaft damper sub-assembly.
| *a | Hold |
| *b | Turn |
Remove the SST and the bolt.
Remove the crankshaft damper sub-assembly from the crankshaft.
| 6. REMOVE OIL PUMP SEAL |
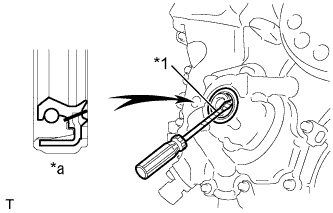 |
Using a knife, cut off the oil seal lip.
| *1 | Protective Tape |
| *a | Cut Position |
Using a screwdriver with its tip wrapped with protective tape, pry out the oil seal.