 |
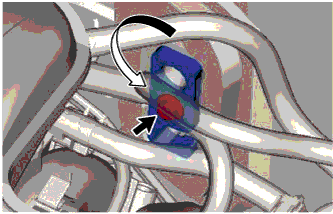
Turn the hook connector in the direction indicated by the arrow in the illustration.
COOLER EXPANSION VALVE (for Hatchback) > INSTALLATION |
| 1. INSTALL COOLER EXPANSION VALVE |
Apply sufficient compressor oil to 2 new O-rings and the fitting surfaces of the cooler expansion valve.
Install the 2 O-rings onto the cooler evaporator.
Using a 4 mm hexagon wrench, install a new cooler expansion valve with the 2 hexagon bolts.
| 2. CONNECT AIR CONDITIONER TUBE AND ACCESSORY ASSEMBLY |
Remove the vinyl tape from air conditioner tube, liquid tube and the connecting portion of the unit.
Apply sufficient compressor oil (ND-OIL8) to 2 new O-rings and the connecting part of the air conditioner tube and liquid tube.
Install the 2 O-rings onto the air conditioner tube and liquid tube.
Securely connect the air conditioner tube and liquid tube to the air conditioning unit.
|
Turn the hook connector in the direction indicated by the arrow in the illustration.
Insert the pipe joints securely into the fitting holes and tighten the new bolt.
| 3. CHARGE REFRIGERANT |
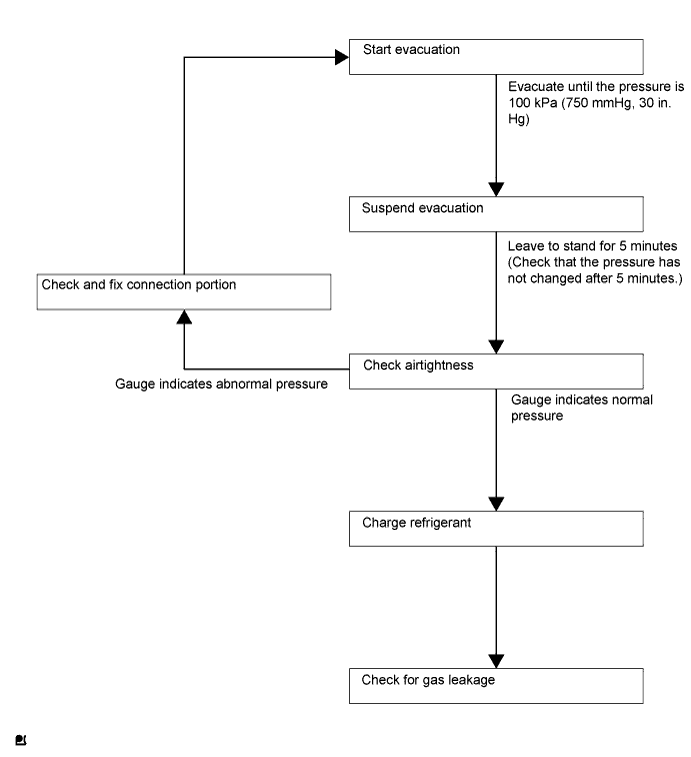
Perform vacuum purging using a vacuum pump.
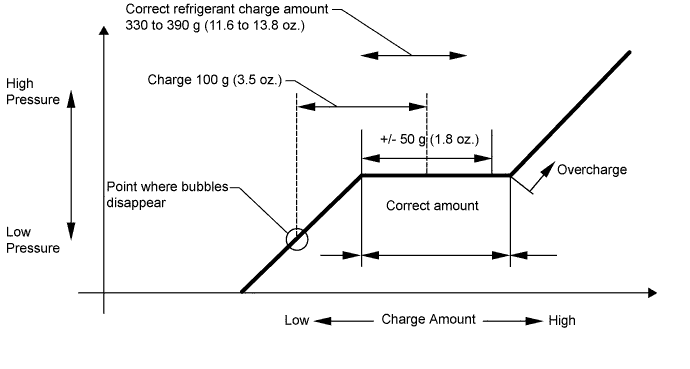
Charge refrigerant HFC-134a (R134a).
Install the caps onto the service valves on the refrigerant line.
| 4. WARM UP ENGINE |
| 5. INSPECT FOR REFRIGERANT LEAK |
After recharging the refrigerant gas, check for refrigerant gas leakage using a halogen leak detector.
Perform the operation as follows:
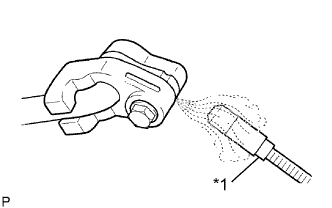 |
Using the halogen leak detector, check the refrigerant line, especially at the connection points, for leakage.
| *1 | Halogen Leak Detector |
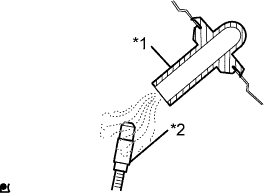 |
Bring the halogen leak detector close to the drain hose before performing the test.
| *1 | Drain Hose |
| *2 | Halogen Leak Detector |
If no gas leakage is detected from the drain hose, remove the blower motor from the cooling unit. Insert the halogen leak detector sensor into the unit and perform the test.
Disconnect the pressure switch connector and leave it for approximately 20 minutes. Bring the halogen leak detector close to the pressure switch and perform the test.