POWER DISTRIBUTION MAIN BODY ECU REMOVAL
PROCEDURE

 1.REMOVE LOWER INSTRUMENT PANEL
2.REMOVE DRIVER SIDE JUNCTION BLOCK ASSEMBLY WITH BODY COMPUTER (for RHD)
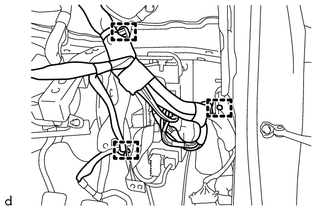
Disengage the 3 harness clamps.
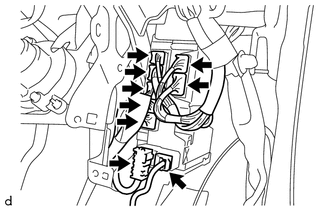
Disconnect the 9 connectors on the front side.
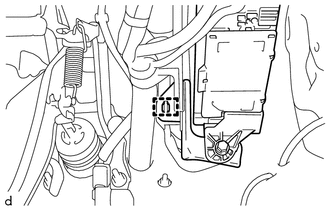
Disengage the harness clamp.
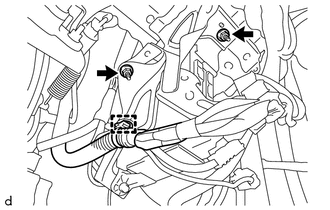
Disengage the harness clamp.
Remove the 2 nuts and separate the driver side junction block assembly with body computer.
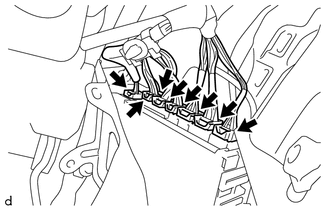
Disconnect the 8 connectors on the back side, and then remove the driver side junction block assembly with body computer.
3.REMOVE DRIVER SIDE JUNCTION BLOCK ASSEMBLY WITH BODY COMPUTER (for LHD)
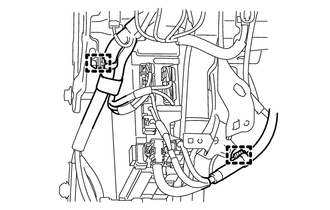
Disengage the 2 harness clamps.
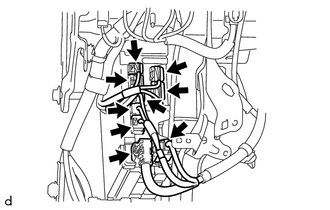
Disconnect the 9 connectors on the front side.
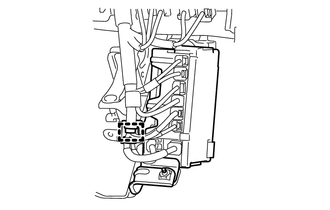
Disengage the harness clamp.
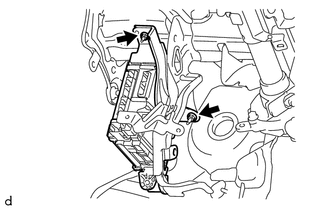
Remove the 2 nuts and separate the driver side junction block assembly with body computer.
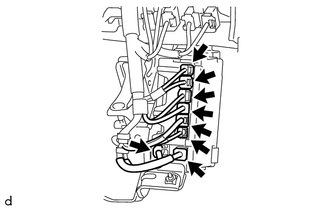
Disconnect the 8 connectors on the back side, and then remove the driver side junction block assembly with body computer.
4.REMOVE WIRING HARNESS CLAMP BRACKET
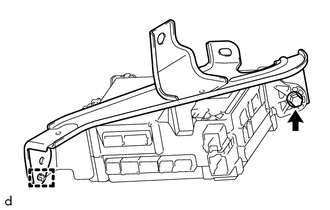
Remove the bolt.
Disengage the pin and remove the wiring harness bracket.
82673A
5.REMOVE JUNCTION BLOCK BRACKET (for Upper Side)
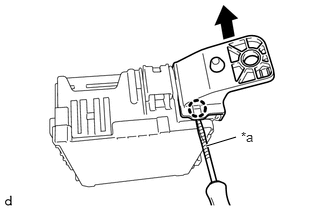
| *a | Protective Tape |
Using a screwdriver with its tip wrapped in protective tape, disengage the claw and remove the junction block bracket (for upper side).
82673B
6.REMOVE JUNCTION BLOCK BRACKET (for Lower Side)
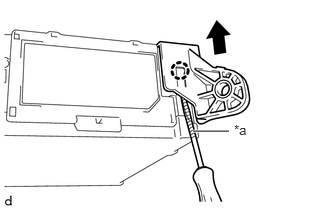
| *a | Protective Tape |
Using a screwdriver with its tip wrapped in protective tape, disengage the claw and remove the junction block bracket (for lower side).
89221B
7.REMOVE BODY COMPUTER
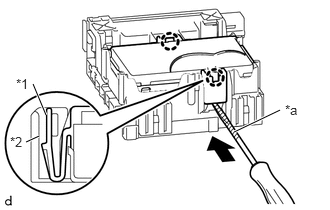
| *a | Protective Tape |
| *1 | Body Computer |
| *2 | Driver Side Junction Block Assembly |
Press in and hold the 2 tabs on the driver side junction block assembly side to disengage the 2 claws.
While pressing in the 2 tabs on the driver side junction block assembly side, insert a screwdriver with its tip wrapped in protective tape between the body computer and the driver side junction block assembly.
- NOTICE:
-
Use a blade screwdriver with a diameter of 5.0 to 6.3 mm (0.197 to 0.248 in.), and with a length of 90 mm or more.
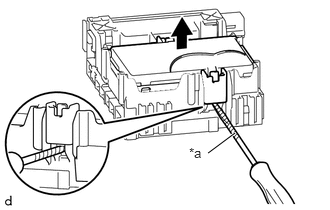
| *a | Protective Tape |
Do not pry the inserted screwdriver. Lift up the body computer to the point where the lock releases.
- NOTICE:
- ·
Do not twist the screwdriver to raise the body computer.
- ·
If any terminals of the connectors, locking parts or cases are deformed or damaged, replace the driver side junction block assembly or the body computer.
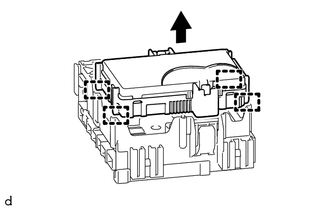
Disengage the 4 guides and remove the body computer by pulling it out from the driver side junction block assembly.