HEATING / AIR CONDITIONING AIR CONDITIONING PANEL(for Manual Air Conditioning System) INSTALLATION
PROCEDURE

 55901D
1.INSTALL NO. 1 HEATER CONTROL SUB-ASSEMBLY
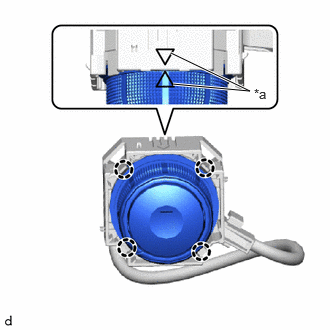
| *a | Alignment Mark |
Engage the claws to install the No. 1 heater control sub-assembly as shownin the illustration.
- NOTICE:
-
Before installing the No. 1 heater control sub-assembly, align the alignment mark of the dial side with the alignment mark of the cable side as shown in the illustration.
55903A
2.INSTALL NO. 3 HEATER CONTROL SUB-ASSEMBLY
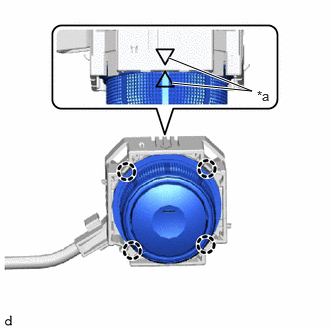
| *a | Alignment Mark |
Engage the claws to install the No. 3 heater control sub-assembly as shown in the illustration.
- NOTICE:
-
Before installing the No. 3 heater control sub-assembly, align the alignment mark of the dial side with the alignment mark of the cable side as shown in the illustration.
55902E
3.INSTALL NO. 2 HEATER CONTROL SUB-ASSEMBLY
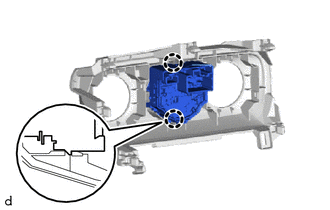
Engage the claws to install the No. 2 heater control sub-assembly.
55406B
4.INSTALL INSTRUMENT CLUSTER FINISH LOWER CENTER PANEL SUB-ASSEMBLY
Engage the claws to install the instrument cluster finish lower center panel sub-assembly as shown in the illustration.
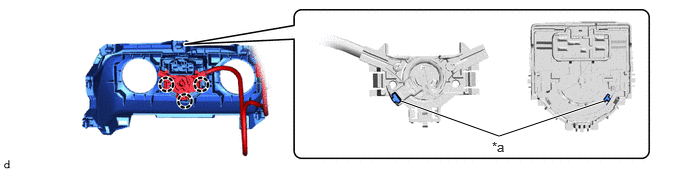
| *a | Alignment Mark | - | - |
- NOTICE:
-
Before installing the instrument cluster finish lower center panel sub-assembly, align the alignment mark of the dial side with the alignment mark of the cable side as shown in the illustration.
Connect the 3 connectors.
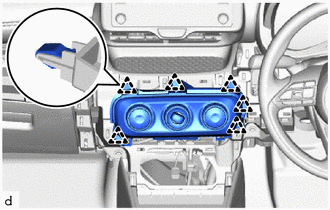
Engage the clips to install the instrument cluster finish lower center panel sub-assembly.
55480D
5.INSTALL LOWER INSTRUMENT PANEL FINISH PANEL ASSEMBLY