M15A-FKS ENGINE MECHANICAL CYLINDER HEAD DISASSEMBLY
CAUTION / NOTICE / HINT
The necessary procedures (adjustment, calibration, initialization, or registration) that must be performed after parts are removed and installed, or replaced during cylinder head removal/installation are shown below.
| Replaced Part or Performed Procedure | Necessary Procedure | Effect/Inoperative Function when Necessary Procedure not Performed | Link |
|---|---|---|---|
| Cylinder head sub-assembly | Inspection after repair | ·
Poor idle, etc. ·
Engine start function, etc. |
( ) |
PROCEDURE

 13711
1.REMOVE INTAKE VALVE
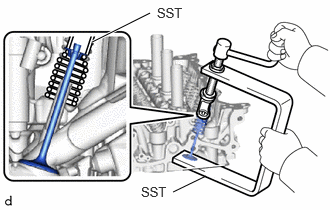
Using SST, compress each compression spring and remove the 6 valve spring retainer locks.
- SST
- 09202-70020 (09202-01010, 09202-01020)
09202-00021
- HINT:
-
Arrange the removed parts in such a way that they can be reinstalled to their original locations.
Remove the 6 valve spring retainers, 6 compression springs and 6 intake valves from the cylinder head sub-assembly.
- HINT:
-
Arrange the removed parts in such a way that they can be reinstalled to their original locations.
13715
2.REMOVE EXHAUST VALVE
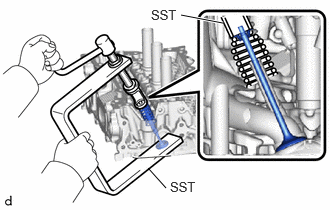
Using SST, compress each compression spring and remove the 6 valve spring retainer locks.
- SST
- 09202-70020 (09202-01010, 09202-01020)
09202-00021
- HINT:
-
Arrange the removed parts in such a way that they can be reinstalled to their original locations.
Remove the 6 valve spring retainers, 6 compression springs and 6 exhaust valves from the cylinder head sub-assembly.
- HINT:
-
Arrange the removed parts in such a way that they can be reinstalled to their original locations.
3.REMOVE VALVE STEM OIL SEAL
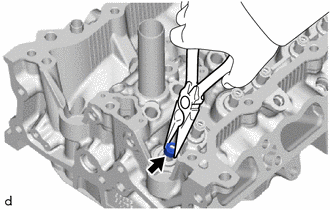
Using needle-nose pliers, remove the 12 valve stem oil seals.
4.REMOVE VALVE SPRING SEAT
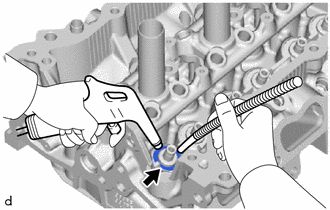
Using compressed air and a Magnet Hand, remove the 12 valve spring seats from the cylinder head sub-assembly by blowing air onto them.
11117E
5.REMOVE NO. 1 STRAIGHT SCREW PLUG
- NOTICE:
-
If coolant leaks from a No. 1 straight screw plug or a plug is corroded, replace it.
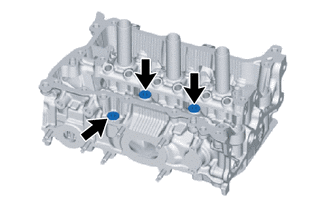
Using a 6 mm straight hexagon wrench, remove the 3 No. 1 straight screw plugs from the cylinder head sub-assembly.
11117F
6.REMOVE NO. 2 STRAIGHT SCREW PLUG
- NOTICE:
-
If coolant leaks from a No. 2 straight screw plug or a plug is corroded, replace it.
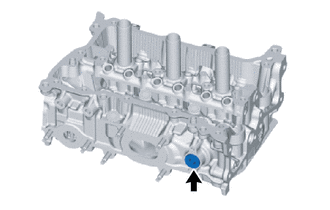
Using a 10 mm straight hexagon wrench, remove the No. 2 straight screw plug from the cylinder head sub-assembly.
7.REMOVE STUD BOLT
- NOTICE:
-
If a stud bolt is deformed or its threads are damaged, replace it.
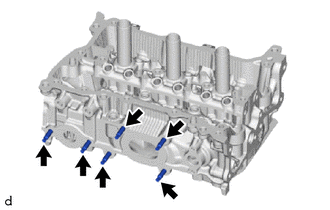
Using an E8 "TORX" socket wrench, remove the 6 stud bolts.