EXTERIOR PANELS / TRIM NAME PLATE(for 3 Door) REMOVAL
CAUTION / NOTICE / HINT
- HINT:
-
When removing the name plates, heat the vehicle body, back door outside garnish and name plates using a heat light.
| Item | Temperature |
|---|---|
| Vehicle Body | 40 to 60°C (104 to 140°F) |
·
Back Door Outside Garnish ·
Name Plates |
20 to 30°C (68 to 86°F) |
- CAUTION:
-
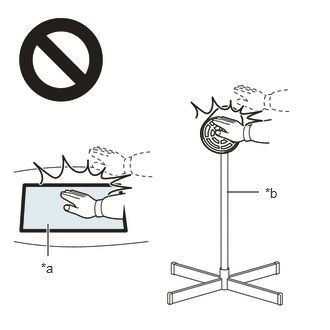 2.365,2 2.698,2 false 0.5,2.333 0.5,2.667 true 0.427,2.708 0.74,2.865 0.313,0.156 10 false *a 2.76,1.927 3.073,2.083 0.313,0.156 10 false *b
*a Heated Part *b Heat Light
- ·
Do not touch the heat light and heated parts, touching the heat light may result in burns.
·Touching heated parts for a long time may result in burns.
- NOTICE:
-
Do not heat the vehicle body, back door outside garnish or name plates excessively.
PROCEDURE

 75741E
1.REMOVE SYMBOL EMBLEM
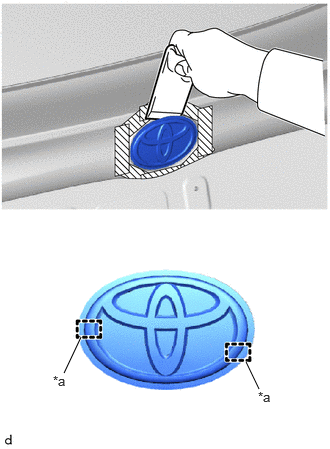
| *a | Location Pin |

|
Protective Tape |
Apply protective tape around the symbol emblem as shown in the illustration.
Using a moulding remover D, separate the double-sided tape and disengage the location pins to remove the symbol emblem.
- NOTICE:
-
Be careful not to damage the back door outside garnish.
Remove the protective tape.
75444A
2.REMOVE NO. 4 BACK DOOR NAME PLATE
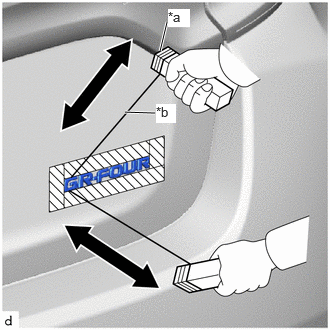
| *a | Wooden Block |
| *b | Piano Wire |
|
|
Protective Tape |
Apply protective tape around the No. 4 back door name plate as shown in the illustration.
Insert a piano wire between the vehicle body and No. 4 back door name plate.
Tie objects that can serve as handles (for example, wooden blocks) to both wire ends.
Pull the piano wire and cut the double-sided tape that holds the No. 4 back door name plate to the vehicle body to remove the No. 4 back door name plate.
- NOTICE:
-
Be careful not to damage the vehicle body.
Remove the protective tape.
75442A
3.REMOVE NO. 2 BACK DOOR NAME PLATE
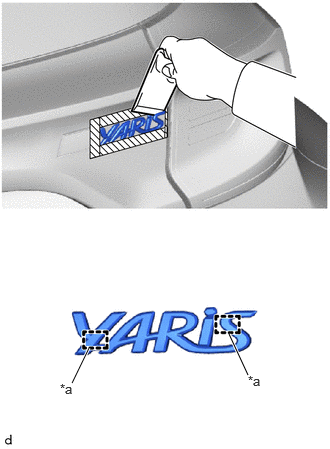
| *a | location pin |
|
|
Protective Tape |
Apply protective tape around the No. 2 back door name plate as shown in the illustration.
Using a moulding remover D, separate the double-sided tape and disengage the location pins to remove the No. 2 back door name plate.
- NOTICE:
-
Be careful not to damage the back door outside garnish.
Remove the protective tape.
75441E
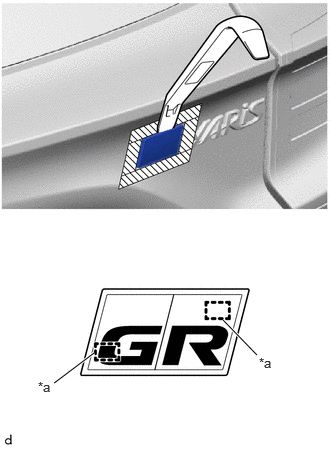
4.REMOVE NO. 1 BACK DOOR NAME PLATE
| *a | location pin |
|
|
Protective Tape |
Apply protective tape around the No. 1 back door name plate as shown in the illustration.
Using a moulding remover A, separate the double-sided tape and disengage the location pins to remove the No. 1 back door name plate.
- NOTICE:
-
Be careful not to damage the back door outside garnish.
Remove the protective tape.
75361A
5.REMOVE NO. 1 FRONT FENDER NAME PLATE
- HINT:
-
Use the same procedure for the RH side and LH side.
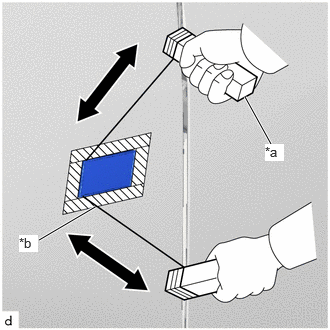
| *a | Wooden Block |
| *b | Piano Wire |
|
|
Protective Tape |
Apply protective tape around the No. 1 front fender name plate as shown in the illustration.
Insert a piano wire between the vehicle body and No. 1 front fender name plate.
Tie objects that can serve as handles (for example, wooden blocks) to both wire ends.
Pull the piano wire and cut the double-sided tape that holds the No. 1 front fender name plate to the vehicle body to remove the No. 1 front fender name plate.
- NOTICE:
-
Be careful not to damage the vehicle body.
Remove the protective tape.