REAR SUSPENSION REAR COIL SPRING(for TMMF, TMMCZ Made) REMOVAL
CAUTION / NOTICE / HINT
The necessary procedures (adjustment, calibration, initialization, or registration) that must be performed after parts are removed and installed, or replaced during the rear coil spring removal/installation are shown below.
| Replacement Part or Procedure | Necessary Procedures | Effect/Inoperative Function When Necessary Procedures are not Performed | Link |
|---|---|---|---|
| for HV Model:
Auxiliary battery terminal is disconnected/reconnected |
Memorize steering angle neutral point | Parking assist monitor system | ( ) |
| Rear wheel alignment adjustment | for HV Model:
1.
Perform "Reset Memory" 2.
Perform calibration (linear solenoid valve offset learning, SM solenoid valve offset learning, brake pedal stroke sensor assembly zero point calibration, system information memorization, and yaw rate and acceleration sensor zero point calibration) |
·
DTCs are stored ·
ABS warning light illuminates ·
Brake system warning light (yellow indicator) ·
Slip indicator light illuminates ·
VSC disabled or malfunctions |
()
|
| for Gasoline Model:
Calibration |
·
DTCs are stored ·
ABS warning light illuminates ·
Slip indicator light illuminates ·
VSC disabled or malfunctions |
()
|
|
| Suspension, tires, etc.
(The vehicle height changes because of suspension or tire replacement.) |
·
Ultrasonic sensor detection angle ·
Ultrasonic sensor detection angle registration |
Parking support brake system | ()
|
| Rear television camera assembly optical axis (Back camera position setting) | Parking assist monitor system | ()
|
- HINT:
- for HV Model
- ·
When the cable is disconnected/reconnected to the auxiliary battery terminal, systems temporarily stop operating. However, each system has a function that completes learning the first time the system is used.
-Learning completes when vehicle is driven
Effect/Inoperative Function When Necessary Procedures are not Performed Necessary Procedures Link Lane tracing assist system Drive the vehicle straight ahead at 35 km/h (22 mph) or more for 5 seconds or more. ( )
Pre-collision system
-Learning completes when vehicle is operated normally
Effect/Inoperative Function When Necessary Procedures are not Performed Necessary Procedures Link Power door lock control system
·Back door opener
Perform door unlock operation with door control switch or electrical key transmitter sub-assembly switch. ( )
Air conditioning system After the ignition switch is turned to ON, the servo motor standard position is recognized. -
- HINT:
- ·
Use the same procedure for the RH and LH sides.
·The following procedure is for the LH side.
PROCEDURE

 1.REMOVE REAR WHEEL
2.DRAIN BRAKE FLUID (for Rear Drum Brake)
- NOTICE:
-
Immediately wash off any brake fluid that comes into contact with any painted surfaces.
89516D
3.SEPARATE SKID CONTROL SENSOR WIRE LH (for Rear Drum Brake)
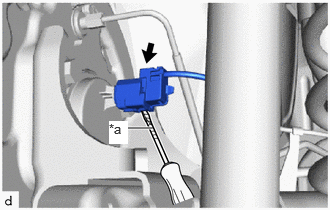
| *a | Protective Tape |
Using a screwdriver with its tip wrapped with protective tape, disengage the claw of the connector lock portion and disconnect the skid control sensor wire LH connector.
- NOTICE:
-
Do not remove the connector cover from the connector because the skid control sensor wire may be damaged.
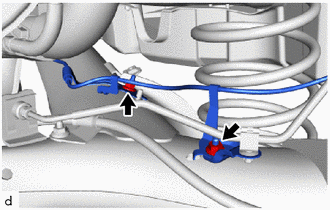
Remove the 2 nuts and separate the skid control sensor wire LH.
89516C
4.SEPARATE SKID CONTROL SENSOR WIRE RH (for Rear Drum Brake)
- HINT:
-
Perform the same procedure as for the LH side.
47319F
5.SEPARATE REAR FLEXIBLE HOSE LH (for Rear Drum Brake)
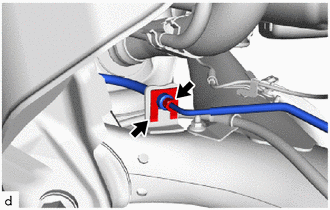
Using a union nut wrench 10 mm, disconnect the brake tube while holding the rear flexible hose with a wrench.
- NOTICE:
- ·
Do not kink or damage the brake line.
·Do not allow any foreign matter such as dirt and dust to enter the brake line.
Remove the clip and disconnect the rear flexible hose LH from the rear axle beam assembly.
47318F
6.SEPARATE REAR FLEXIBLE HOSE RH (for Rear Drum Brake)
- HINT:
-
Perform the same procedure as for the LH side.
46430
7.SEPARATE NO. 3 PARKING BRAKE CABLE ASSEMBLY (for Rear Drum Brake)
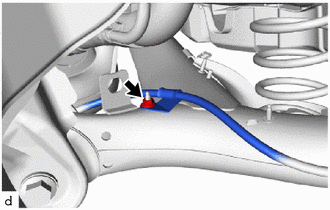
Remove the nut and separate the No. 3 parking brake cable assembly.
46420
8.SEPARATE NO. 2 PARKING BRAKE CABLE ASSEMBLY (for Rear Drum Brake)
- HINT:
-
Perform the same procedure as for the No. 3 side.
9.SEPARATE NO. 2 PARKING BRAKE WIRE ASSEMBLY (for Rear Disc Brake)
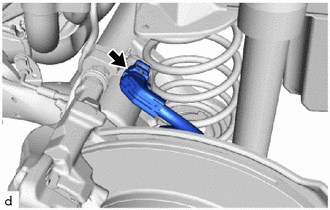
Disconnect the No. 2 parking brake wire assembly connector from the parking brake actuator assembly.
- NOTICE:
- ·
Remove any dirt or foreign matter on and around the No. 2 parking brake wire assembly connector before performing this step.
·Do not allow water, oil or dirt to enter the No. 2 parking brake wire assembly connector.
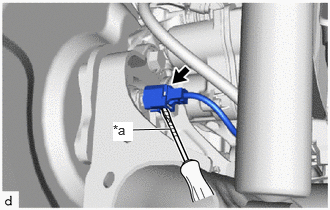
| *a | Protective Tape |
Using a screwdriver with its tip wrapped with protective tape, disconnect the No. 2 parking brake wire assembly connector from the rear axle hub and bearing assembly.
- NOTICE:
-
Be careful not to damage the rear axle hub and bearing assembly or connector cover.
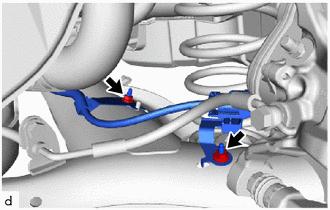
Remove the 2 nuts and separate the No. 2 parking brake wire assembly.
10.SEPARATE NO. 1 PARKING BRAKE WIRE ASSEMBLY (for Rear Disc Brake)
- HINT:
-
Perform the same procedure as for the No. 2 side.
11.SEPARATE REAR FLEXIBLE HOSE LH (for Rear Disc Brake)
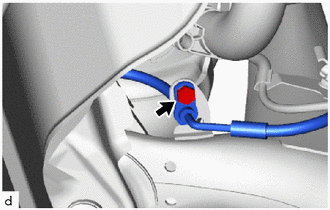
Remove the bolt and separate the rear flexible hose LH.
12.SEPARATE REAR FLEXIBLE HOSE RH (for Rear Disc Brake)
- HINT:
-
Perform the same procedure as for the LH side.
13.SEPARATE REAR DISC BRAKE CALIPER ASSEMBLY LH (for Rear Disc Brake)
14.SEPARATE REAR DISC BRAKE CALIPER ASSEMBLY RH (for Rear Disc Brake)
- HINT:
-
Perform the same procedure as for the LH side.
48231B
15.REMOVE REAR COIL SPRING LH
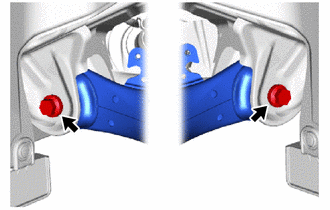
Loosen the 2 bolts.
- NOTICE:
-
Do not remove the bolts.
Support the spring seat of the rear axle beam assembly using 2 jacks and 2 wooden blocks.
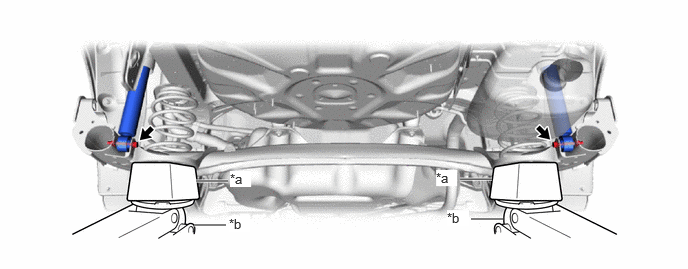
| *a | Wooden Block | *b | Jack |
- CAUTION:
-
Do not jack up the rear axle beam assembly too high as the vehicle may fall.
Remove the 2 bolts and 2 nuts, and separate the rear axle beam assembly from the rear shock absorber assemblies LH and RH.
- NOTICE:
-
Because the nut has its own stopper, do not turn the nut. Loosen the bolt with the nut fixed in place.
Slowly lower the rear axle beam assembly using 2 jacks and 2 wooden blocks, and remove the rear coil spring.
Slowly jack up the rear axle beam assembly using 2 jacks and 2 wooden blocks, and temporarily install the rear axle beam assembly to the rear shock absorber assemblies LH and RH with the 2 bolts and 2 nuts.
- NOTICE:
-
Because the nut has its own stopper, do not turn the nut. Tighten the bolt with the nut secured.
48259A
16.REMOVE REAR UPPER COIL SPRING INSULATOR
Remove the rear upper coil spring insulator.
48258C
17.REMOVE REAR LOWER COIL SPRING INSULATOR
Remove the rear lower coil spring insulator.