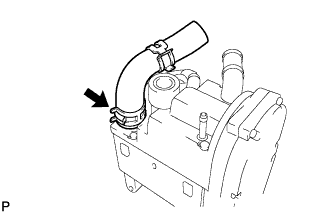
REMOVAL
Removal / installation · Vehicles built from Nov 2005
| 1. DISCONNECT CABLE FROM NEGATIVE BATTERY TERMINAL |
| 2. DRAIN ENGINE COOLANT |

- CAUTION:
- To avoid the danger of being burned, do not remove the radiator cap while the engine and radiator are still hot. Thermal expansion will cause hot engine coolant and steam to blow out from the radiator.
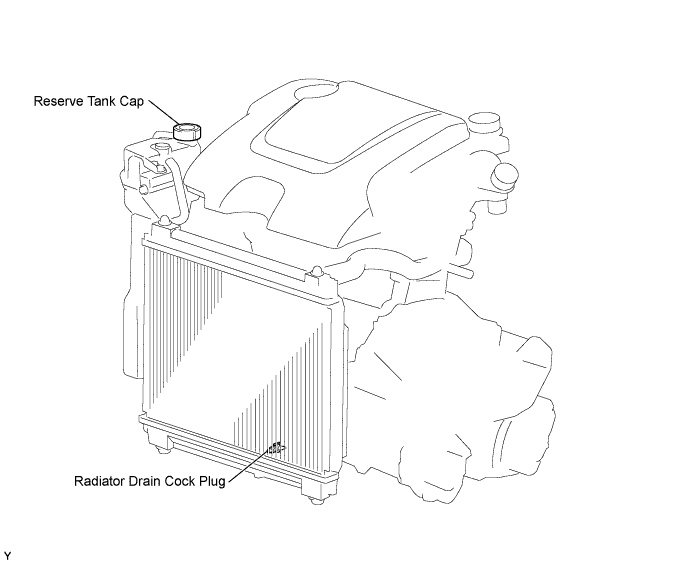
Loosen the radiator drain cock plug.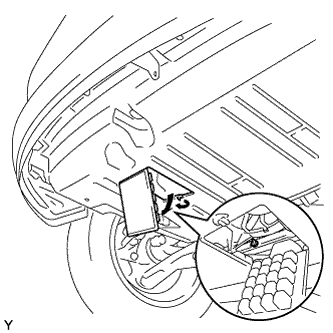

Remove the reserve tank cap and drain the coolant.
Tighten the radiator drain cock plug.
| 3. REMOVE ENGINE COVER SUB-ASSEMBLY NO. 1 |
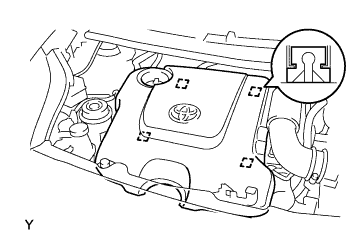 |
Disengage the 4 pins and remove engine cover No. 1.
| 4. REMOVE FRONT WIPER ARM HEAD CAP |
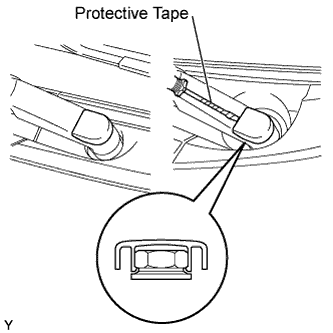 |
Using a screwdriver with its tip wrapped in protective tape, disengage the claw and remove the 2 front wiper arm head caps.
| 5. REMOVE FRONT WIPER ARM AND BLADE ASSEMBLY LH |
Operate the wiper, then stop the windshield wiper motor in the automatic stop position.
Remove the nut and front wiper arm.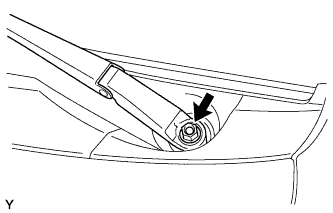
| 6. REMOVE FRONT WIPER ARM AND BLADE ASSEMBLY RH |
- HINT:
- Use the same procedure as for the LH side.
| 7. REMOVE HOOD TO COWL TOP SEAL |
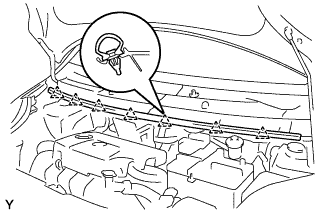 |
Disengage the 7 clips and remove the hood to cowl top seal.
| 8. REMOVE COWL TOP VENTILATION LOUVER SUB-ASSEMBLY (for LHD) |
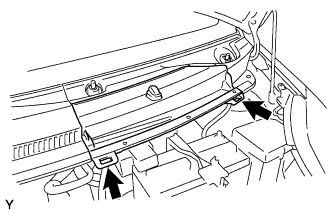 |
Disengage the 2 hooks and remove cowl top ventilator louver center No. 1.
Disconnect the washer hose.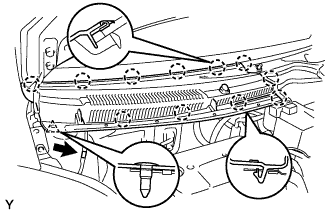
Disengage the 11 claws and clip.
Disconnect the washer hose and remove the cowl top ventilator louver sub-assembly.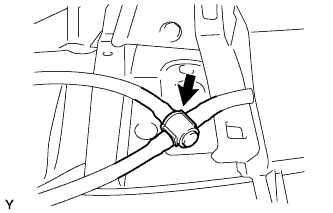
| 9. REMOVE COWL TOP VENTILATOR LOUVER LH (for LHD) |
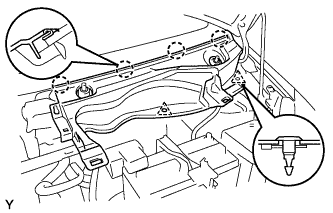 |
Remove the 2 clips.
Disengage the 4 claws and remove the cowl top ventilator louver LH.
| 10. REMOVE FRONT WIPER MOTOR AND LINK |
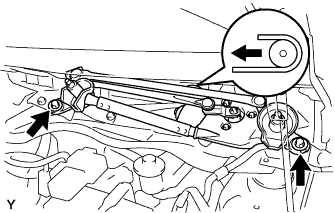 |
Remove the 2 bolts.
Slide the wiper link. Disengage the meshing of the rubber pin, then disconnect the connector and remove the front wiper motor and link.
| 11. REMOVE NO. 2 COWL TO REGISTER DUCT SUB-ASSEMBLY |
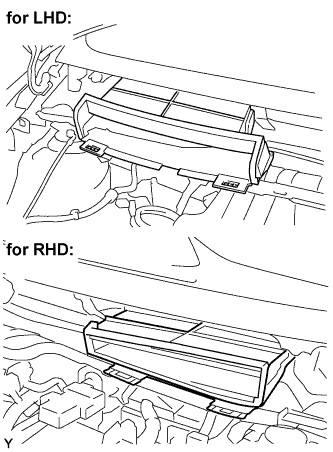 |
Disengage the claws, and remove cowl to resister duct No. 2.
| 12. REMOVE COWL TOP PANEL OUTER |
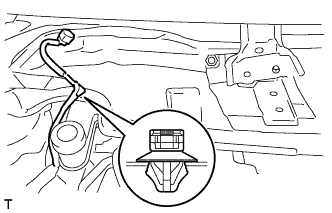 |
Disengage the wire harness clamp.
Remove the 9 bolts and remove the cowl top panel outer.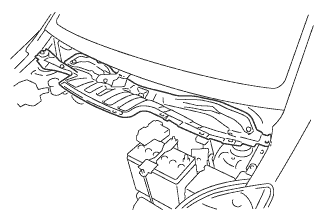
| 13. REMOVE ECM |
Remove the 2 lock knobs and harness clamp.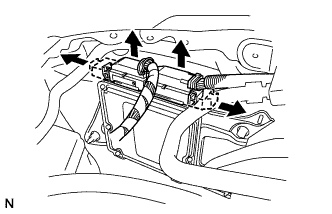
Disconnect the 2 ECM connectors.
Remove the 2 bolts and separate the brake booster vacuum pipe.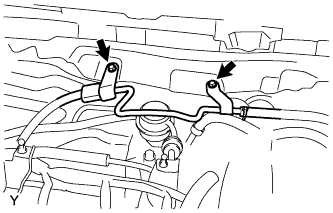
Remove the 2 nuts and separate the water pipe.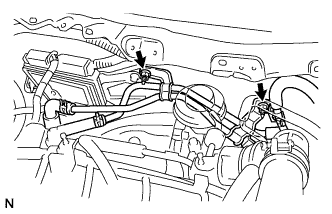
Remove the bolt, 2 nuts and the ECM.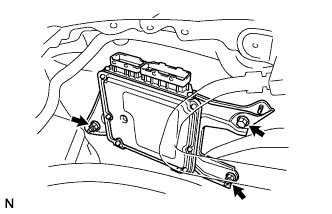
| 14. REMOVE EXHAUST PIPE SUB-ASSEMBLY |
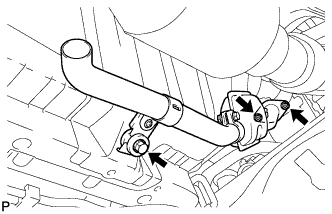 |
Remove the bolt and 2 nuts and remove the exhaust pipe.
| 15. REMOVE HEATER ASSEMBLY |
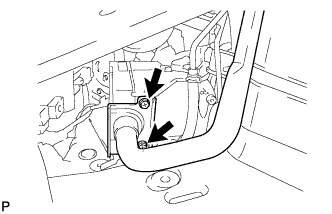 |
Remove the 2 bolts.
Disconnect the 2 clamps.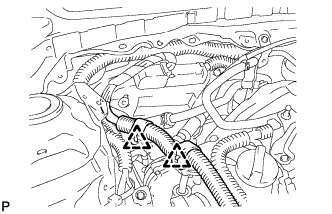
Disconnect the connector and the fuel hose.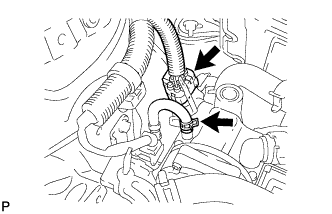
Remove the bolt and the nut.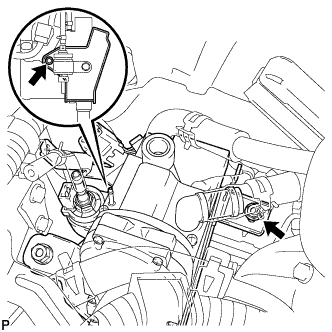
Disconnect the 2 water hoses and remove the heater assembly.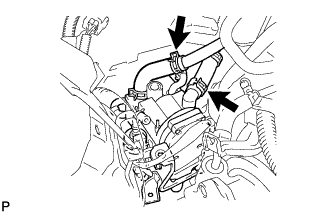
Disconnect the connector and the clamp.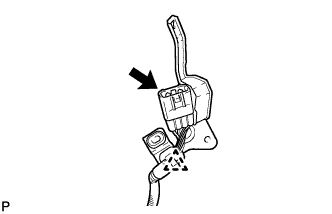
Disconnect the clamp.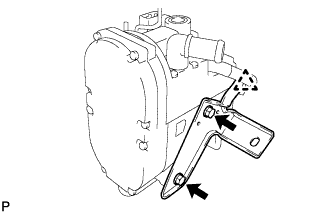
Remove the 2 bolts and the bracket.
Remove the water hose.