REMOVAL
Removal / installation · Vehicles built from Nov 2005
| 1. CLUTCH POSITION ADJUSTMENT |

- NOTICE:
- Remove the clutch actuator with the rod in the predetermined position. Otherwise, it may cause clutch slipping or operational malfunctions when reinstalling.
| 2. DISCONNECT CABLE FROM NEGATIVE BATTERY TERMINAL |
| 3. REMOVE NO.1 AIR CLEANER HOSE |
Loosen the hose clamp and disconnect No. 1 air cleaner hose.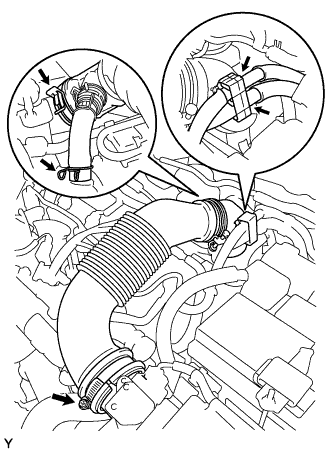

Disconnect the 2 fuel hoses.
Loosen the 2 clips and disconnect No. 1 air cleaner hose.
| 4. REMOVE AIR CLEANER ASSEMBLY |
| 5. REMOVE CLUTCH ACTUATOR ASSEMBLY |
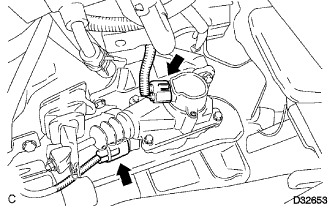 |
Disconnect the clutch stoke sensor connector and motor connector.
- NOTICE:
- Do not forcibly pull the connectors as this may damage the wire harness.
Remove the 3 bolts and clutch actuator assembly.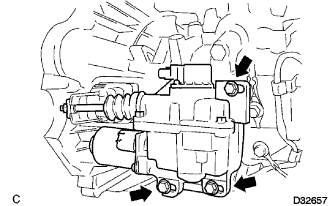
- NOTICE:
- Loosen the bolts slowly, and be careful not to get your fingers caught as the clutch actuator assembly moves due to reaction force from the clutch cover.
- Do not drop the removed clutch actuator assembly or impact it in any way.
- Do not loosen the nut on the rod tip.
- Loosen the bolts slowly, and be careful not to get your fingers caught as the clutch actuator assembly moves due to reaction force from the clutch cover.