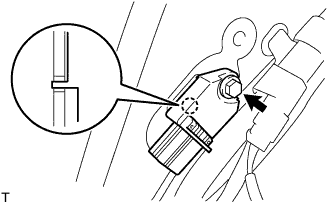
REMOVAL
Removal / installation · Vehicles built from Nov 2005
- CAUTION:
- Some of these service operations affect the SRS airbag system. Read the precautionary notices concerning the SRS airbag system before servicing (Click here).
- NOTICE:
- Always use "Torx" socket wrench E10 when removing the rear seat.
- HINT:
- The procedure described below is for the RH side. Use the same procedure for both the RH and LH sides, unless otherwise specified.
| 1. DISCONNECT CABLE FROM NEGATIVE BATTERY TERMINAL |
| 2. REMOVE PACKAGE TRAY TRIM PANEL ASSEMBLY (w/ Package Tray Trim) |

Remove the 2 package tray trim suspenders.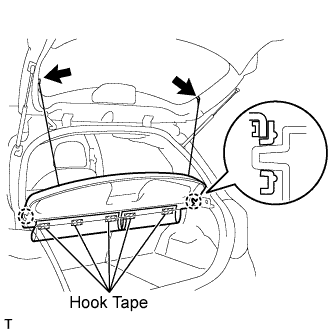

Remove the 5 pieces of hook tape.
Disengage the 2 claws and remove the package tray trim.
| 3. REMOVE DECK BOARD SUB-ASSEMBLY (w/ Deck Board) |
Release the 2 knobs and remove the deck board.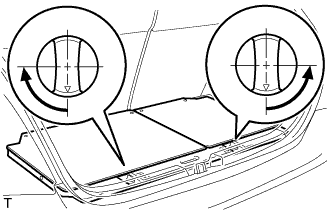
| 4. REMOVE SPARE WHEEL COVER ASSEMBLY (w/ Deck Board) |
Remove the spare wheel cover.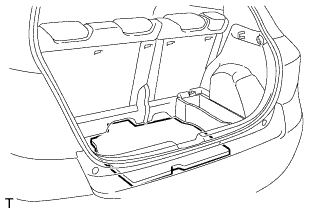
| 5. REMOVE DECK FLOOR BOX RH (w/ Deck Board) |
Release the 2 knobs and remove the deck floor box.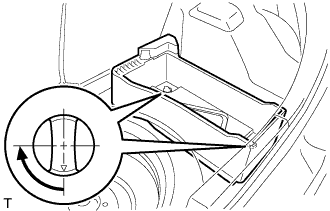
| 6. REMOVE DECK FLOOR BOX LH (w/ Deck Board) |
- HINT:
- Use the same procedure as for the RH side.
| 7. REMOVE REAR FLOOR CARPET ASSEMBLY (w/o Deck Board) |
Remove the rear floor carpet.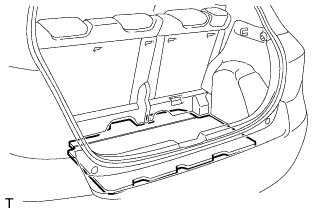
| 8. REMOVE NO. 1 REAR SEAT LEG COVER |
Disengage the 4 claws and remove the No. 1 rear seat leg cover.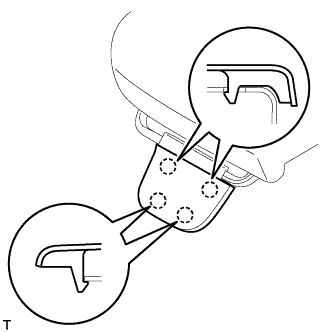
| 9. REMOVE NO. 2 REAR SEAT LEG COVER |
Disengage the 6 claws and remove the No. 2 rear seat leg cover.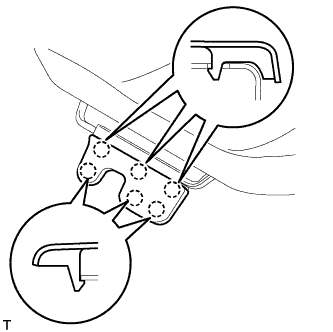
| 10. REMOVE REAR SEAT ASSEMBLY RH |
Using "Torx" socket wrench E10, remove the 2 bolts and pull up the rear seat cushion.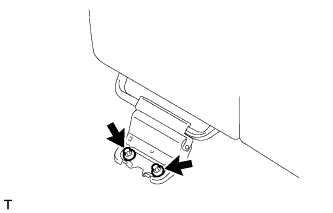
Using "Torx" socket wrench E10, remove the 2 bolts and rear seat.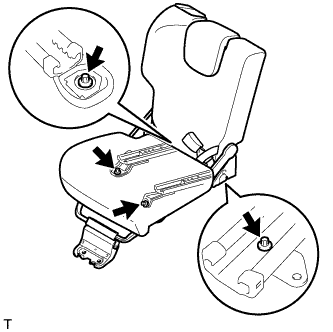
| 11. REMOVE REAR SEAT ASSEMBLY LH |
Using "Torx" socket wrench E10, remove the 3 bolts and pull up the rear seat cushion.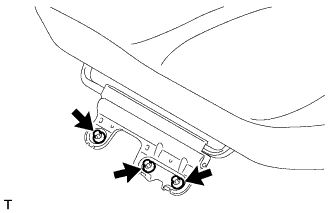
Using "Torx" socket wrench E10, remove the 4 bolts and the rear seat.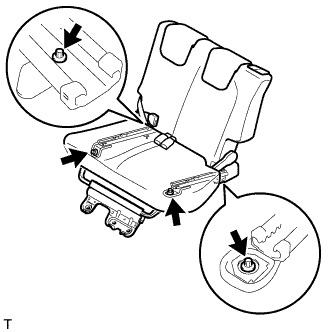
| 12. REMOVE DECK TRIM COVER |
for Grand Tire: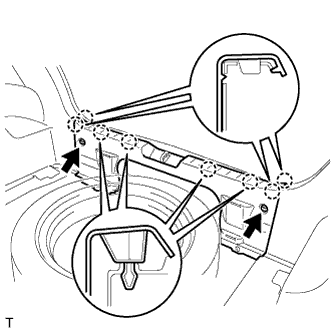
Using a clip remover, remove the 2 clips.
Disengage the 8 claws and remove the rear deck trim cover.
for Temper Spare Tire: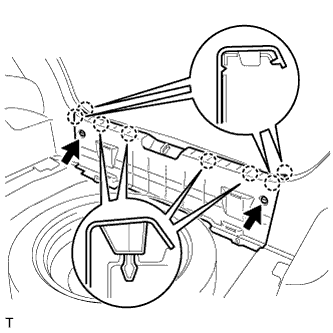
Using a clip remover, remove the 2 clips.
Disengage the 8 claws and remove the rear deck trim cover.
| 13. REMOVE REAR DOOR SCUFF PLATE RH |
Disengage the 6 claws and remove the rear door scuff plate.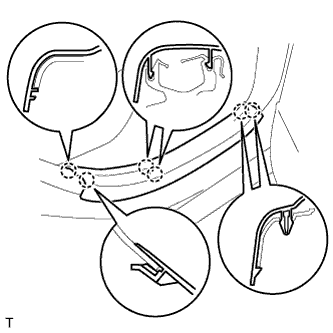
| 14. REMOVE REAR DOOR OPENING TRIM WEATHERSTRIP RH |
Remove the front door opening trim weatherstrip.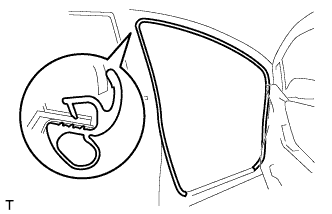
| 15. REMOVE REAR SEAT OUTER BELT ASSEMBLY RH |
Remove the belt.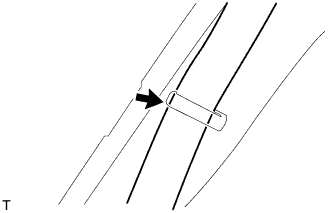
Remove the bolt.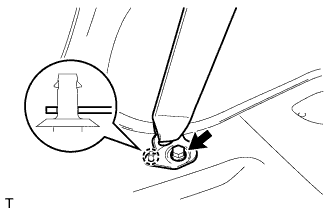
Disengage the clip and remove the anchor plate.
| 16. REMOVE DECK TRIM SIDE PANEL ASSEMBLY RH |
w/ Package Tray Trim: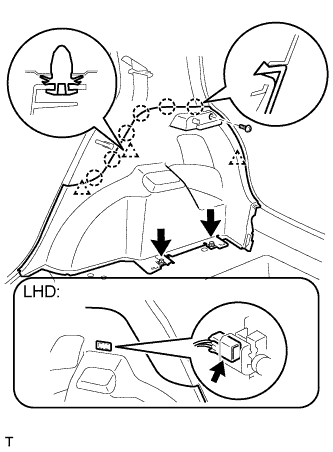
Remove the 3 screws.
Disengage the 3 clips and the 6 claws and remove the deck trim side panel.
- HINT:
- When removing the deck trim side panel assembly LH from the vehicle with the luggage compartment room light, disconnect the room light connector and then remove the deck trim side panel assembly.
w/o Package Tray Trim: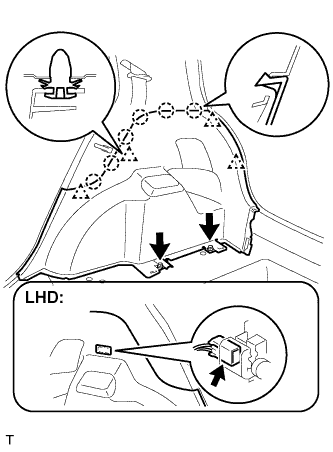
Remove the 3 screws.
Disengage the 4 clips and the 6 claws and remove the deck trim side panel.
- HINT:
- When removing the deck trim side trim side panel assembly LH from the vehicle with the luggage compartment room light, disconnect the room light connector and then remove the deck trim side panel assembly..
| 17. REMOVE AIR BAG SENSOR REAR RH |
- CAUTION:
- Confirm that the negative battery terminal is disconnected before performing the operation. Even an impact to only the airbag sensor will cause the airbag to deploy.
Slide the outer housing and detach the airbag connector.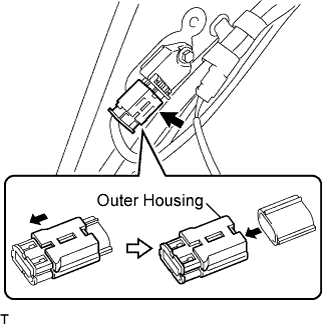
Engage the bolt and hook and remove the airbag sensor.