REMOVAL
Removal / installation · Vehicles built from Jan 2006
| 1. DISCONNECT CABLE FROM NEGATIVE BATTERY TERMINAL |
| 2. REMOVE SHIFT LEVER KNOB SUB-ASSEMBLY |

Remove the shift lever knob sub-assembly from the shift lever.
| 3. REMOVE INSTRUMENT PANEL FINISH PANEL LOWER CENTER |
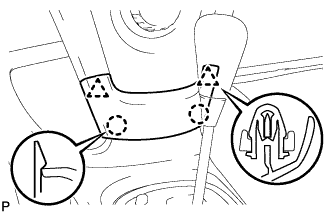  |
Disengage the 2 claws and 2 clips and remove the instrument panel finish panel lower center.
| 4. REMOVE UPPER CONSOLE PANEL SUB-ASSEMBLY |
Shift the shift lever into the N position.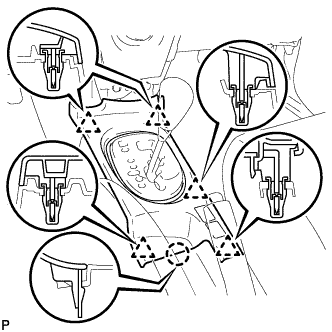
Disengage the 5 clips and the claw and remove the upper console panel.
| 5. REMOVE CONSOLE UPPER REAR PANEL SUB-ASSEMBLY |
Disengage the 3 clips and 3 claws.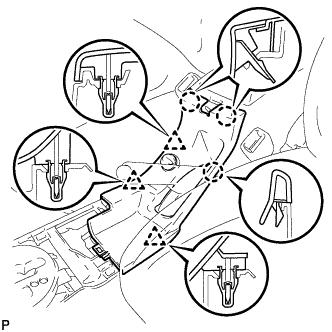
Disconnect the connector and remove the console upper rear panel.
| 6. REMOVE CONSOLE BOX CARPET |
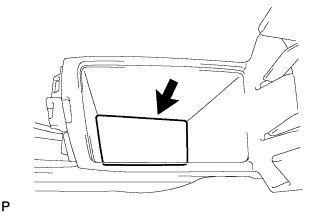 |
Remove the console box carpet.
| 7. REMOVE REAR CONSOLE BOX ASSEMBLY |
Disconnect the clamp.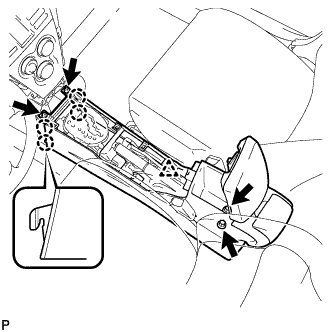
Remove the 2 bolts and 2 screws.
Disengage the 4 claws and remove the rear console box.
| 8. SEPARATE TRANSMISSION CONTROL CABLE ASSEMBLY |
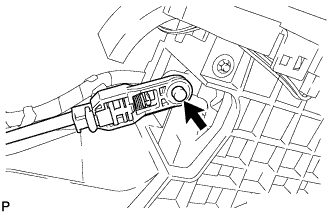 |
Disconnect the control cable from the shift lever.
Turn the nut and separate the control cable from the shift lever retainer.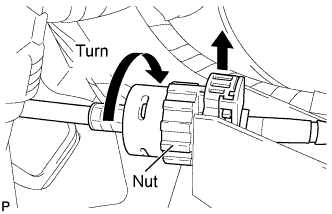
| 9. REMOVE FLOOR SHIFT ASSEMBLY |
Separate the shift lock control computer connector and indicator wire connector.
Separate the 2 wire harness clamps from the shift lever.
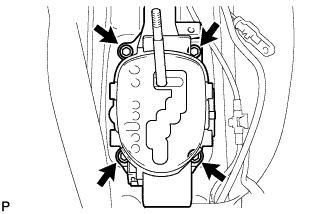
Remove the 4 bolts and remove the shift lever.