REMOVAL
Removal / installation · Vehicles built from Nov 2005
| 1. DISCONNECT CABLE FROM NEGATIVE BATTERY TERMINAL |
| 2. REMOVE FRONT WIPER ARM HEAD CAP |

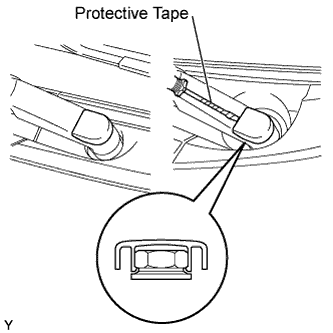  |
Using a screwdriver with its tip wrapped in protective tape, disengage the claw and remove the 2 front wiper arm head caps.
| 3. REMOVE FRONT WIPER ARM AND BLADE ASSEMBLY LH |
Operate the wiper, then stop the windshield wiper motor in the automatic stop position.
Remove the nut and front wiper arm.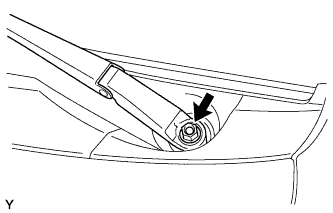
| 4. REMOVE FRONT WIPER ARM AND BLADE ASSEMBLY RH |
- HINT:
- Use the same procedure as for the LH side.
| 5. REMOVE HOOD TO COWL TOP SEAL |
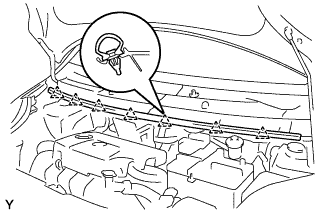 |
Disengage the 7 clips and remove the hood to cowl top seal.
| 6. REMOVE COWL TOP VENTILATOR LOUVER SUB-ASSEMBLY (for LHD) |
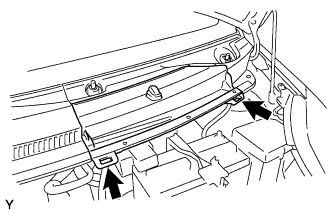 |
Disengage the 2 hooks and remove cowl top ventilator louver center No. 1.
Disconnect the washer hose.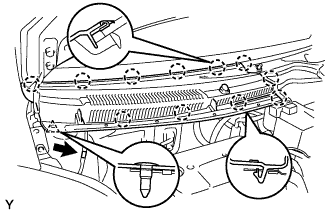
Disengage the 11 claws and clip.
Disconnect the washer hose and remove the cowl top ventilator louver sub-assembly.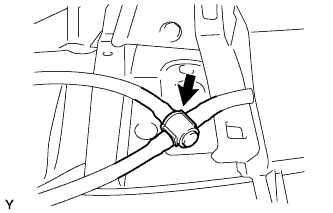
| 7. REMOVE COWL TOP VENTILATOR LOUVER LH (for LHD) |
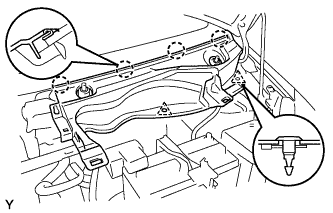 |
Remove the 2 clips.
Disengage the 4 claws and remove the cowl top ventilator louver LH.
| 8. REMOVE COWL TOP VENTILATOR LOUVER SUB-ASSEMBLY (for RHD) |
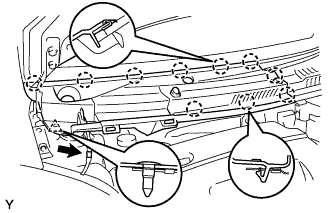 |
Disconnect the washer hose.
Disengage the 10 claws and clip and remove the cowl top ventilator louver sub-assembly.
| 9. REMOVE COWL TOP VENTILATOR LOUVER LH (for RHD) |
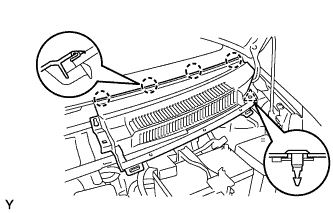 |
Remove the clip.
Disengage the 4 claws and remove the cowl top ventilator louver LH.
| 10. REMOVE FRONT WIPER MOTOR AND LINK |
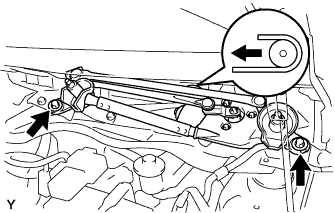 |
Remove the 2 bolts.
Slide the wiper link. Disengage the meshing of the rubber pin, then disconnect the connector and remove the front wiper motor and link.
| 11. REMOVE NO. 2 COWL TO REGISTER DUCT SUB-ASSEMBLY |
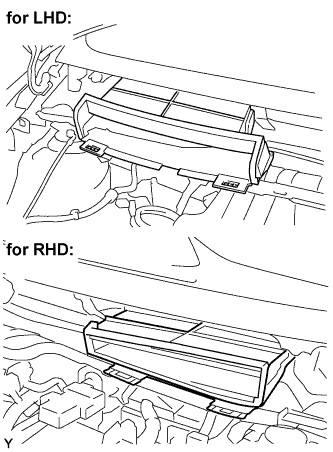 |
Disengage the claws, and remove cowl to resister duct No. 2.
| 12. REMOVE COWL TOP PANEL OUTER |
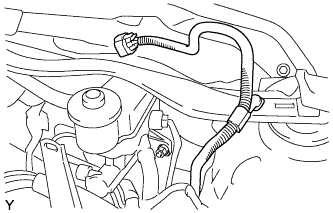 |
Disengage the clamp, and separate the wiper motor connector.
Remove the 9 bolts and the cowl top panel outer.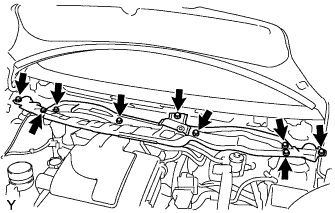
| 13. REMOVE FRONT WHEEL |
| 14. SEPARATE FRONT STABILIZER LINK ASSEMBLY |
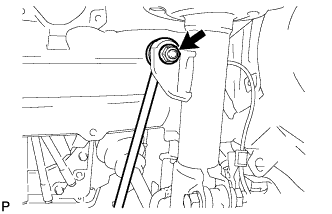 |
Remove the nut and separate the stabilizer link from the shock absorber.
- HINT:
- If the ball joint turns together with the nut, use a socket hexagon wrench 6 to hold the stud.
| 15. SEPARATE FRONT FLEXIBLE HOSE |
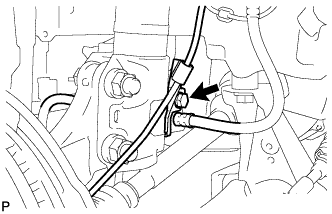 |
Remove the bolt and separate the speed sensor and flexible hose.
| 16. REMOVE FRONT SUSPENSION SUPPORT DUST COVER |
| 17. REMOVE FRONT SHOCK ABSORBER WITH COIL SPRING |
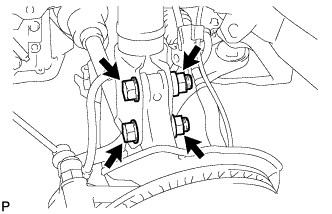 |
Remove the 2 nuts and 2 bolts and separate the shock absorber with coil spring from the steering knuckle.
- HINT:
- Keep the bolt from rotating while loosening and removing the nuts.
Using a socket hexagon wrench 6, fix the shock absorber rod and remove the nut.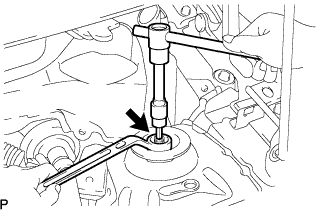
Remove the No. 2 suspension support.
Remove the front shock absorber with coil spring from the vehicle.