REMOVAL
Removal / installation · Vehicles built from Aug 2005
| 1. DISCONNECT CABLE FROM NEGATIVE BATTERY TERMINAL |
| 2. REMOVE FRONT WHEEL RH |
| 3. REMOVE ENGINE UNDER COVER RH |
| 4. REMOVE ENGINE UNDER COVER SUB-ASSEMBLY (for Rough Road Area Specification Vehicles) |
| 5. DRAIN ENGINE OIL |
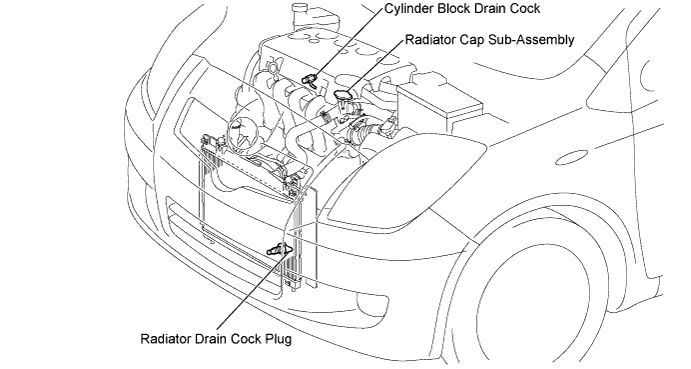
| 6. DRAIN ENGINE COOLANT |

- NOTICE:
- To avoid the danger of being burned, do not remove the radiator cap sub-assembly while the engine and radiator assembly are still hot. Thermal expansion will cause hot engine coolant and steam to blow out from the radiator assembly.
Loosen the radiator drain cock plug.
Remove the radiator cap sub-assembly.
Loosen the cylinder block drain cock plug, then drain the coolant.

| 7. REMOVE CYLINDER HEAD COVER NO. 2 |
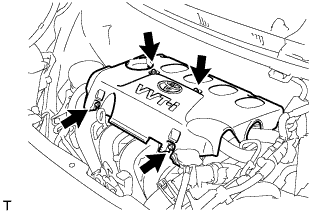 |
Remove the 4 nuts and cylinder head cover No. 2.
| 8. REMOVE FAN AND GENERATOR V BELT |
Loosen bolts A and B.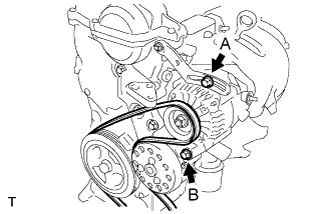
Release the fan and generator V belt tension and remove the fan and generator V belt.
| 9. REMOVE GENERATOR ASSEMBLY |
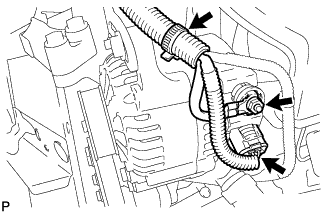 |
Remove the terminal cap.
Separate the connector and harness clamp.
Remove the nut and remove terminal B.
Remove fan belt adjusting slider fixing bolts A and B and remove the fan belt adjusting slider.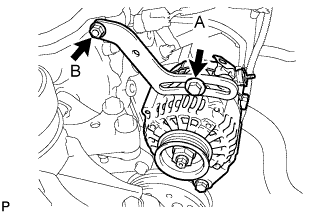
Remove fixing bolt B and remove the generator.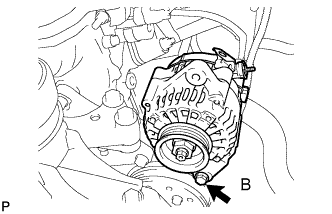
| 10. REMOVE IGNITION COIL NO. 1 |
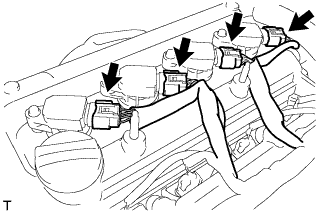 |
Disconnect the 4 ignition coil connectors.
Remove the 4 bolts and 4 ignition coils.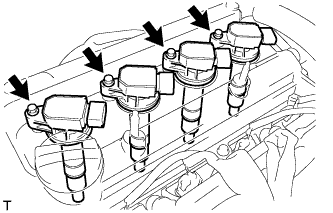
| 11. DISCONNECT VENTILATION HOSE |
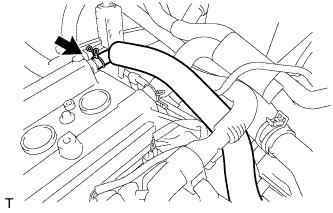 |
Disconnect the ventilation hose.
| 12. DISCONNECT VENTILATION HOSE NO. 2 |
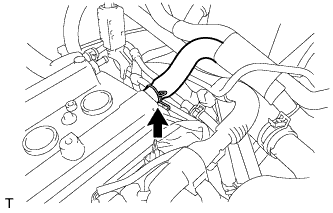 |
Disconnect ventilation hose No. 2.
| 13. REMOVE CYLINDER HEAD COVER SUB-ASSEMBLY (for RHD) |
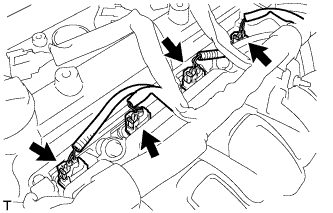 |
Disconnect the fuel injector connectors.
Disconnect the connector and 3 wire harness clamps shown in the illustration and disconnect the engine wire harness.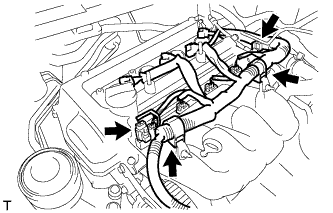
Remove the 9 bolts, 2 nuts and 2 seal washers and then remove the cylinder head cover sub-assembly.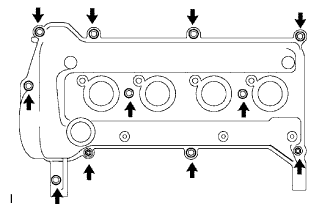
| 14. REMOVE CYLINDER HEAD COVER SUB-ASSEMBLY (for LHD) |
|
|
Disconnect the fuel injector connectors.
Disconnect the connector and 3 wire harness clamps shown in the illustration and disconnect the engine wire harness.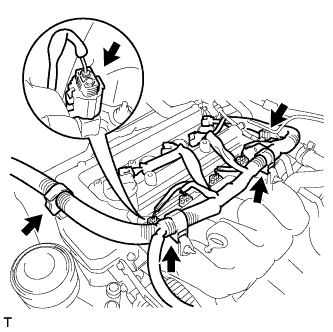
Remove the bolt and remove the wire harness bracket.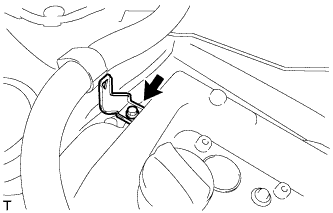
Remove the 9 bolts and 2 nuts, 2 seal washers and then remove the cylinder head cover sub-assembly.
| 15. REMOVE ENGINE MOUNTING INSULATOR SUB-ASSEMBLY RH |
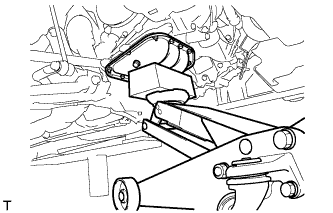 |
Place a wooden block on a jack underneath the engine.
Remove the 5 bolts and nut and remove the engine mounting insulator sub-assembly RH.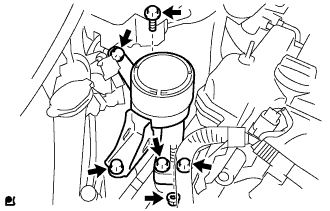
| 16. REMOVE CRANKSHAFT DAMPER SUB-ASSEMBLY |
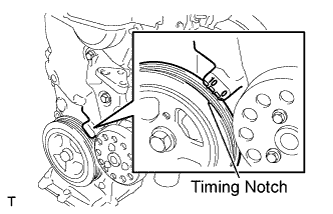 |
Set cylinder No. 1 to TDC/compression.
Turn the crankshaft damper sub-assembly, and align its timing notch with timing mark "0" of the oil pump.
for Unleaded Gasoline Specification Vehicle: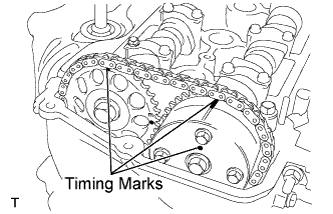
Check that the timing marks on the camshaft timing sprocket and the camshaft timing gear are all facing upward as shown in the illustration.- HINT:
- If not, turn the crankshaft 1 complete revolution (360°) and align the marks as above.
for Leaded Gasoline Specification Vehicle: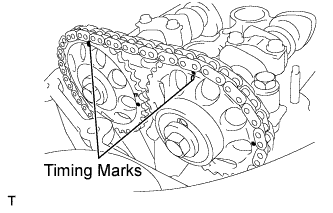
Check that both timing marks on the camshaft timing sprockets facing upward as shown in the illustration.- HINT:
- If not, turn the crankshaft 1 complete revolution (360°) and align the marks as above.
Using 2 SSTs, loosen the bolt while holding the crankshaft damper sub-assembly.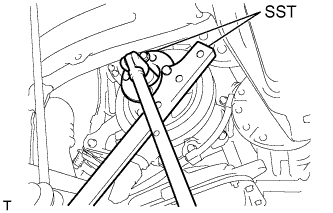
- SST
- 09213-14010
(91651-60865)
09330-00021
- NOTICE:
- Check the SST installation positions when installing them, to avoid the SST fixing bolts from coming into contact with the oil pump assembly.
Remove the SSTs and the bolt.
Remove the crankshaft damper sub-assembly.
| 17. REMOVE CRANKSHAFT POSITION SENSOR |
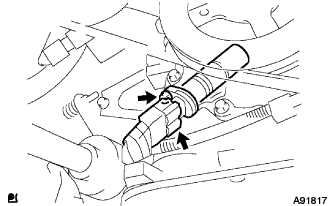 |
Disconnect the crankshaft position sensor connector.
Remove the bolt and remove the crankshaft position sensor.
| 18. REMOVE CAMSHAFT TIMING OIL CONTROL VALVE ASSEMBLY (for Unleaded Gasoline Specification Vehicle) |
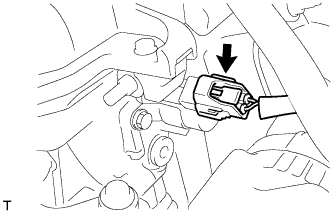 |
Disconnect the camshaft timing oil control valve assembly connector.
Remove the bolt and nut and remove the camshaft timing oil control valve assembly.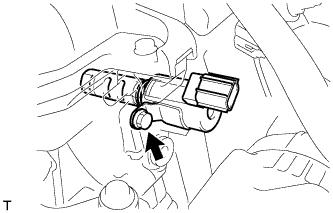
Remove the O-ring from the camshaft timing oil control valve assembly.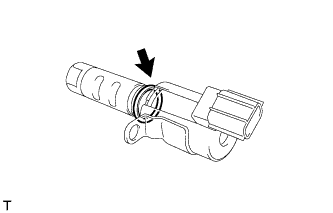
| 19. REMOVE WATER PUMP PULLEY |
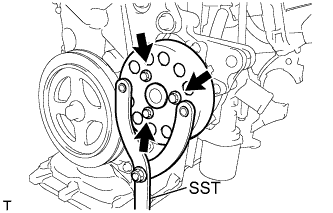 |
Using SST, hold the water pump pulley.
- SST
- 09960-10010
(09962-01000, 09963-00700)
Remove the 3 bolts and remove the water pump pulley.
| 20. REMOVE WATER PUMP ASSEMBLY |
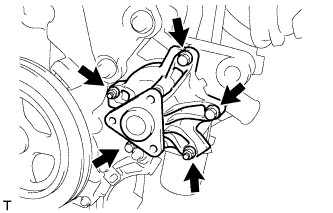 |
Remove the 3 bolts and 2 nuts and remove the water pump assembly and gasket.
| 21. REMOVE TRANSVERSE ENGINE ENGINE MOUNTING BRACKET |
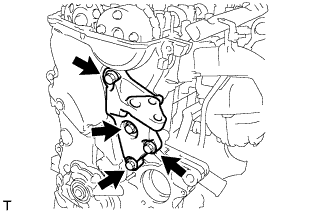 |
Remove the 4 bolts and remove the transverse engine engine mounting bracket.
| 22. REMOVE OIL PUMP ASSEMBLY |
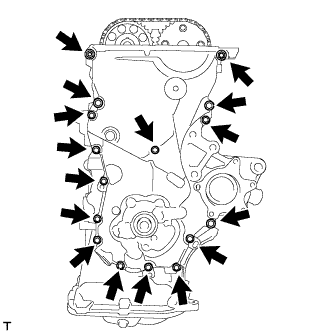 |
Remove the 15 bolts and the nut.
Using a screwdriver with its tip wrapped in protective tape, prize the oil pump assembly to remove it.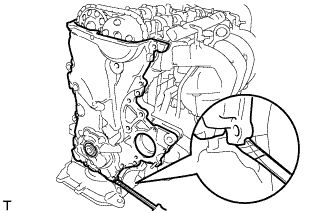
- NOTICE:
- Do not damage the contact surfaces of the oil pump assembly and oil pan sub-assembly.
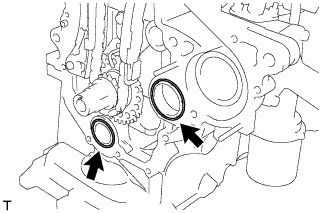
Remove the 2 O-rings from the cylinder block and oil pan sub-assembly.