REMOVAL
Removal / installation · Vehicles built from Aug 2005
| 1. DISCONNECT CABLE FROM NEGATIVE BATTERY TERMINAL |
| 2. REMOVE ENGINE COOLANT |

- NOTICE:
- To avoid the danger of being burned, do not remove the radiator cap sub-assembly while the engine and radiator assembly are still hot. Thermal expansion will cause hot engine coolant and steam to blow out from the radiator assembly.
Loosen the radiator drain cock plug.
Remove the radiator cap sub-assembly.
Loosen the cylinder block drain cock plug, then drain the coolant.
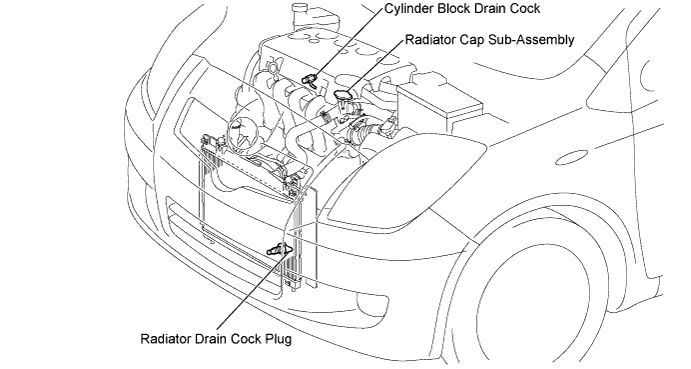

| 3. REMOVE ENGINE UNDER COVER RH |
| 4. REMOVE ENGINE UNDER COVER SUB-ASSEMBLY (for Rough Road Area Specification Vehicles) |
| 5. REMOVE FAN AND GENERATOR V BELT |
Loosen bolts A and B.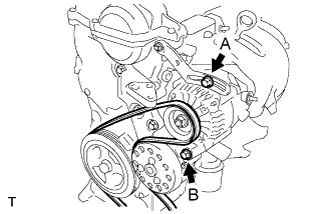
Release the fan and generator V belt tension and remove the fan and generator V belt.
| 6. REMOVE GENERATOR ASSEMBLY |
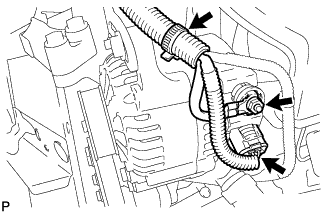 |
Remove the terminal cap.
Separate the connector and harness clamp.
Remove the nut and remove terminal B.
Remove fan belt adjusting slider fixing bolts A and B and remove the fan belt adjusting slider.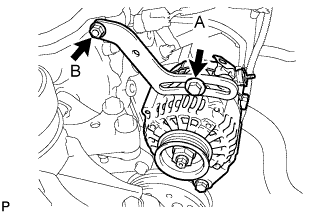
Remove fixing bolt B and remove the generator.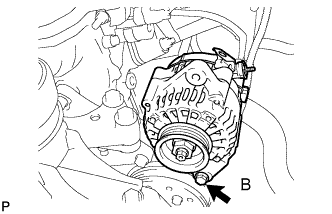
| 7. REMOVE ENGINE MOUNTING INSULATOR SUB-ASSEMBLY RH |
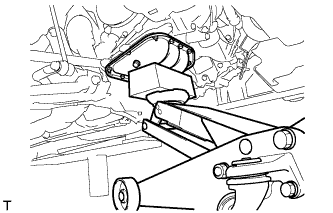 |
Place a wooden block on a jack underneath the engine.
Remove the 5 bolts and nut and remove the engine mounting insulator sub-assembly RH.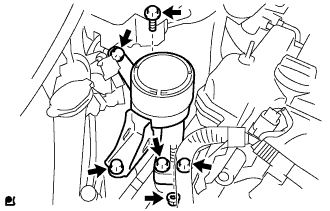
| 8. REMOVE WATER PUMP PULLEY |
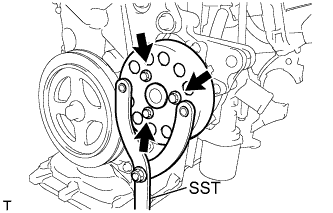 |
Using SST, hold the water pump pulley.
- SST
- 09960-10010
(09962-01000, 09963-00700)
Remove the 3 bolts and remove the water pump pulley.
| 9. REMOVE WATER PUMP ASSEMBLY |
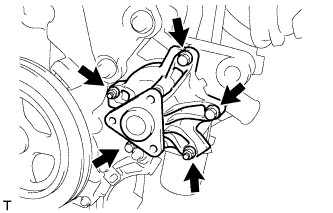 |
Remove the 3 bolts and 2 nuts and remove the water pump assembly and gasket.