Removal / installation · Vehicles built Aug 2005 – Dec 2005
Versions by build date: Aug 2005 – Dec 2005from Jan 2006
CAUTION:
Be sure that the ignition is off if you work near the electric cooling fans or radiator grille. With the ignition on the electric cooling fans may automatically start to run if the engine coolant temperature is high and/or the air conditioning is on.
1.
DISCONNECT CABLE FROM NEGATIVE BATTERY TERMINAL
2.
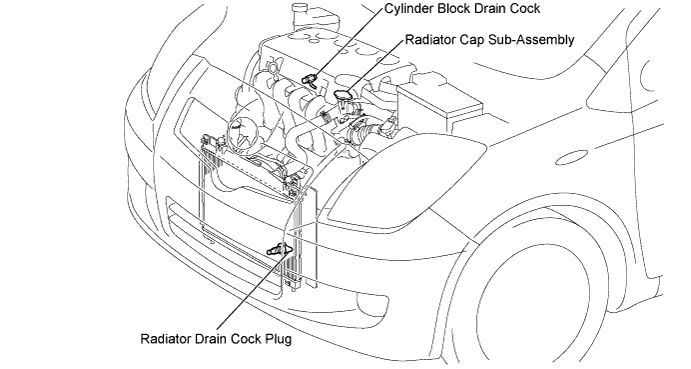
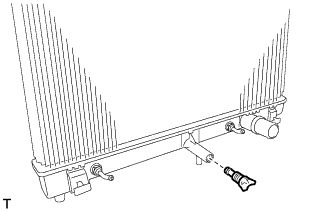
DRAIN ENGINE COOLANT
NOTICE:
To avoid the danger of being burned, do not remove the radiator cap sub-assembly while the engine and radiator assembly are still hot. Thermal expansion will cause hot engine coolant and steam to blow out from the radiator assembly.
Loosen the radiator drain cock plug.
Remove the radiator cap sub-assembly.
Loosen the cylinder block drain cock plug, then drain the coolant.
3.
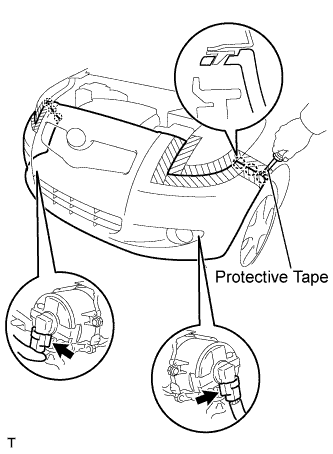
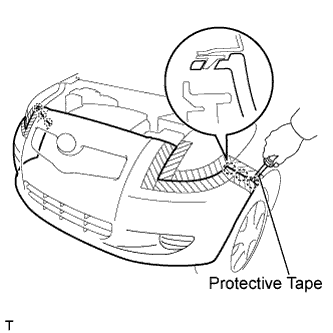
REMOVE FRONT BUMPER COVER
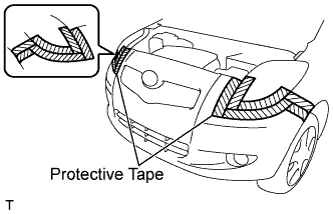
Apply protective tape as shown in the illustration.
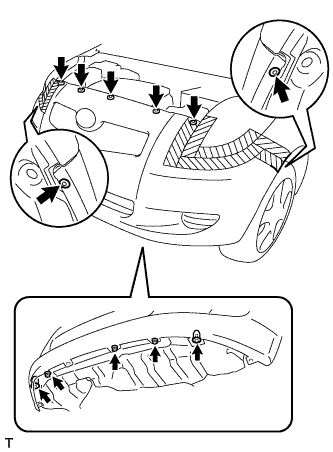
w/ Front Spoiler:
Remove the 3 screws.
Remove the 2 screw grommets.
Remove the 7 clips.
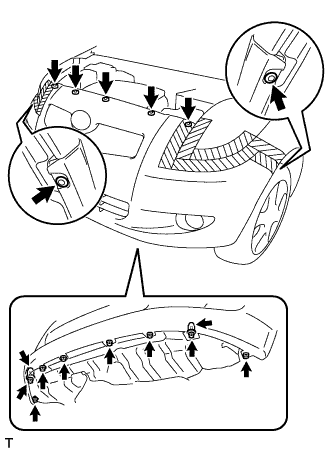
w/o Front Spoiler:
Remove the 8 screws.
Remove the 2 screw grommets.
Remove the 7 clips.
w/ Fog Light:
Using a screwdriver with its tip wrapped in protective tape, disengage the 6 claws and remove the front bumper cover.
Disconnect the 2 fog light connectors.
w/o Fog Light:
Using a screwdriver with its tip wrapped in protective tape, disengage the 6 claws and remove the front bumper cover.
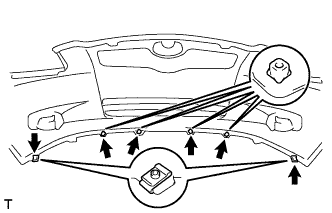
w/ Front Spoiler:
Remove the 2 clips and the 4 screw grommets.
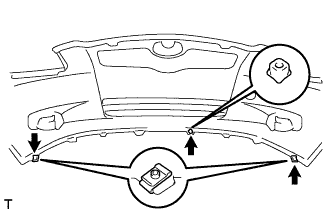
w/o Front Spoiler:
Remove the 2 clips and the screw grommet.
4.
REMOVE AIR CLEANER ASSEMBLY
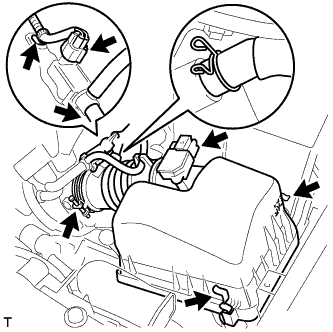
Separate the intake air flow meter connector and wire harness clamp.
Separate the fuel vapor feed hose and fuel vapor feed hose No. 1 from the vacuum switching valve assembly.
Separate the vacuum switching valve connector and wire harness clamp.
Separate the ventilation hose from the air cleaner hose.
Release the air cleaner cap sub-assembly with air cleaner hose No. 1.
Loosen the air cleaner hose clamp on the throttle body side and remove the air cleaner cap and air cleaner hose.
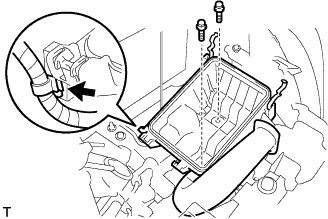
Remove the air cleaner element.
Separate the wire harness clamp from the air cleaner case.
Remove the 2 bolts and remove the air cleaner case with air cleaner inlet No. 1.
5.
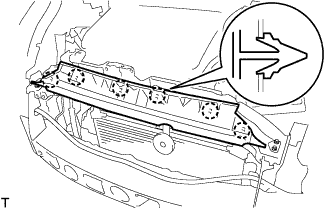
REMOVE RADIATOR SUPPORT ABSORBER UPPER
Disengage the 6 claws and remove the radiator support absorber upper.
6.
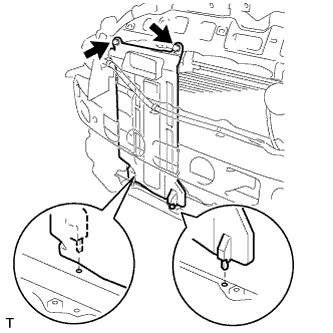
REMOVE COOLER COVER NO. 1
Remove the 2 clips and cooler cover No. 1.
7.
REMOVE HOOD LOCK ASSEMBLY
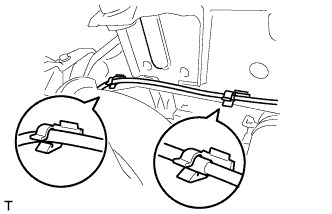
Separate the hood lock control cable assembly from the 2 clamps.
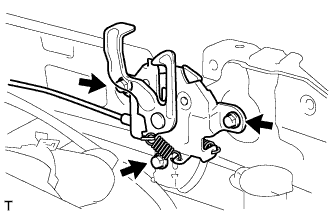
Remove the 3 bolts and remove the hood lock assembly.
8.
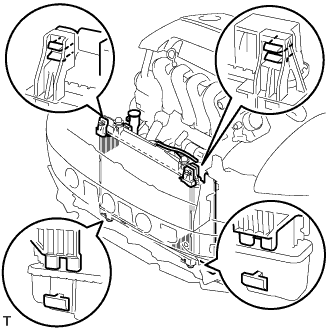
REMOVE RADIATOR SUPPORT SUB-ASSEMBLY UPPER
Separate the horn assembly connector.
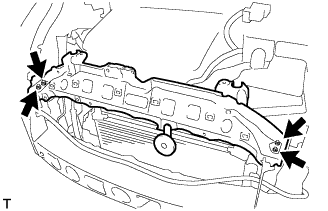
Remove the 4 bolts and remove the radiator support sub-assembly upper.
9.
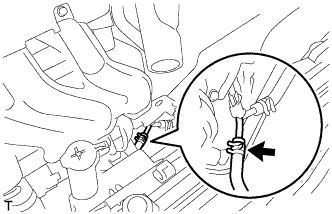
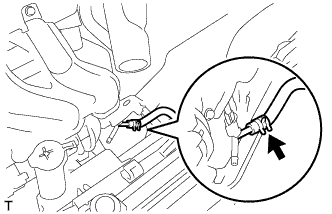
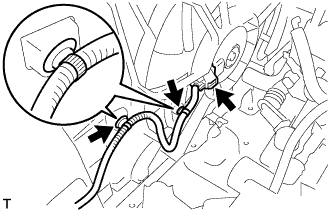
DISCONNECT RADIATOR RESERVOIR TANK HOSE
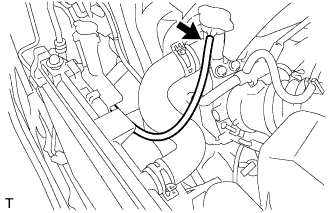
Disconnect the radiator reservoir tank hose from the water filler.
10.
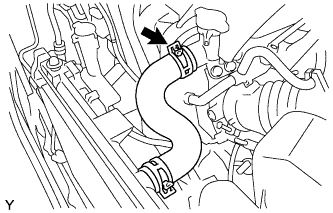
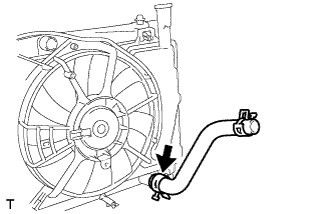
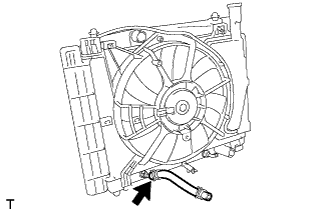
REMOVE RADIATOR HOSE NO. 3
Loosen the 2 clips and remove radiator hose No. 3.
11.
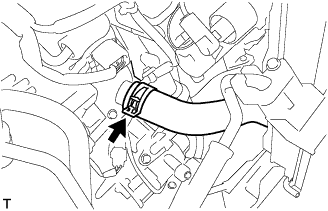
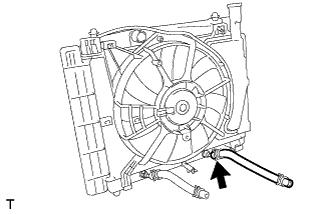
DISCONNECT RADIATOR HOSE NO. 2
Loosen the clip and disconnect radiator hose No. 2.